APPENDIX C: SYSTEM CALIBRATION
Camera Calibration
Note: Camera calibration on the Fusion
Pro is only necessary if recommended
by Epilog’s Technical Support.
Note: Before beginning, reboot your
machine if you have recently run any
jobs.
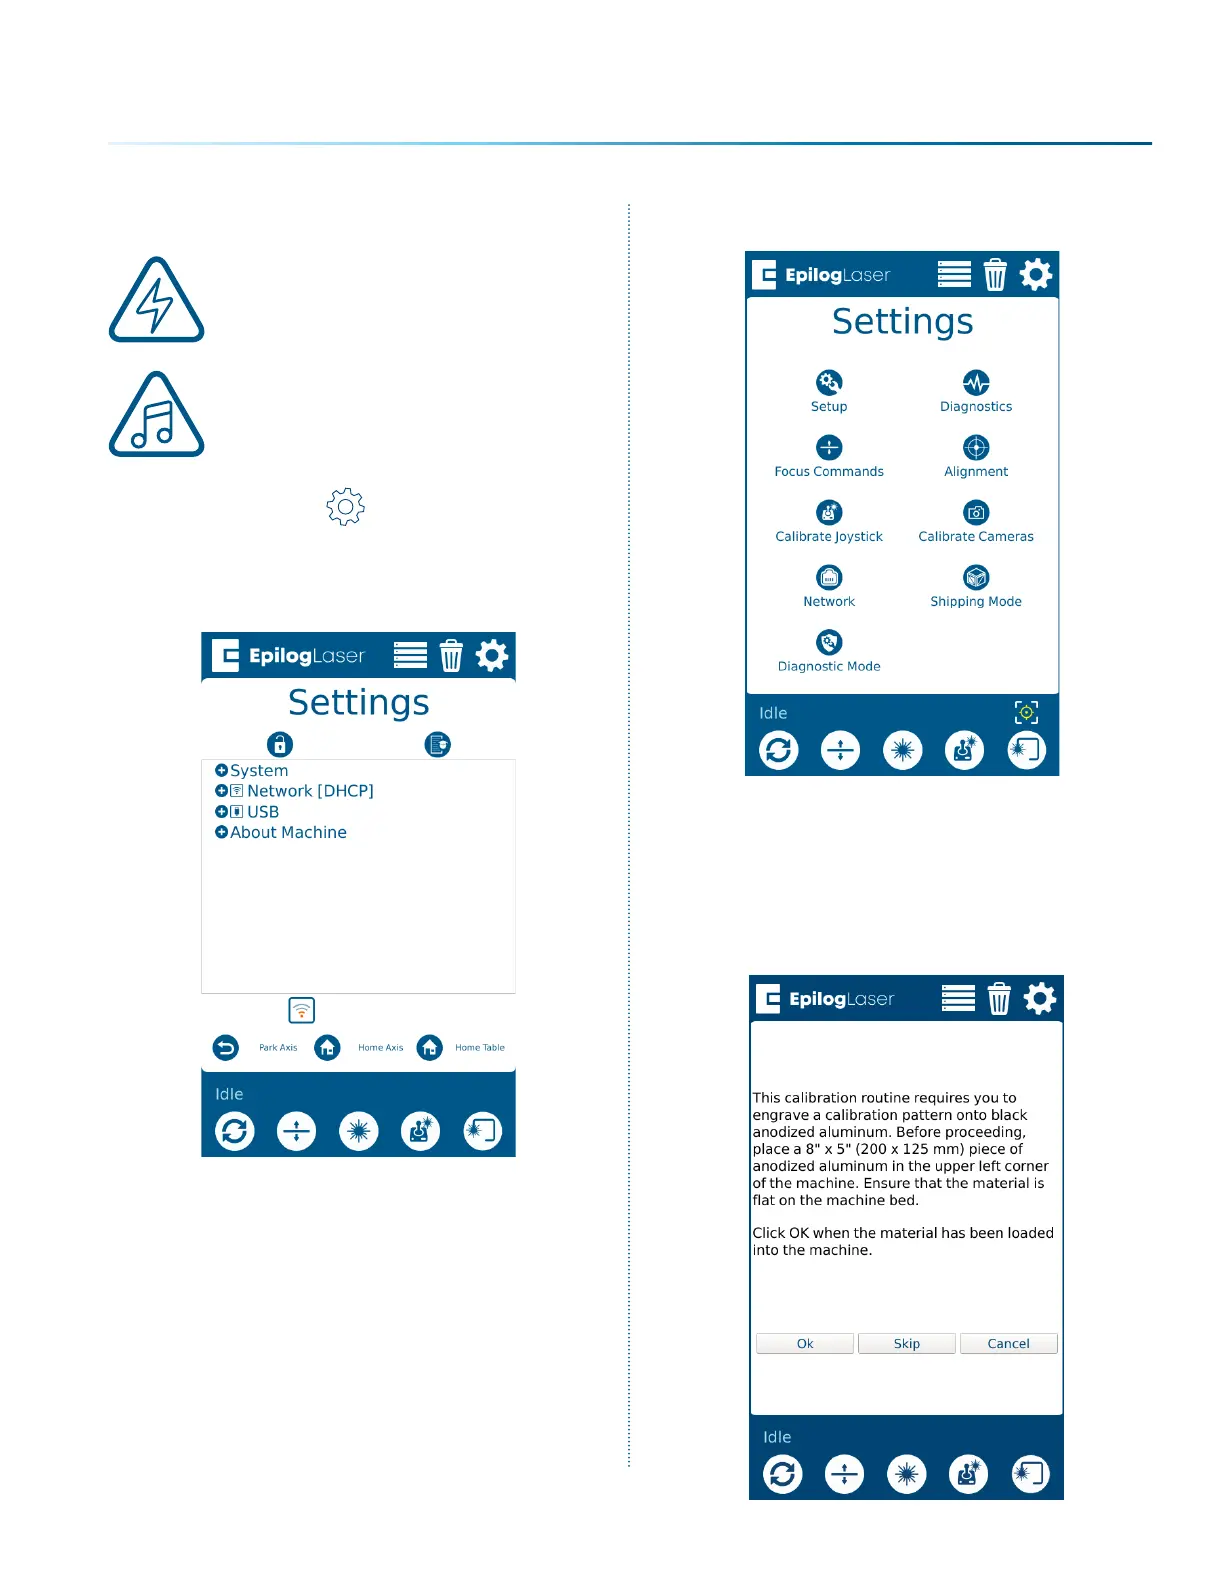
1. Click the Settings button to enter the
Settings menu.
2. Long Press the “Settings” text for 5 seconds
to enter the Advanced Settings Menu.
3. Click on “Calibrate Cameras” to enter the
Camera Calibration menu.
4. While the machine is Idle, follow the prompt,
and begin the calibration routine by selecting
“Ok”. The calibration pattern mentioned in
the prompt will be used by the single camera
at the laser head. Use an 8” x 5” (203 x 127 mm)
or larger piece of anodized aluminum. (You
can also optionally skip this step by clicking
Skip.)
- 217 -

 Loading...


