18
Preparation
4
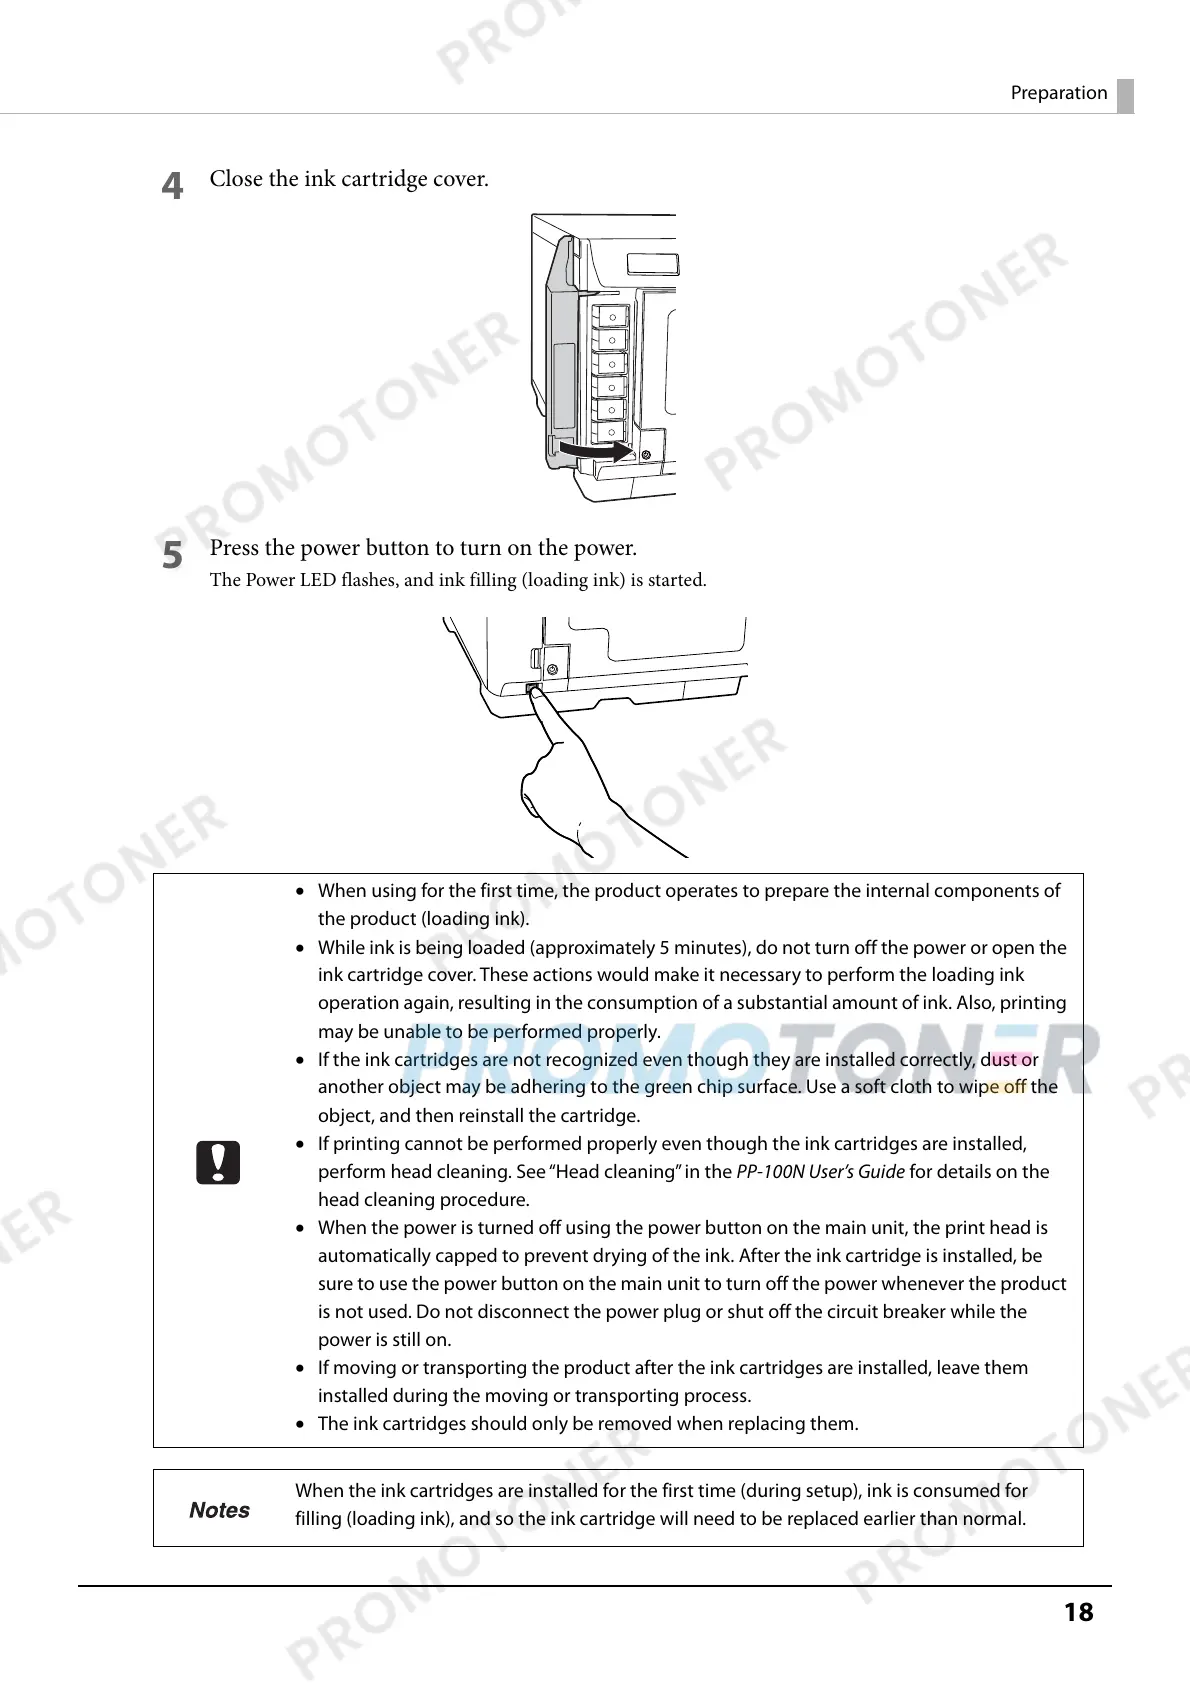
Close the ink cartridge cover.
5
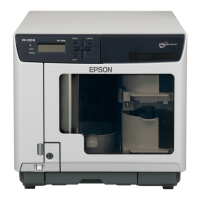
Press the power button to turn on the power.
The Power LED flashes, and ink filling (loading ink) is started.
• When using for the first time, the product operates to prepare the internal components of
the product (loading ink).
• While ink is being loaded (approximately 5 minutes), do not turn off the power or open the
ink cartridge cover. These actions would make it necessary to perform the loading ink
operation again, resulting in the consumption of a substantial amount of ink. Also, printing
may be unable to be performed properly.
• If the ink cartridges are not recognized even though they are installed correctly, dust or
another object may be adhering to the green chip surface. Use a soft cloth to wipe off the
object, and then reinstall the cartridge.
• If printing cannot be performed properly even though the ink cartridges are installed,
perform head cleaning. See “Head cleaning” in the PP-100N User’s Guide for details on the
head cleaning procedure.
• When the power is turned off using the power button on the main unit, the print head is
automatically capped to prevent drying of the ink. After the ink cartridge is installed, be
sure to use the power button on the main unit to turn off the power whenever the product
is not used. Do not disconnect the power plug or shut off the circuit breaker while the
power is still on.
• If moving or transporting the product after the ink cartridges are installed, leave them
installed during the moving or transporting process.
• The ink cartridges should only be removed when replacing them.
When the ink cartridges are installed for the first time (during setup), ink is consumed for
filling (loading ink), and so the ink cartridge will need to be replaced earlier than normal.