112
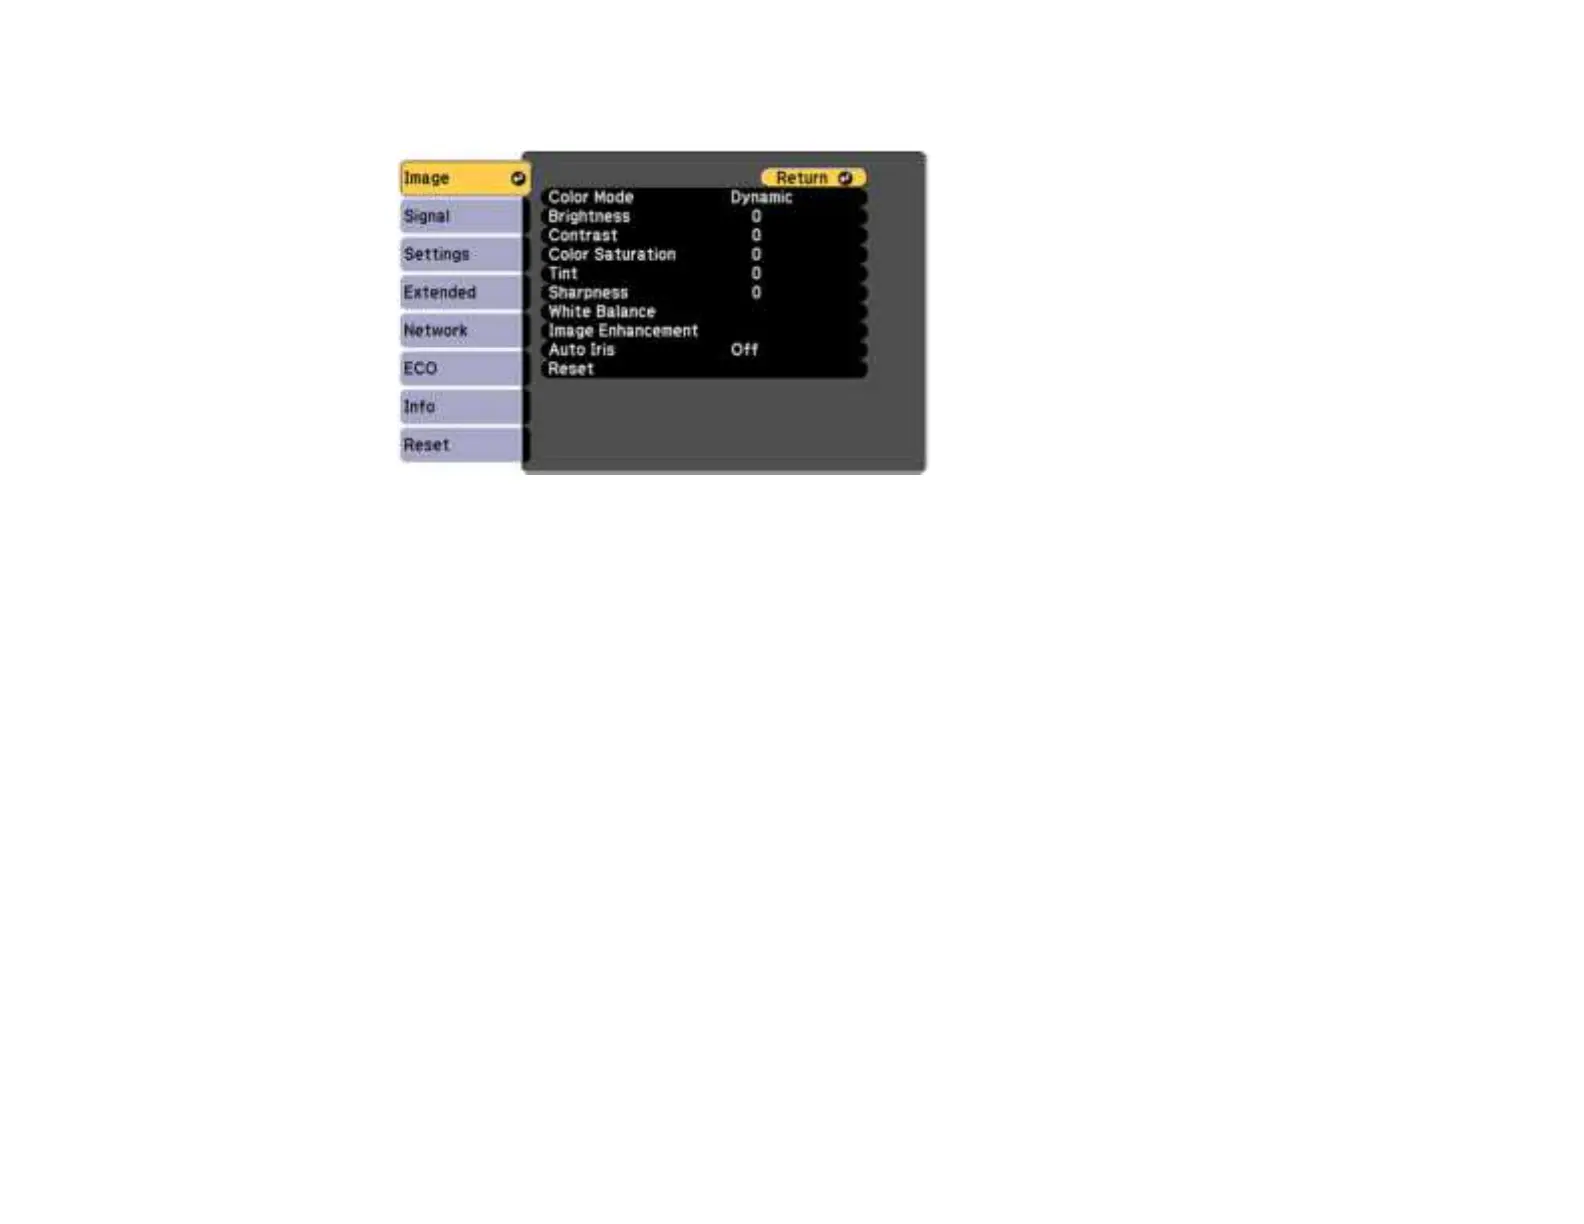
3. Select the Image menu and press Enter.
4. Select the Auto Iris setting and choose one of the following:
• Normal for standard brightness adjustment.
• High Speed to adjust brightness as soon as the scene changes.
Note: You can set Auto Iris for each Color Mode that supports the feature. You cannot change the
Auto Iris setting when you are using a Closed Caption setting.
5. Press Menu or Esc to exit the menus.
Parent topic: Color Mode
Related references
Projector Setup Settings - Extended Menu
Controlling the Volume with the Volume Buttons
You can use the Volume buttons on the remote control or projector to adjust the volume as you project a
presentation with audio. The volume buttons control the projector’s internal speaker system or any
external speakers you connected to the projector.
You must adjust the volume separately for each connected input source.
1. Turn on the projector and start a presentation that includes audio.