2. Installation
RC180 Safety and Installation Rev.18
53
S5
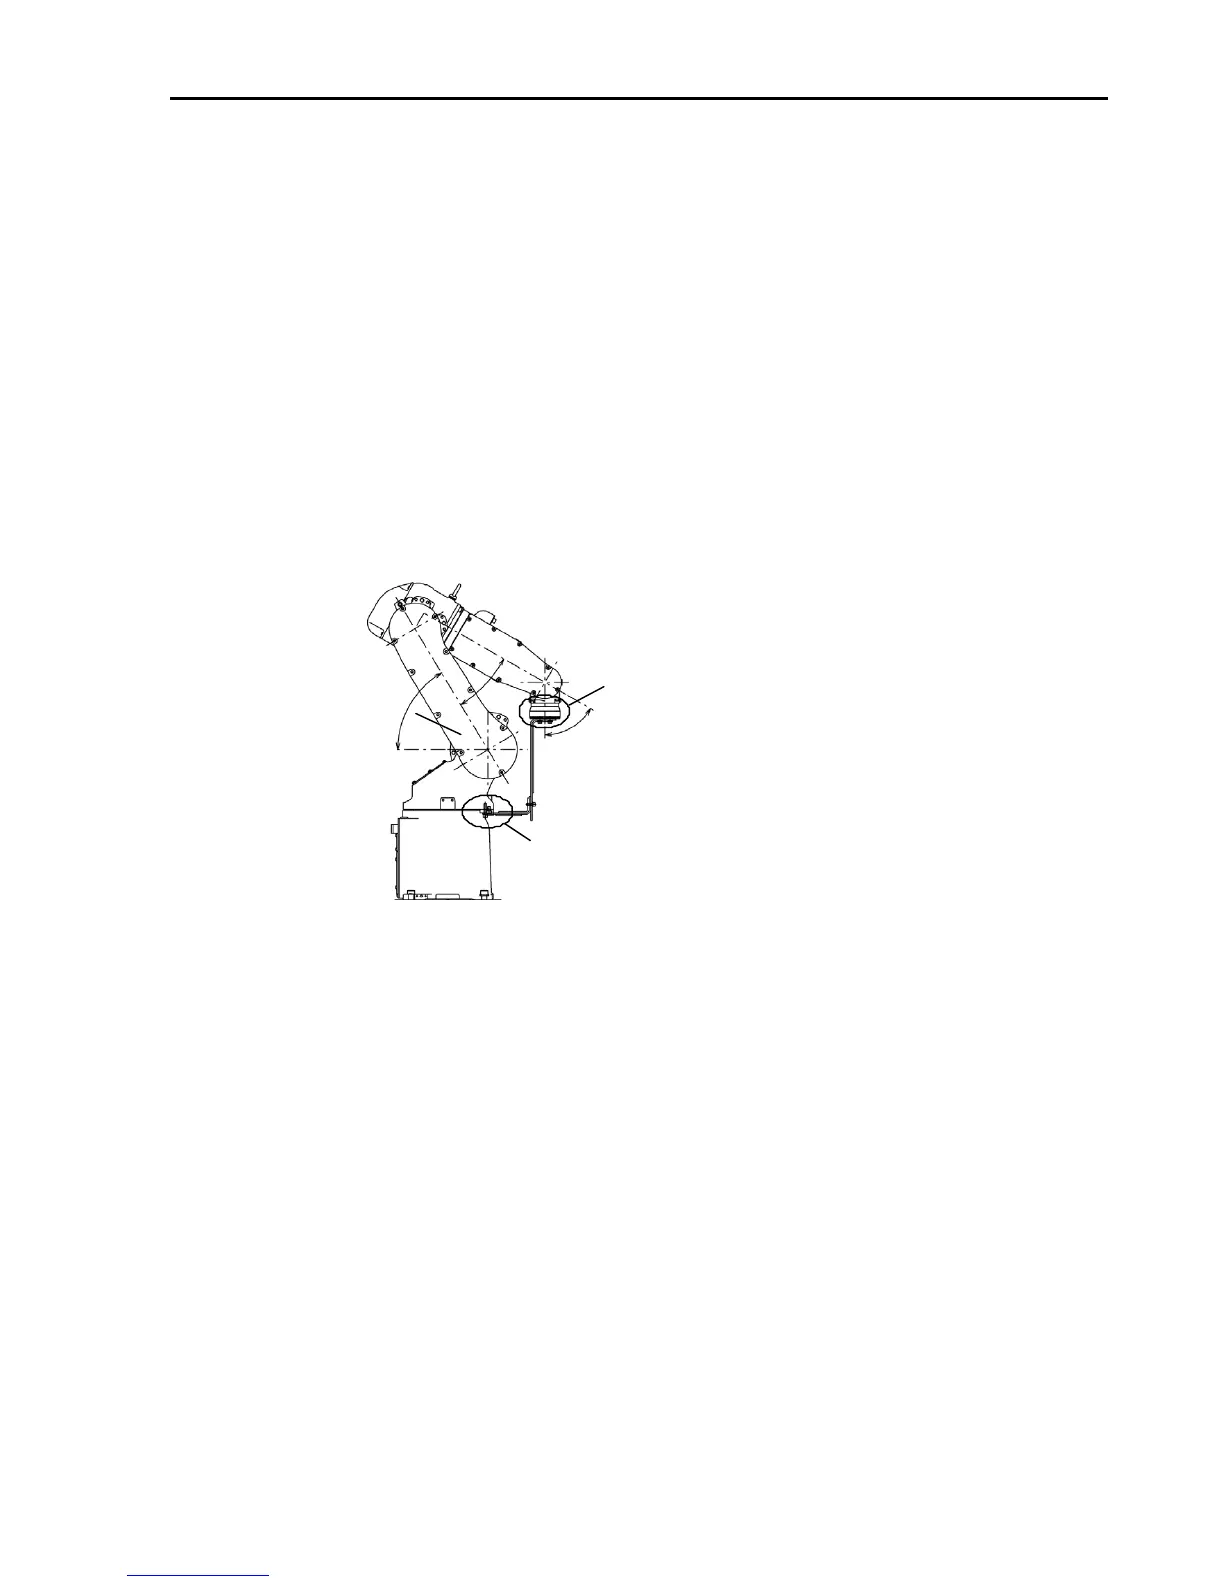
The shipping bolts and jigs are attached to the Manipulator as shown the
figure below (points A, B) for protecting the Manipulator from various
external forces during transportation.
Be sure to remove the bolts from the Point A first, and then, remove the bolts
from Point B.
The jigs are painted yellow.
Point A : 6-M5×14 hexagon socket head cap bolts
with plain washers and disc spring washers
Point B : 2-M6×10 hexagon socket head cap bolts
with plain washers and disc spring washers
Point A
Point B
(° = degree)
29°
59°
60°
C3
S/C model: There are four threaded holes for the Manipulator base.
Use M8 mounting bolts conforming to the strength of
ISO898-1 property class 12.9.
V/P model: There are six threaded holes for the Manipulator base.
Use attached stainless M8 mounting bolts and M8 stainless
washer which are chemical resistance conscious.

 Loading...


