EasyManuals Logo

Epson SC-P600 Service Manual

Epson SC-P600
82 pages
To Next Page IconTo Next Page
To Previous Page IconTo Previous Page
Page #41 background imageLoading...
Page #41 background image
SE Group Confidential (Related Staff Only)
Adjustment Details of Adjustments 41
SC-P600 Revision D
2. Install the printer on a level workbench.
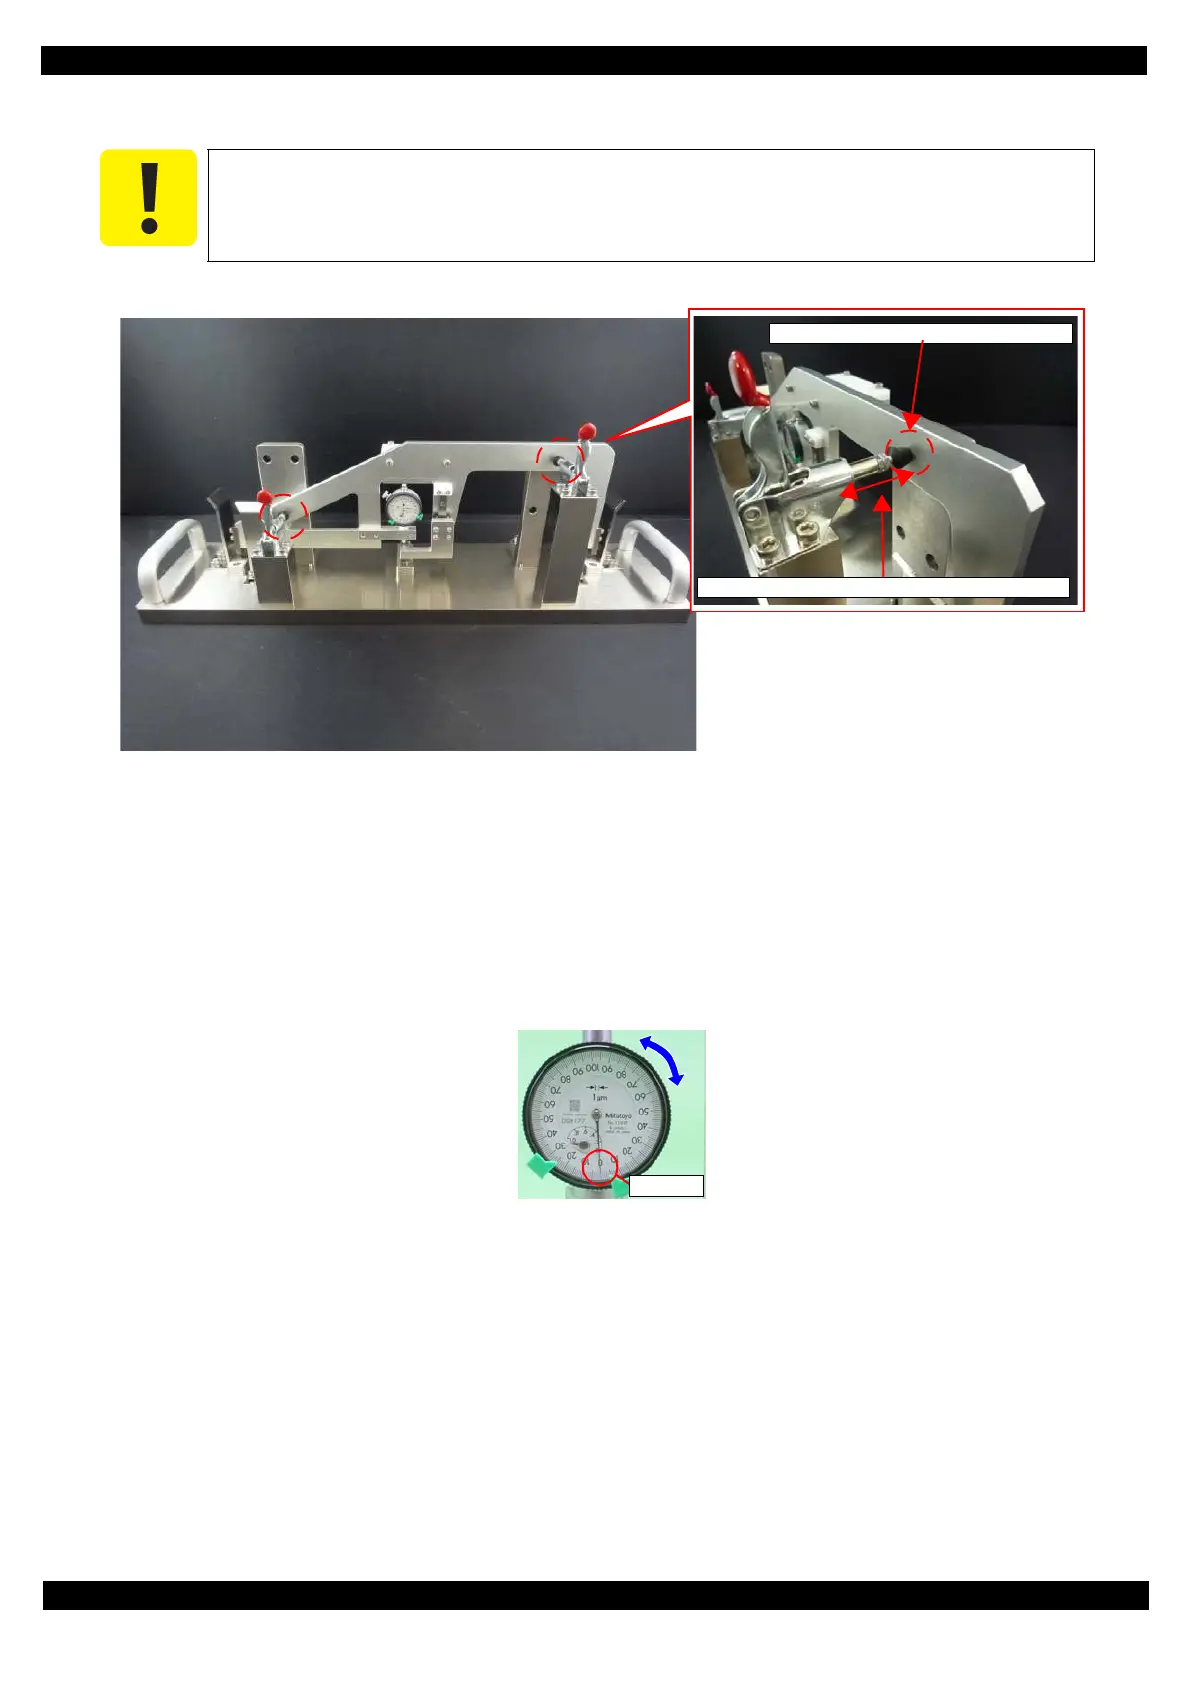
3. Set the PF Roller Adjustment Jig to the PF Roller Adjustment Jig Stand show in Figure 2-3.
Figure 2-3. Setting the PF Roller Adjustment Jig to the PF Roller Adjustment Jig Stand
4. Perform zero adjustment.
Long hand position: Turn the dial to adjust the “0” position on the scale to the long hand position with the jig set in
place on the PF Roller Adjustment Jig Stand.
Short hand position: Check it.
Figure 2-4. Perform zero adjustment
Place the printer on a level, warp-free table. This adjustment cannot be performed correctly if
it is performed on a warped table.
Confirm the fixing with rubber of jig.
The length can be changed by adjusting the bolts.
0 position

Questions and Answers:

Question and Answer IconNeed help?

Do you have a question about the Epson SC-P600 and is the answer not in the manual?

Epson SC-P600 Specifications

General IconGeneral
Print TechnologyInkjet
Max Print Resolution5760 x 1440 dpi
Number of Ink Colors9
Ink Cartridge ConfigurationIndividual cartridges
ConnectivityUSB 2.0, Ethernet, Wi-Fi
Ink ColorsCyan, Magenta, Yellow, Gray
Max Print Size13" x 19"
Media HandlingSheet feed, roll paper
Paper SizesA4, A3, 13" x 19", 4" x 6", 5" x 7", 8" x 10"
Borderless PrintingYes
Display2.7" Color LCD
Weight35.3 lb (16 kg)
Ink TypeUltraChrome HD

Related product manuals