EasyManuals Logo

Epson SC-P600 Service Manual

Epson SC-P600
82 pages
To Next Page IconTo Next Page
To Previous Page IconTo Previous Page
Page #50 background imageLoading...
Page #50 background image
SE Group Confidential (Related Staff Only)
Adjustment Details of Adjustments 50
SC-P600 Revision D
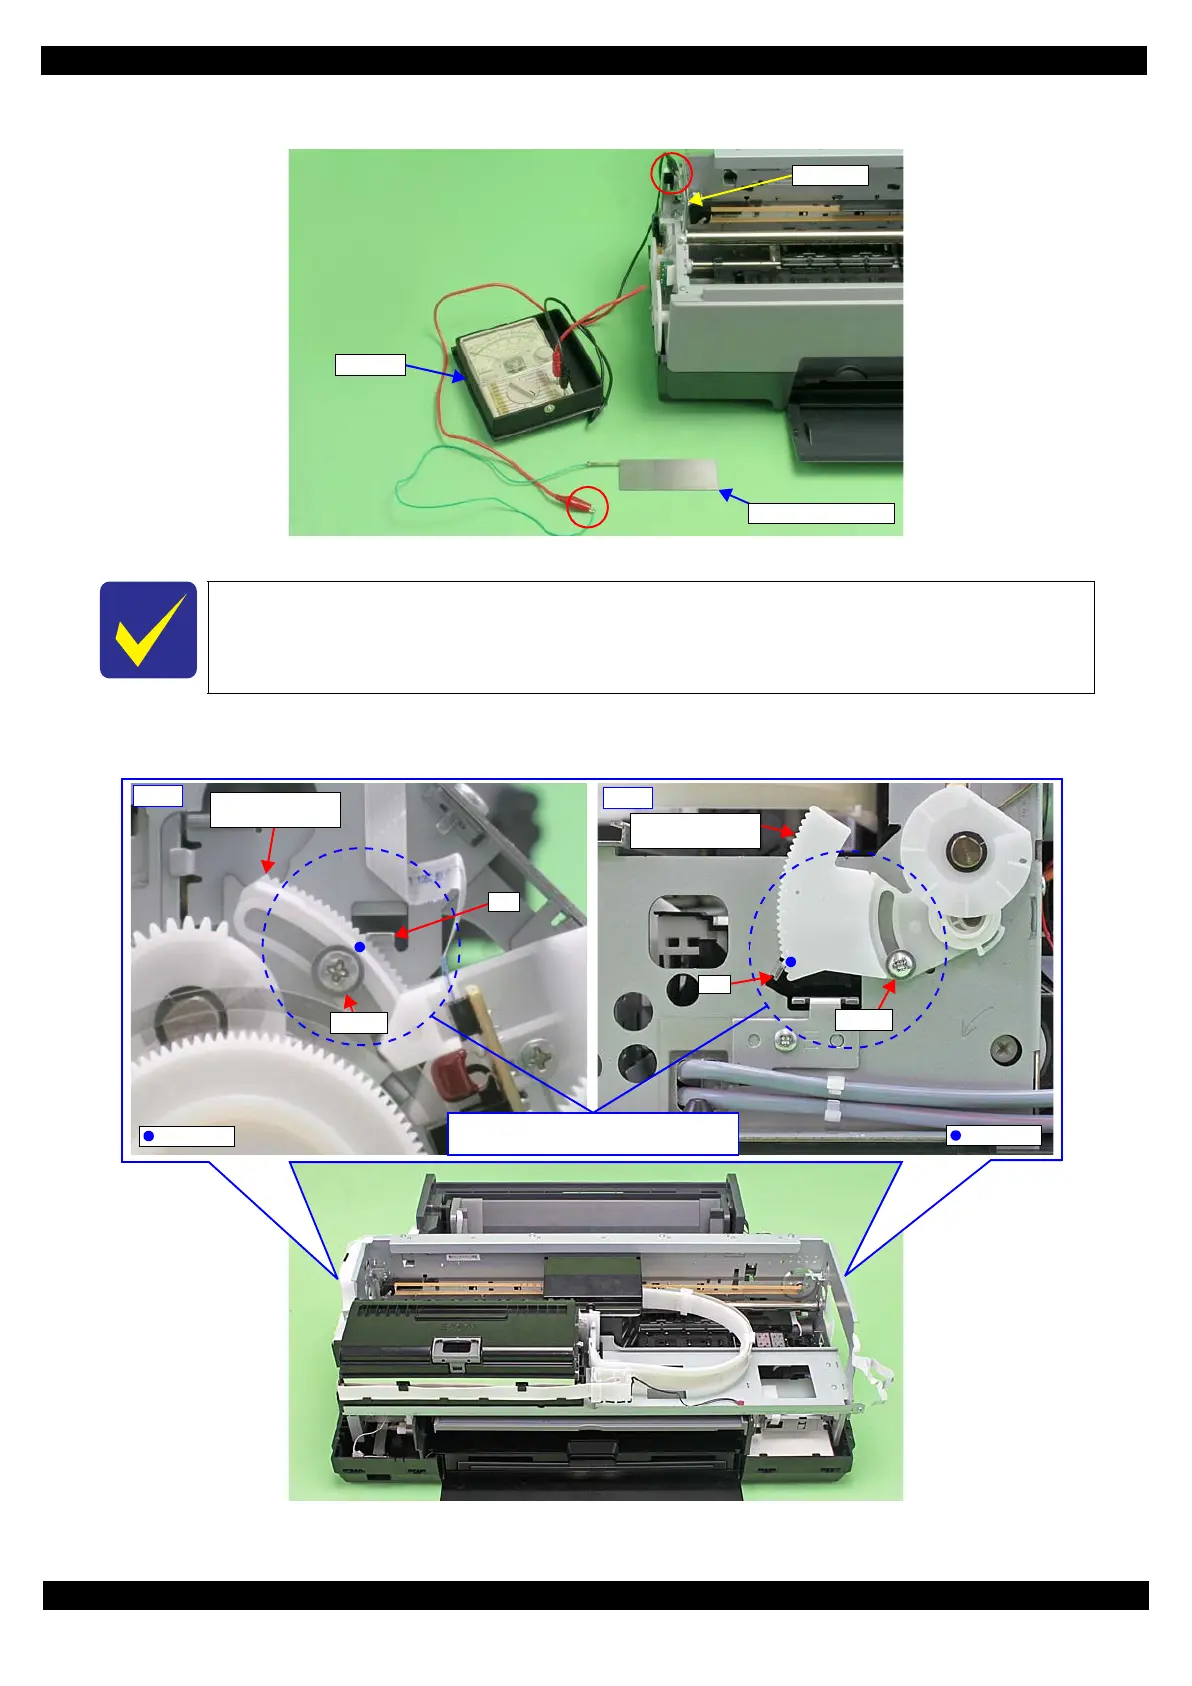
2. Connect the tester to the upper section of the 130-side on the frame and adjustment gauge.
Figure 2-15. Connecting the Tester (Example)
3. Loosen the screws (x2) that secure the Parallelism Adjust Bushings (x2), and align the markings (marked
when disassembling) with the frame.
Figure 2-16. Setting the Parallelism Adjust Bushing
Before disassembling the unit, mark the contact points on the Parallelism Adjust Bushings
(x2) with the rib of the frame, and align the markings with the rib when reassembling them.
(See Figure 2-16.)
Tester
Adjustment gauge
Frame
Right
Parallelism
Adjust Bushing
Screw
Marking
Rib
Screw
Rib
Left
Parallelism
Adjust Bushing
Marking
Align marking on Parallelism Adjust
Bushings with rib when disassembling.

Questions and Answers:

Question and Answer IconNeed help?

Do you have a question about the Epson SC-P600 and is the answer not in the manual?

Epson SC-P600 Specifications

General IconGeneral
Print TechnologyInkjet
Max Print Resolution5760 x 1440 dpi
Number of Ink Colors9
Ink Cartridge ConfigurationIndividual cartridges
ConnectivityUSB 2.0, Ethernet, Wi-Fi
Ink ColorsCyan, Magenta, Yellow, Gray
Max Print Size13" x 19"
Media HandlingSheet feed, roll paper
Paper SizesA4, A3, 13" x 19", 4" x 6", 5" x 7", 8" x 10"
Borderless PrintingYes
Display2.7" Color LCD
Weight35.3 lb (16 kg)
Ink TypeUltraChrome HD

Related product manuals