c
Important:
Be sure to follow the steps below when positioning
the print head. Moving the print head manually
could cause malfunction.
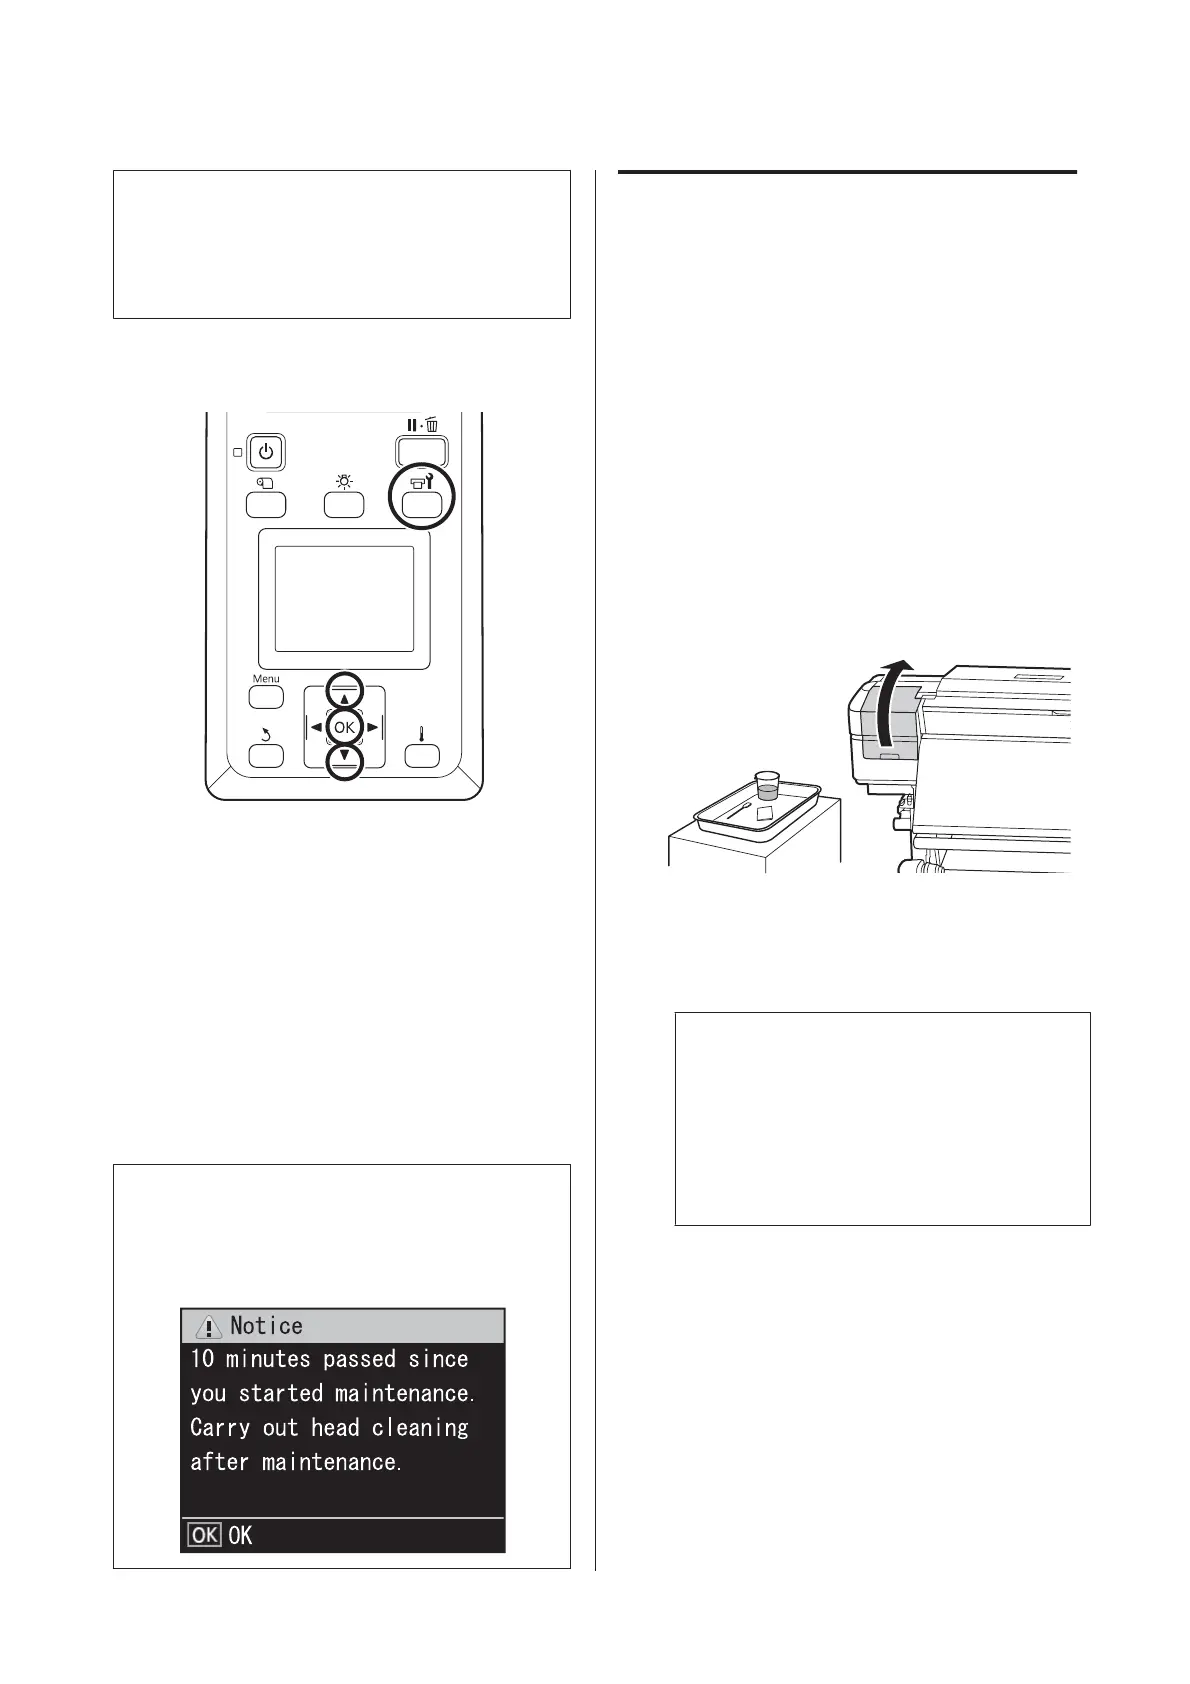
Buttons that are used in the following settings
A
Confirm that the printer is on and press the #
button.
The Maintenance menu will be displayed.
B
Use the d/u buttons to select Head
Maintenance and press the Z button.
C
Use the d/u buttons to select Regular Cleaning,
and then press the Z button.
The print head moves to the cleaning position.
Note:
The buzzer sounds 10 minutes after the print head is
moved (default setting). Press the Z button to continue
the cleaning process. After 10 more minutes have passed,
the buzzer sounds again.
Cleaning Around the Print Head
If you notice any ink clots, lint, or dust when checking
the area around the print head, clean the area by
following the steps below.
The SC-S80600 Series/SC-S80600L Series/SC-S60600
Series/SC-S60600L Series have two print heads. Clean
around both print heads.
Before starting this procedure, be sure to read the
following:
U “Precautions regarding maintenance” on page 26
A
After the print head moves to the left end of the
printer, open the left maintenance cover.
B
Dampen the cleaning stick with ink cleaner.
Use new cleaning stick and ink cleaner.
U “Using Ink Cleaner” on page 28
c
Important:
❏ Rinse a cleaning stick using ink cleaner for
each step.
❏ After removing a clot of ink with a
cleaning stick, wipe off using a clean-room
wiper.
SC-S80600 Series/SC-S80600L Series/SC-S60600 Series/SC-S60600L Series/SC-S40600 Series Operator's Guide
Maintenance
29

 Loading...