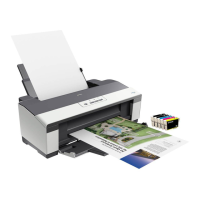
WorkForce 1100/Epson Stylus Office T1110/B1100/T1100/Epson ME Office 1100 Revision A
Disassembly And Assembly Disassembling the Printer Mechanism 86
Confidential
4.4.4 Lower Housing / Printer Mechanism
1. Remove the Upper Housing / Printer Cover. (p.72)
2. Grip both ends of the Waste Ink Tube Fasteners with your fingers, slide them in
the direction of the arrows, and pull out the Waste Ink Tube from the Joint Tube.
3. Remove the C.B.P. M3 x 12 screw and the C.B.S. (P2) M3 x 10 screw that secure
the Shield Plate Holder, and remove the Shield Plate Holder.
4. Remove the five screws (four C.B.P. M3 x 10 screws and one C.B.S. (P2) M3 x 10
screw) secure the Printer Mechanism.
Figure 4-51. Screws that Secure the Printer Mechanism
Step 2
Waste Ink Tube
Fastener
Joint Tube
1) C.B.P. M3x10
(6±1 kgf.cm)
Printer Mechanism
1) C.B.P. M3x10
(6±1 kgf.cm)
5
3) C.B.S. (P2) M3x10
(6±1 kgf.cm)
Left Rear
Shield Plate Holder
18) C.B.P. 3x12
(6±1 kgf.cm)
3) C.B.S. (P2) M3x10
(6±1 kgf.cm)
Right Rear
A
B
Step 3
高速行式打印机 http://www.lineprinter.com.cn/
_______________________________________________________________________________________
_______________________________________________________________________________________
打印机维修论坛 http://www.printerwhy.net/ 打印机驱动下载 http://www.printerwhy.com/

 Loading...
