TM-P20II User's Manual CHAP02.FM (A4 size) Rev.A
Part Names
9
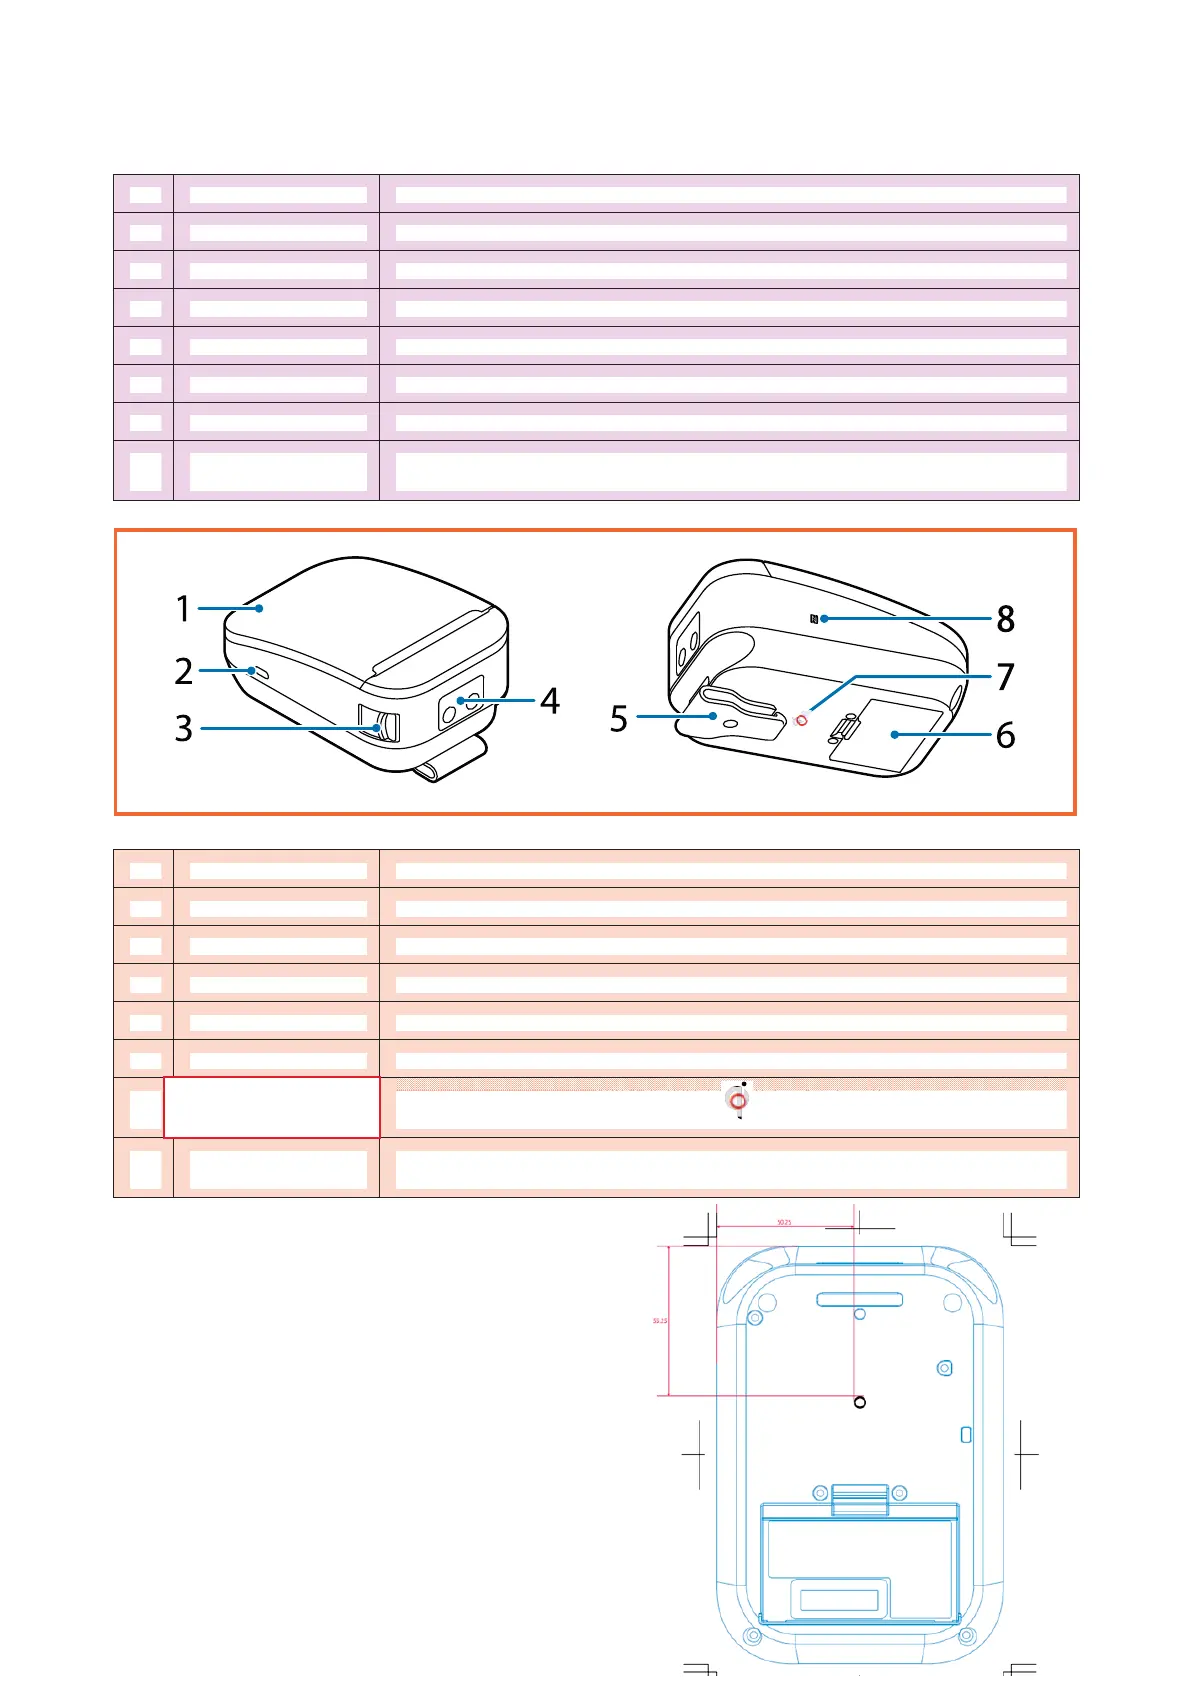
1 Roll paper cover Open this cover when installing or replacing the roll paper.
2 USB-C connector Connects a USB cable.
3 Cover open lever Operate this lever to open the roll paper cover.
4 Operation panel There are buttons to operate the printer and LEDs to display the printer status.
5 Manual cutter A cutter for cutting roll paper.
6 Belt clip A clip for hanging the printer from a waist belt.
7 Battery Provides electricity to the printer. The printer does not work without the battery installed.
8 NFC Tag A mark is printed here to indicate the position of the NFC tag. Bring an NFC-compatible
device close to the mark to obtain information about the printer.
1 Roll paper cover Open this cover when installing or replacing the roll paper.
2 USB-C connector Connects a USB cable.
3 Cover open lever Operate this lever to open the roll paper cover.
4 Operation panel There are buttons to operate the printer and LEDs to display the printer status.
5 Belt clip A clip for hanging the printer from a waist belt.
6 Battery Provides electricity to the printer. The printer does not work without the battery installed.
7 symbol The printer can be charged by aligning the symbol with a Qi symbol on a
commercially available wireless charger.
8 NFC Tag A mark is printed here to indicate the position of the NFC tag. Bring an NFC-compatible
device close to the mark to obtain information about the printer.
the position of
wireless charger
 Loading...