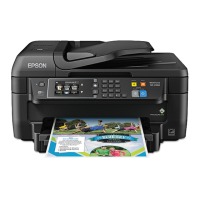
Do you have a question about the Epson WF-2860 and is the answer not in the manual?
Learn about the control panel and select control panel settings for your product.
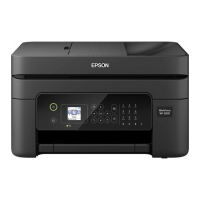
Identify and understand the function of each button and light on the printer's control panel.
Understand the layout and function of the printer's LCD screen and its display elements.
Follow guidelines to navigate and use the menus displayed on the printer's LCD screen.
Learn how to enter characters for passwords and other settings using the on-screen keyboard.
Set the current date, time, and daylight saving phase for your product.
Change the language displayed on the printer's LCD screen to your preferred language.
Adjust the sound level heard when pressing buttons on the printer's control panel.
Adjust the brightness level of the printer's LCD screen for better visibility.
Disable the feature that returns the LCD screen to the Home screen after inactivity.
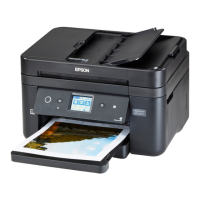
Locate and identify the front-facing parts of the Epson product.
Locate and identify the internal components of the Epson product.
Locate and identify the rear-facing parts and ports of the Epson product.
Adjust the time period before the product enters sleep mode and turns off the LCD screen.
Set the product to turn off automatically after a specified period of inactivity.
Activate your product's email address for Epson Connect services via the control panel.
Print documents by sending emails to your product's unique email address.
Print and scan wirelessly using the Epson iPrint app on Apple and Android devices.
Print from a laptop or desktop computer to your Epson Email-enabled product remotely.
Protect your network environment with appropriate security measures to deter unauthorized access.
Set up your product to communicate with computers via a wireless router or access point.
Select or change wireless network settings directly using the product's control panel.
Connect directly to computers or devices without a wireless router or access point.
Connect your product to a WPS-enabled network quickly using Wi-Fi Protected Setup.
Print a network status sheet to help diagnose network connectivity problems.
Change or update how your product connects to a network, such as switching between Wi-Fi and wired.
Select network settings and confirm operating status using a web browser via the Web Config utility.
Load paper into the paper cassette, up to Legal size (8.5 x 14 inches).
View the table for the loading capacity of the paper cassette for different paper types.
Identify compatible paper types and sizes for printing borderless photos.
Select paper type or media type settings within the printing software.
Change default printer settings using the product's control panel for all Windows programs.
Select and customize various printer setting options for your print jobs.
Change default paper size and paper type settings using the product's control panel.
Place originals on the scanner glass, up to Letter or A4 size, for scanning.
Place single or multi-page originals in the ADF, ensuring they meet ADF specifications.
Place originals on scanner glass, load paper, and select Copy to begin the copying process.
Select and configure various copying options like color mode, 2-sided, and density.
Print using your product with any Windows application, following specific section guides.
Select basic settings for documents or photos you want to print from a Windows application.
Print on both sides of the paper by selecting Auto or Manual binding options.
Save print settings and print your document or photo after selecting all desired options.
Select basic settings for documents or photos you want to print from a Mac application.
Print on both sides of the paper by selecting Two-sided Printing options from the pop-up menu.
Print your document or photo after selecting all desired print settings from the print window.
Begin scanning originals using methods like the control panel, Epson Scan 2 icon, or scanning programs.
Scan images to various destinations using your product's control panel.
Send scanned files to destinations registered with Epson Connect.
Start Epson Scan 2 to select settings, scan, and save the scanned image to a file.
Connect your product to a telephone wall jack to send or receive faxes.
Select basic settings for fax features like Fax Setup Wizard, Line Type, and Rings to Answer.
Select and configure various advanced fax settings including receive, report, basic, and security options.
Send faxes from your product control panel by entering numbers or selecting from lists.
Your product will automatically receive and print faxes when Receive Mode is set to Auto.
Ensure Receive Mode is set to Auto for automatic fax reception.
Set Receive Mode to Manual to check for fax tone before receiving faxes manually.
Check the status of ink cartridges and maintenance box via LCD screen or computer utility.
Follow instructions to safely remove old ink cartridges and install new ones.
Replace the maintenance box when prompted by a message on the LCD screen.
Clean print head nozzles if printouts are light or have bands; check for clogged nozzles first.
Print a nozzle check pattern to identify clogged nozzles and determine if cleaning is needed.
Clean the print head to correct missing dots or poor print quality if nozzle check indicates clogging.
Align the print head if printouts have misaligned lines, blurriness, or banding.
Keep your product working optimally by cleaning it several times a year, following safety precautions.
Clean paper rollers inside the product to resolve paper feeding issues from the cassettes.
Prepare your product for transportation or storage by following specific guidelines to prevent damage.
Periodically check Epson's support website for free updates to your product software.
Diagnose problems by checking messages on the LCD screen and using the help button.
Check solutions for problems setting up or using your product on a network.
Check solutions for problems related to paper feeding, jams, or ejection issues.
Check solutions for print quality issues like white/dark lines, blurriness, or incorrect colors.
Check solutions for problems encountered while scanning with your product.
Check solutions for problems with sending or receiving faxes, memory errors, or fax quality.
Follow instructions to uninstall and re-install software to resolve problems, with steps for Windows and Mac.
Computer must use compatible Microsoft operating systems like Windows 10, 8.x, or 7.
Your Mac should use compatible operating systems like macOS 10.13.x or OS X 10.11.x.
Details scanner type, photoelectric device, effective pixels, document size, and resolution.
Information on ink cartridge compatibility, life, and storage conditions.
Read and follow safety instructions before using the Epson product.
Equipment complies with FCC Part 68 rules and ACTA requirements; provides product identifier and USOC.
Agreement terms for disputes, binding arbitration, and waiver of class actions.
| Print Technology | Inkjet |
|---|---|
| Max Print Size | 8.5 x 47.2 inches |
| Functions | Print, Copy, Scan, Fax |
| Copy Resolution | 600 x 600 dpi |
| Scanner Type | Color Flatbed / ADF |
| Scan Resolution | 1200 x 2400 dpi |
| Fax Speed | 33.6 Kbps |
| Automatic Document Feeder | Yes |
| ADF Capacity | 30 sheets |
| Duplex Printing | Automatic |
| Display | 2.4" Color LCD |
| Print Speed (Black) | 14 ppm ISO |
| Print Speed (Color) | 7.5 ISO ppm |
| Copy Speed (Color) | 5.5 ISO cpm |
| Connectivity | Wi-Fi, Ethernet, USB |
| Mobile Printing | Apple AirPrint, Google Cloud Print |
| Weight | 14.6 lb |
| Paper Sizes Supported | A4, A6, A5, B5, Letter, Legal, Envelopes |
| Copy Speed (Black) | 11 ppm ISO |
