Epson WF-5690/4640/4630/5620/5190/5110series Revision D
Disassembly/Reassembly Detailed Disassembly/Reassembly Procedure for each Part/Unit 41
Confidential
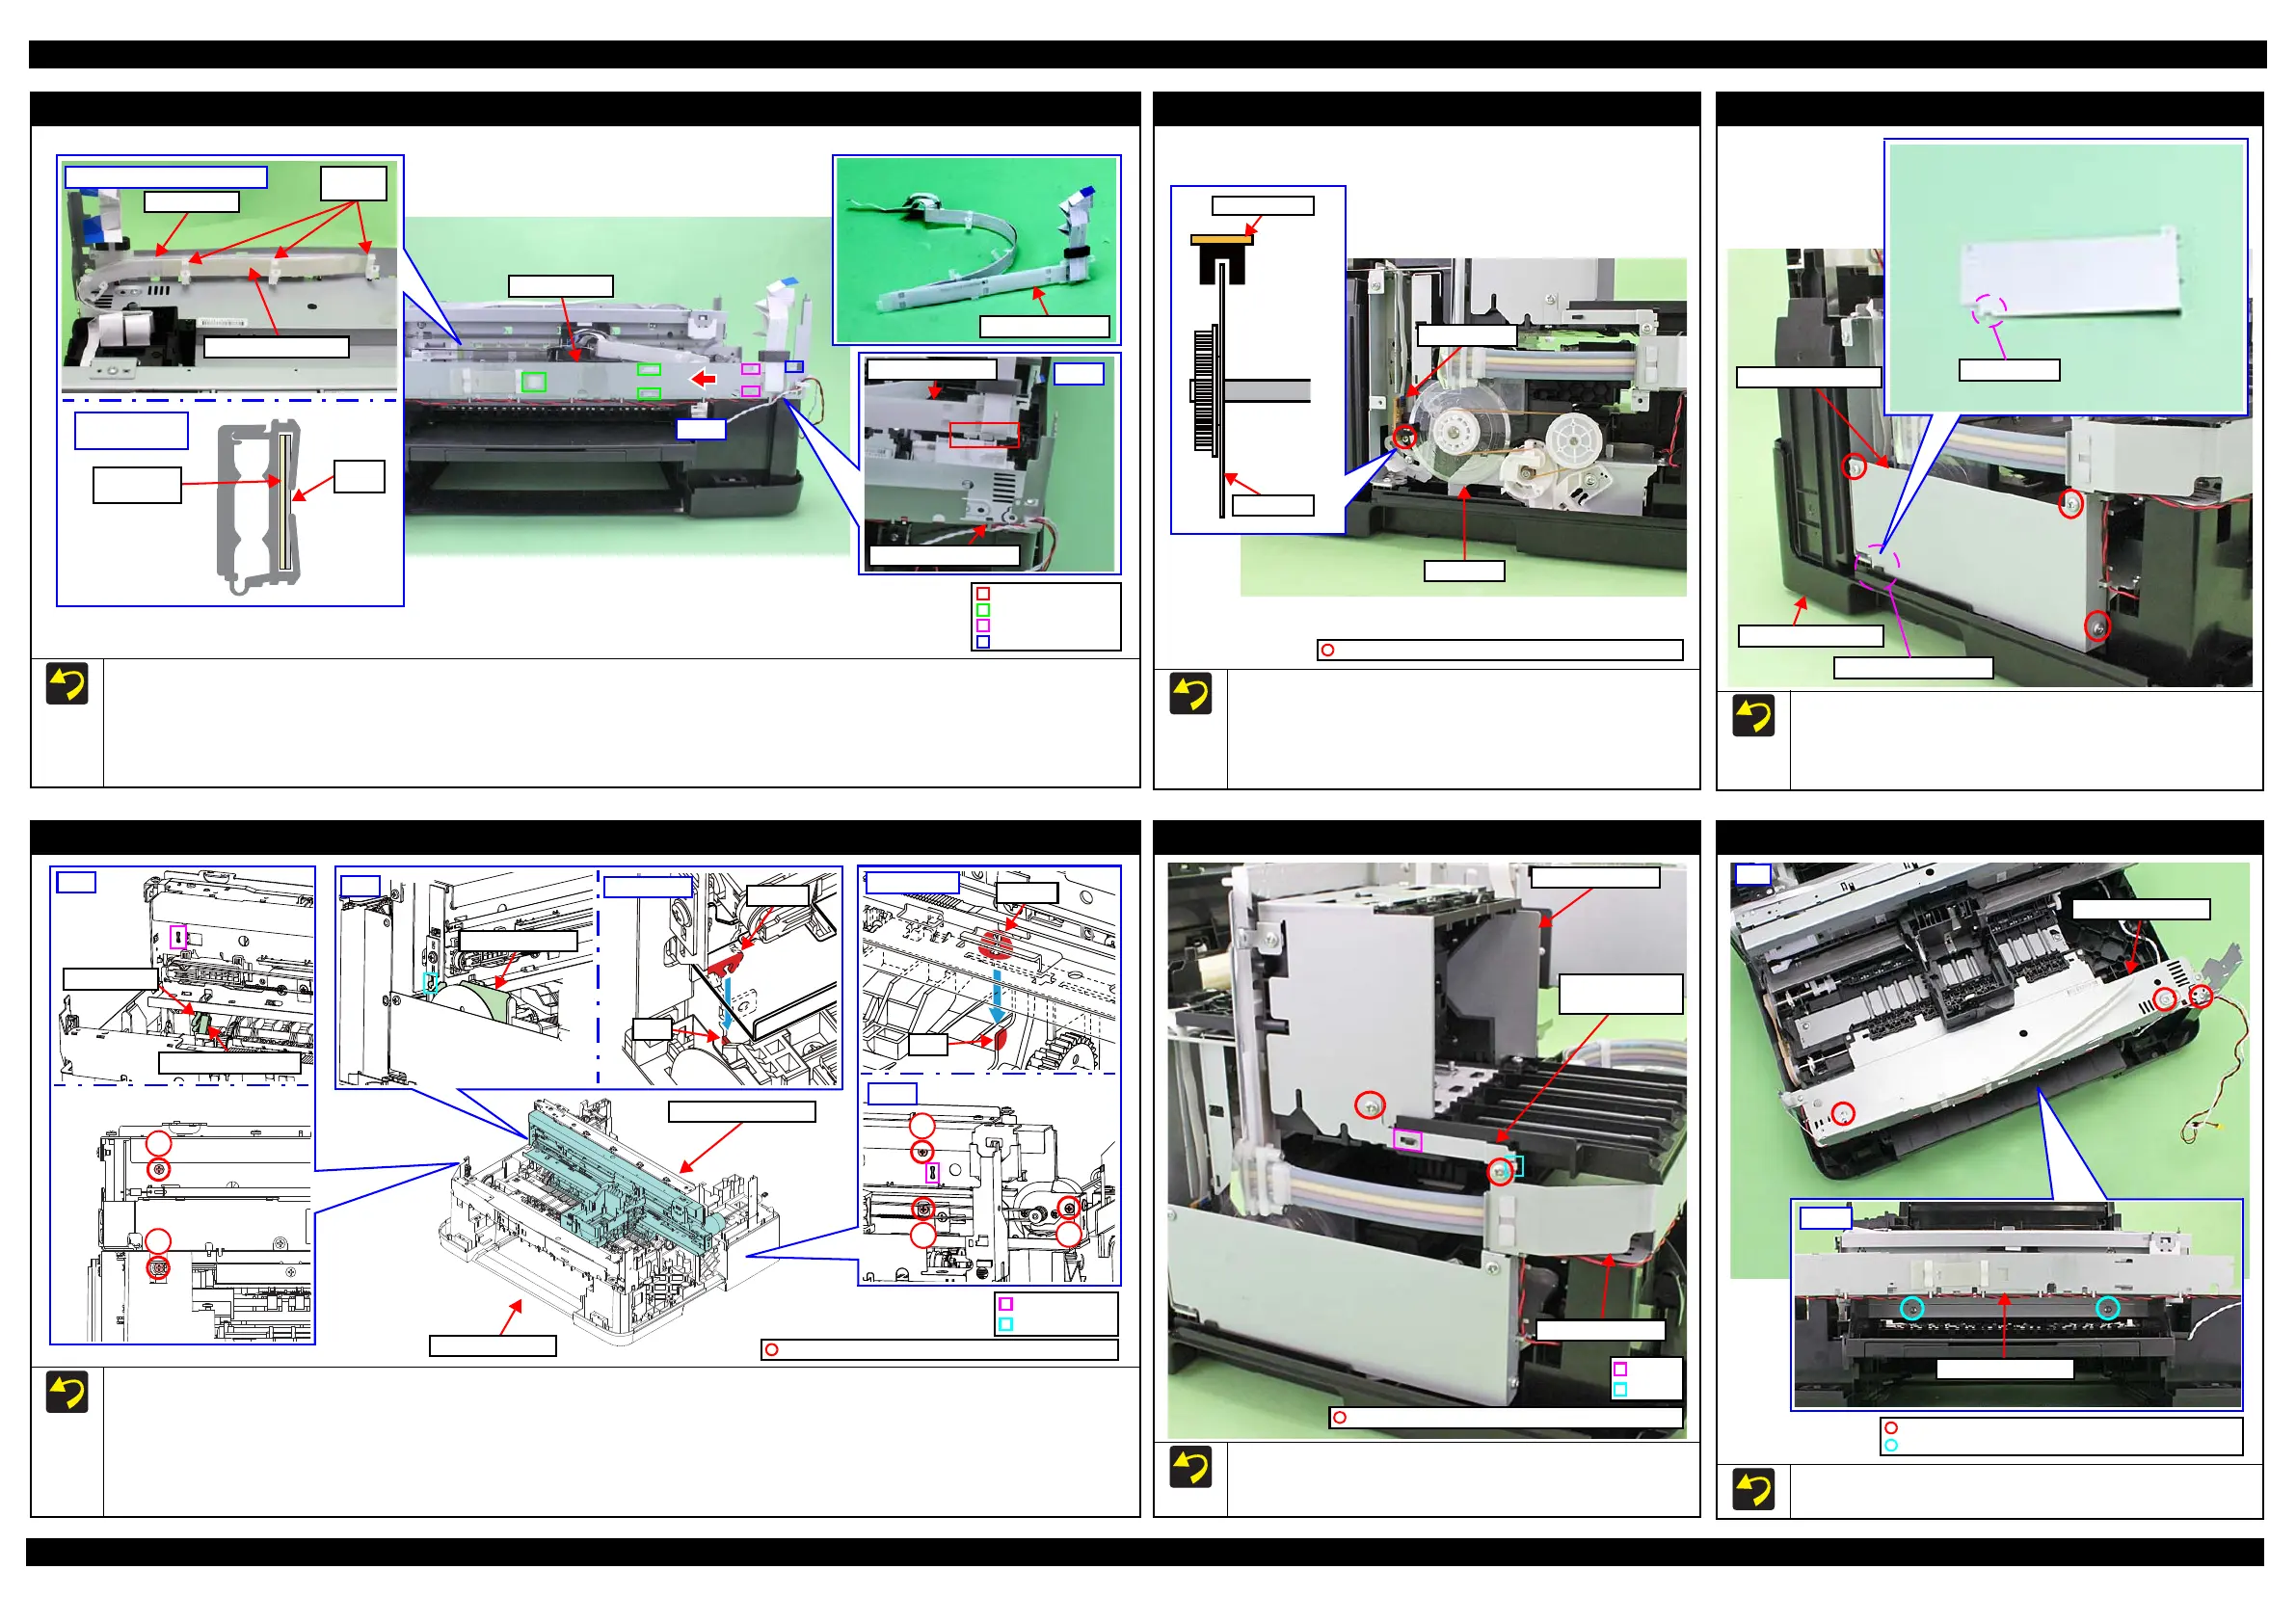
Head FFC
When installing the Head FFC, follow the procedure below.
1. Fit in the rib of the Front Frame to the space between the rib A (x3).
2. Align the rib B (x3), rib C (x2) and hook of the Head FFC Holder with the hole A (x3), cutouts (x2) and the hole B of the Front Frame, and slide
the Head FFC Holder in the direction of the arrow to secure it to the Front Frame.
3. Insert the Front Tube Guide between the Tube Holder and Head FFC.
Rib B and hole A
Rib C and cutout
Hook and hole B
Rib A
Front Frame
Rib of Front Frame
Step 1
Head FFC Holder
Head FFC
Front Tube Guide
Tube
Holders
Step 3: Back of Front Frame
Cross-section of
Tube Holder
Front Tube
Guide
Head
FFC
PF Encoder / PF Timing Belt
When installing the PF Encoder, set the encoder over the PF
Scale with the scale in the slit as shown in the figure above. After
installing PF Encoder, make sure it does not touch the PF Scale.
Install the PF Timing Belt as shown above and make sure the
belt is correctly attached to the gears and pulley.
C.B.P-TITE SCREW 2.5x8 F/ZN-3C (6 ± 1 kgf·cm)
PF Encoder
Metal Plate Left
When installing the Metal Plate Left to the Frame Base Assy,
align the cutout of the Metal Plate Left with the rib of the
Frame Base Assy.
Tighten the screws in the order indicated in the figure above.
Align cutout with rib
Frame Base Assy
Metal Plate Left
Main Frame Assy (w / CR Guide Frame)
When installing the Main Frame Assy to the Frame Base Assy, make sure of the following.
• Align the holes (x2) of the Main Frame Assy with the ribs (x2) of the Frame Base Assy shown above.
• Align the cutout on the bottom of the Main Frame Assy with the rib of the Frame Base Assy.
• Engage the APG Lever with the APG Change Lever properly.
• Align the hook of the PF Scale Sheet with the hole of the Main Frame Assy.
Tighten the screws in the order indicated in the figure above.
Left
APG Lever
APG Change Lever
Hole and rib
Hole and hook
C.B.S-TITE SCREW 3x6 F/ZN-3C (6 ± 1 kgf·cm)
Frame Base Assy
Main Frame Assy
Ink Supply Unit Grounding Plate
When installing the Ink Supply Unit Grounding Plate, secure it with
the hook of the Ink Supply Unit and rib of the Front Frame, and
tighten the screws (x2) in the order indicated in the figure above.
C.B.S-TITE SCREW 3x6 F/ZN-3C (6 ± 1 kgf·cm)
Rib
Ink Supply Unit
Ink Supply Unit
Grounding Plate
Front Frame Assy
Hook
Front Frame Assy
Tighten the screws in the order indicated in the figure above.
C.B.P-TITE SCREW 3x10 F/ZN-3C (6 ± 1 kgf·cm)
C.B.S-TITE SCREW 3x6 F/ZN-3C (6 ± 1 kgf·cm)
 Loading...


