Confidential
Adjustment Details of Adjustments 70
Epson WF-5690/4640/4630/5620/5190/5110 series Revision D
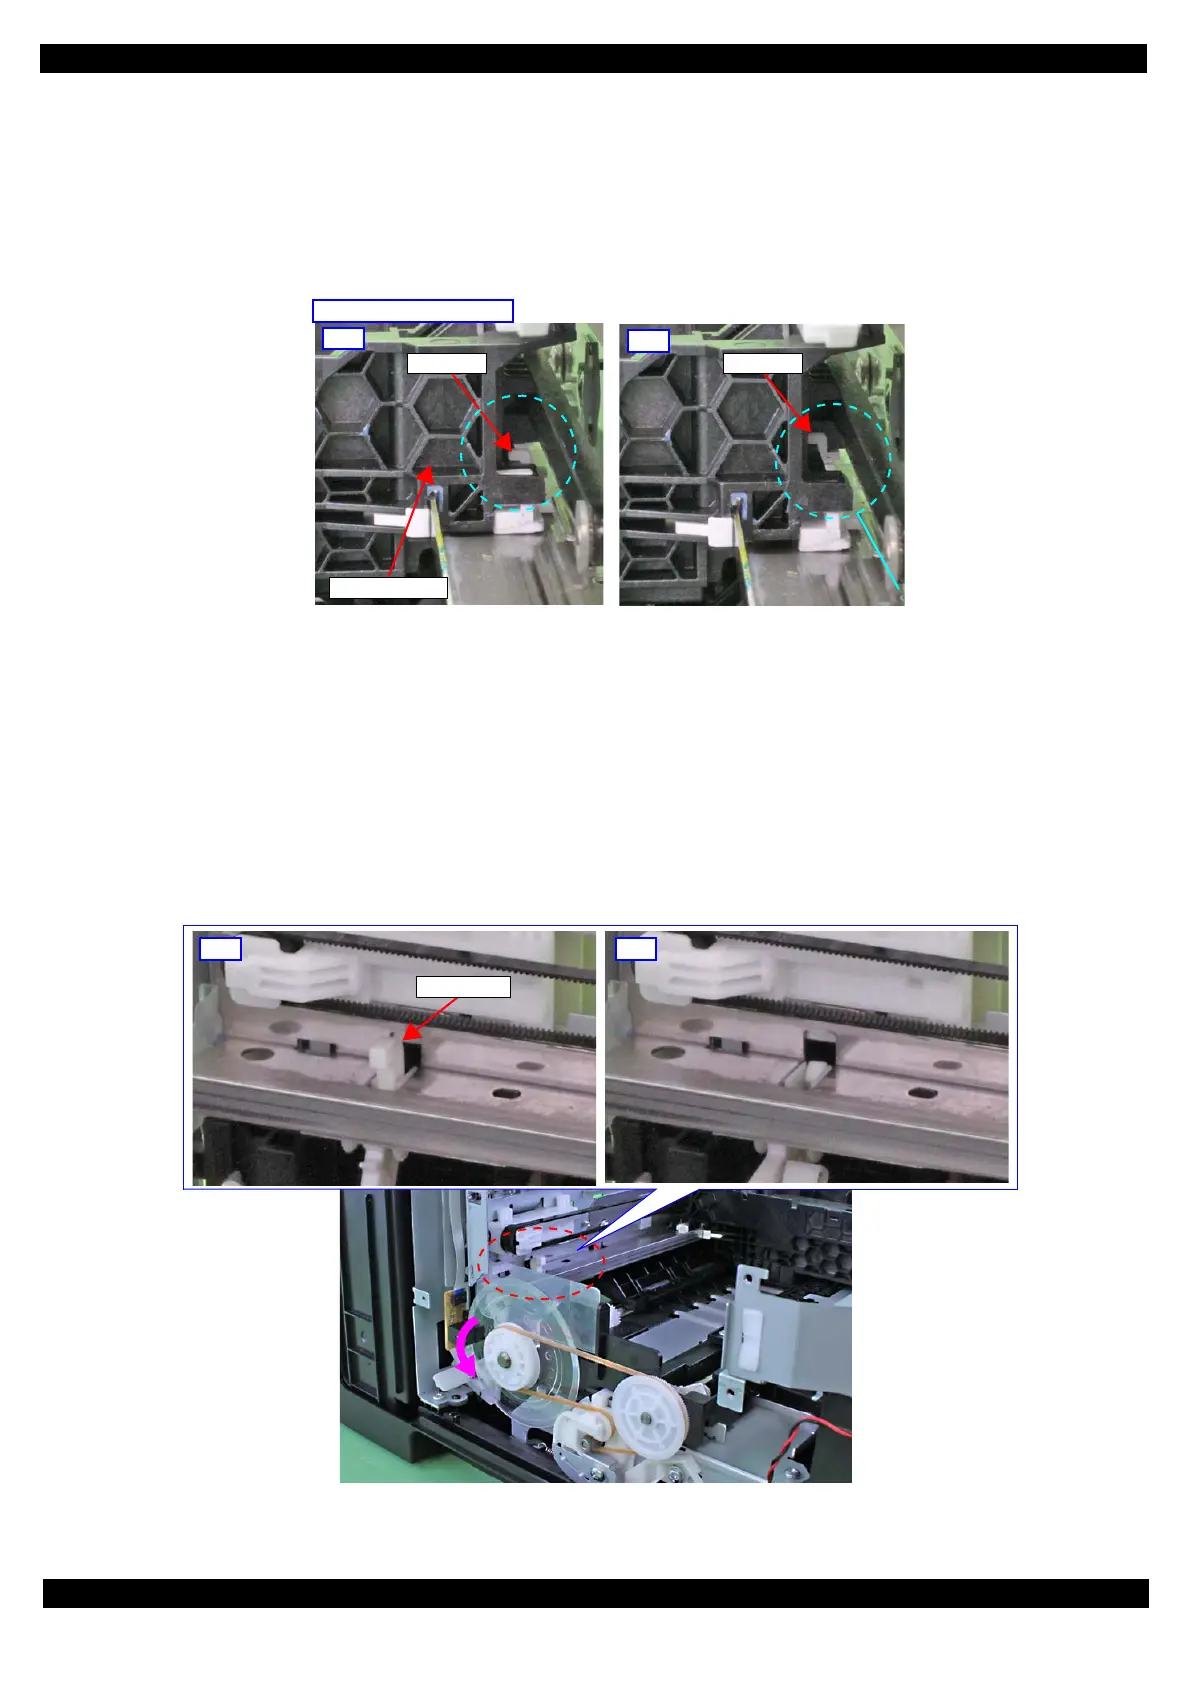
APG Position Check
Make sure the APG position is in the [PG1] position.
How to check
Perform the following to check if the PG position is surely set to PG 1.
1. Move the Carriage Assy to the center of the printer.
2. From the 0-digit side between the Main Frame and Carriage Assy, check the APG Cam is as shown
in “PG 1” in Figure 3-19.
Figure 3-19. PG Position
If the lever is in the NG condition shown in Figure 3-19 , set it in the [PG1] position as follows.
1. Move the Carriage Assy to the 0-digit side.
2. Rotate the PF Roller counterclockwise to move the APG Lever out of the hole of the Main Frame.
3. Move the Carriage Assy to the 80-digit side until it touches the APG Lever.
4. Return the Carriage Assy to the center of the printer.
Figure 3-20. APG Lever
Right side of Carriage Assy
PG 1
When the APG Cam is the nearest to
the 0-digit side.
PG 4
When the APG Cam is the nearest to
the 80-digit side.
 Loading...


