C
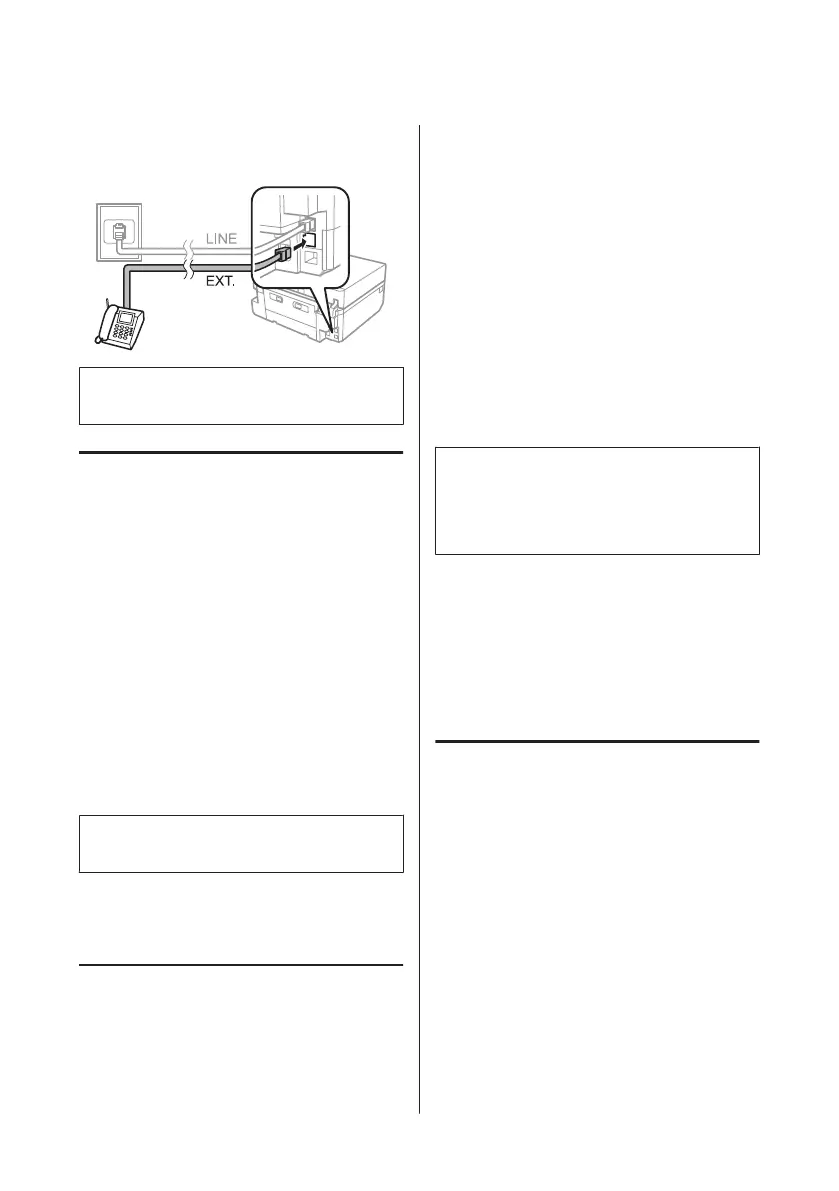
Connect a phone or answering machine to the
EXT. port.
Note:
See the PDF User’s Guide for other connection methods.
Checking the fax connection
You can check whether the product is ready to send or
receive faxes.
A
Load A4-size plain paper in the cassette.
& “Loading Paper” on page 5
B
Enter Setup mode from the Home menu.
C
Select Fax Settings.
D
Select Check Fax Connection.
E
Press x to print the report.
Note:
If an errors are reported, try the solutions in the report.
Setting Up Fax Features
Setting up speed dial entries
You can create a speed dial list allowing you to select fax
recipient numbers quickly when faxing. Up to 60
combined speed dial and group dial entries can be
registered.
A
Enter Fax mode from the Home menu.
B
Press Contacts.
C
Select Add/Edit Contacts.
D
Select Speed Dial Setup. You see the available
speed dial entry numbers.
E
Select the speed dial entry number that you want
to register. You can register up to 60 entries.
F
Enter a phone number. You can enter up to 64
digits.
Note:
A hyphen ("-") causes a slight pause when dialing. Only
include it in phone numbers when a pause is necessary.
Spaces entered between numbers are ignored when
dialing.
G
Select Done.
H
Enter a name to identify the speed dial entry. You
can enter up to 30 characters.
I
Select Done to register the name.
Setting up group dial entries
You can add speed dial entries to a group, allowing you
to send a fax to multiple recipients at the same time. Up
to 60 combined speed dial and group dial entries can be
entered.
A
Enter Fax mode from the Home menu.
B
Select Contacts.
C
Select Edit Contacts.
D
Select Group Dial Setup. You see the available
group dial entry numbers.
Basic Guide
Faxing
15

 Loading...