4 PS6500 Rack Mount Instructions
5. Slide the chassis into the rack.
6. Attach the chassis cover to the front rail flanges.
7. Install the disk drives.
8. Install the bezel.
9. Install the power supply and cooling modules.
10. Install the cable management system.
These steps are described in detail in the following sections. After you rack mount the array, see the
Installation and Setup manual for information about completing the array hardware installation.
Step 1: Determine Where to Place the Mounting Rails in the Rack
Make sure there is enough space in the rack for a 4U chassis. In a standard rack, the height of a 4U
chassis will span 12 post holes.
Step 2: Remove the Bezel
You must remove the bezel before mounting the array in a rack.
1. Remove the array from the shipping box and place it on a sturdy surface that can hold the weight of
the chassis without disk drives (35 kg or 77 lb).
The array is heavy. Use the lifting straps included in the shipping box only to remove the
array from the box. At least two people are needed to lift the chassis. If possible, use a
mechanical box lifter to move the array.
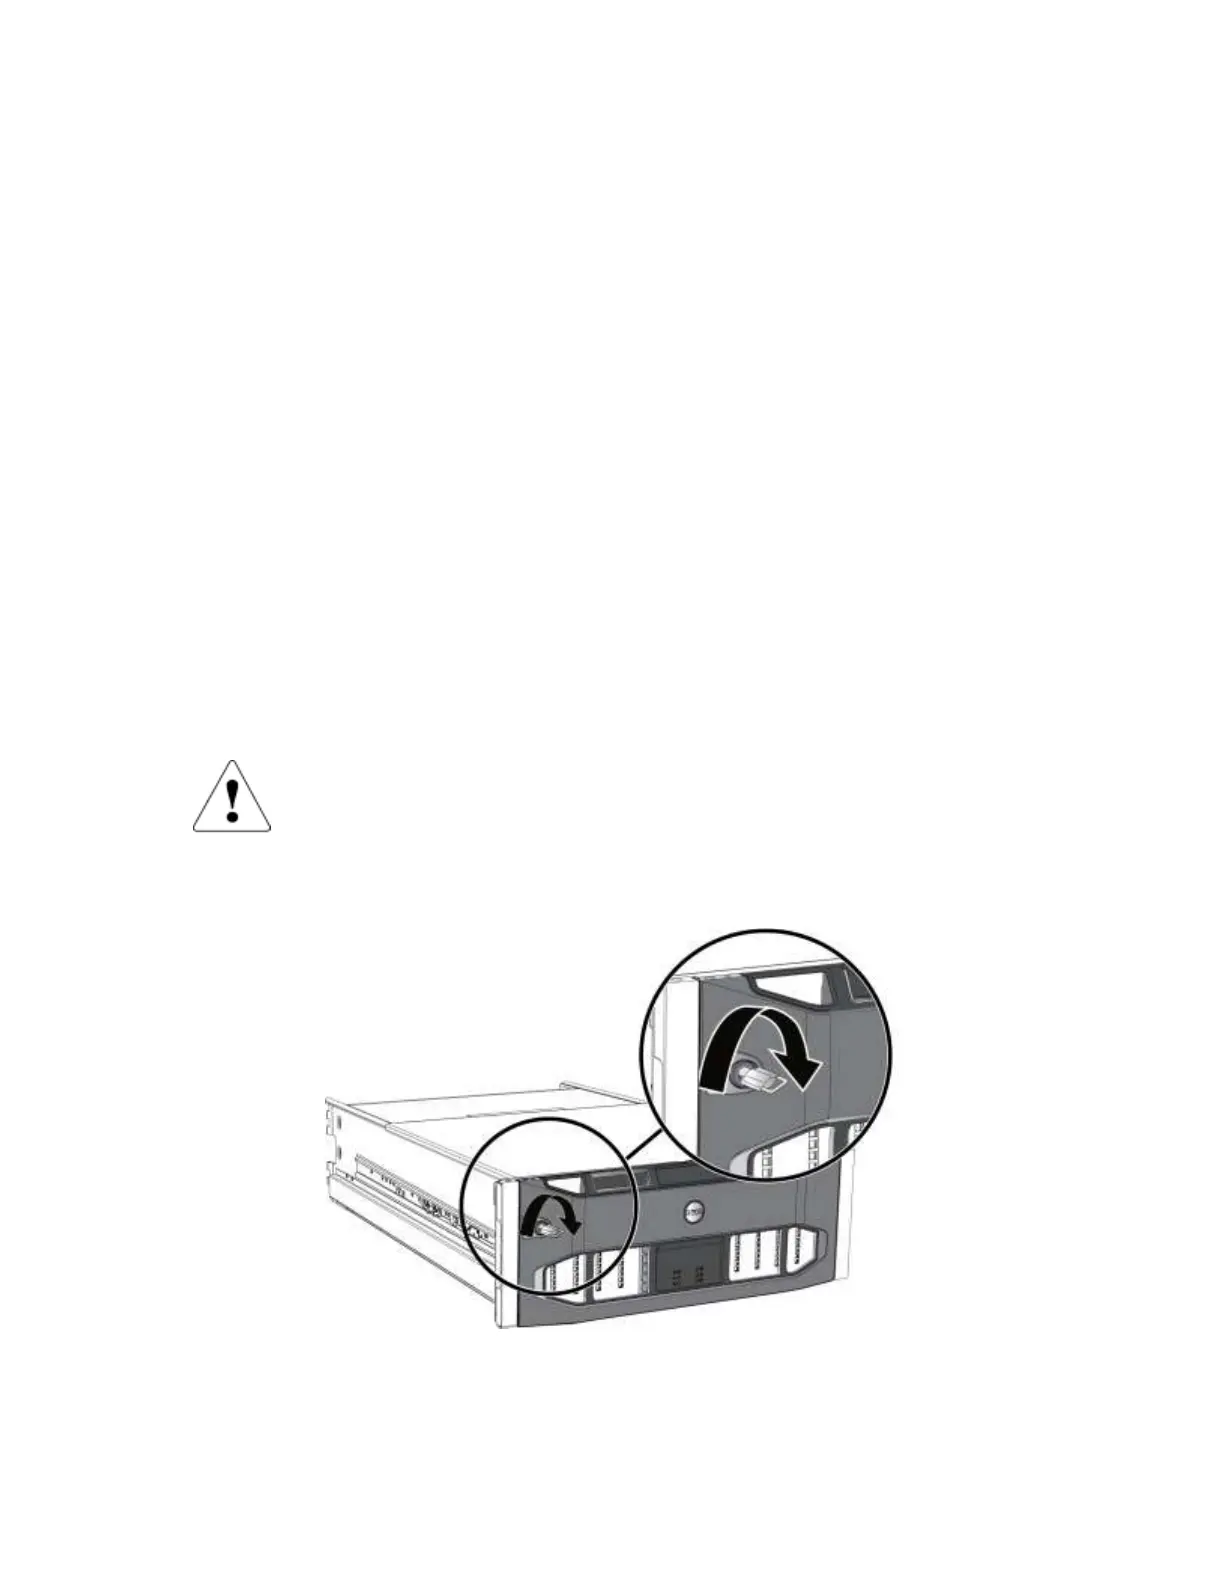
2. Insert the bezel key and turn it clockwise to unlock the bezel. The key is attached to the bezel.
Figure 1 Unlocking the Bezel
3. While holding the bezel on the right side, release the bezel latch by pushing the latch up.
See Figure 2.