12 PS6500 Rack Mount Instructions
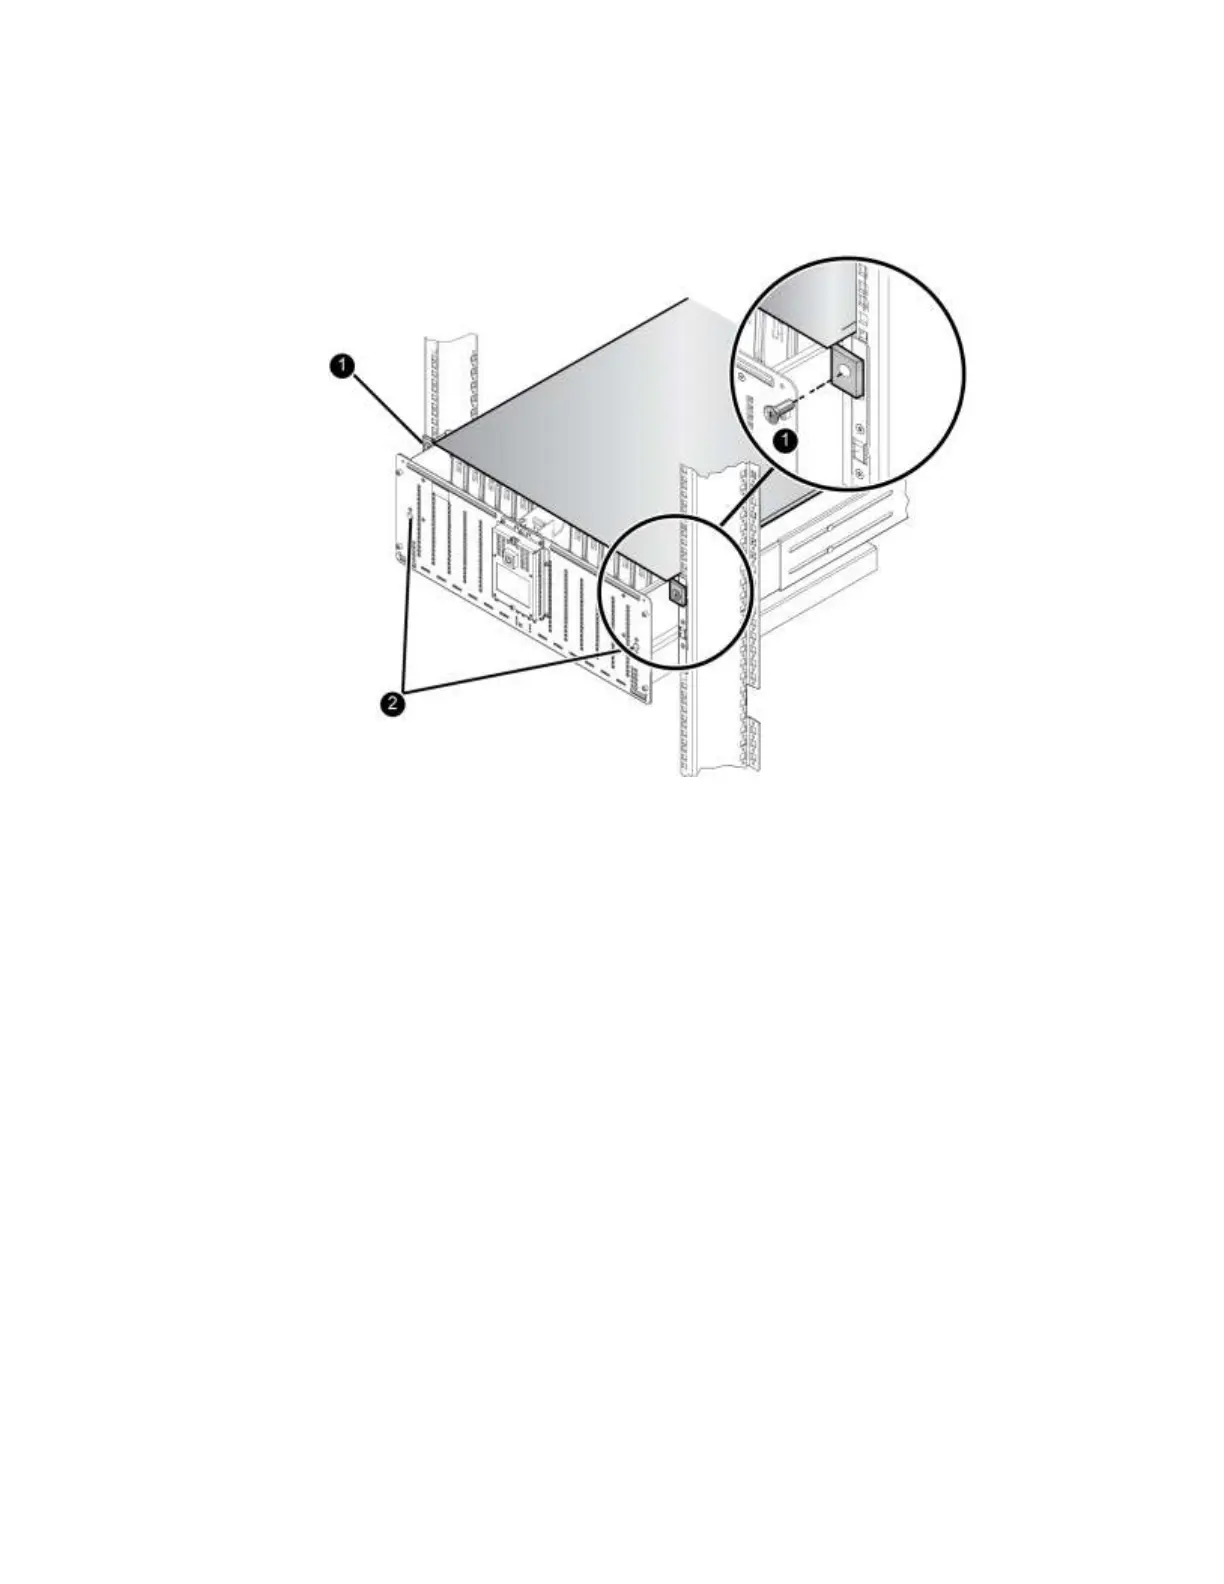
Figure 10 Attaching the Chassis Cover to the Rack
4. Lock the chassis using the flathead screwdriver to turn both cam screws (callout 2 in Figure 10) on
the front panel as follows:
a. Rotate the cam screws towards the open position (counter-clockwise) as far as they will go.
b. Push the front of array in to make sure it is fully in contact with the rail flanges.
c. While holding the array in place, rotate the cam screws towards the closed position
(clockwise) until they firmly latch.
Step 7: Install the Disk Drives
Handle the disk drives as follows:
Hold a disk drive only by the plastic carrier. Do not pick it up by the release lever.
Do not drop or jolt a disk drive.
Let disk drives warm to room temperature before installation. For example, let a disk drive sit
overnight before installing it in an array.
Insert disk drives in the correct position, with the latch toward the rear of the array. Do not force a
disk drive into a slot.
Follow these steps to install a disk drive:
1. Unlock the chassis cover by using a flathead screwdriver to turn both cam screws on the front panel
counter-clockwise.