40
WELD CONDITION POSSIBLE CAUSE REMEDY
c. Loose connection. c. Check all welding cable
connections.
d. Malfunctioning capacitor bank. d. Check capacitors for low
leakage resistance.
6. Stringy irregular bead, a. Torch moved too fast. a. Move Torch slower along seams.
poor penetration. b. Controls are not set properly for b. Reset control properly.
metal gauge thickness.
c. Wrong polarity. c. Check for correct polarity.
7. Bead not centered. a. Nozzle not aligned. a. Move Torch nozzle parallel to
and centered over seam.
8. Bead too large. a. Torch moved too slowly. a. Move Torch faster along seam.
9. Unstable arc, excess a. Incorrectly set controls. a. Reset controls.
spatter, weld porous.
b. Shield gas ow is too low or b. See Condition 10.
stopped.
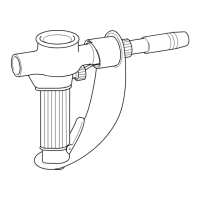
c. Torch nozzle is too far from work. c. Maintain 1/4" (.6 mm) wire
protrusion; hold closer to work.
d. Faulty regulator or adapter. d. Check ow at outlet;
replace faulty item.
e. Faulty gas solenoid valve (SOL). e. Replace solenoid valve.
f. Wrong polarity. f. Check polarity.
10.Shield gas ow low or a. Cylinder valve closed. a. Turn o regulator, slowly open
stopped valve, until regulator reaches
35 c.f.h. pressure.
b. Cylinder empty. b. Replace if gauge so indicates.
c. Faulty regulator or adaptor. c. Check ow at outlet; replace
faulty item.
d. Faulty gas solenoid valve. d. Replace solenoid valve.
11.Wire stubs on work a. Controls not set properly for a. Reset controls properly.
while welding. metal gauge, thickness.
12.Wire burns back into a. Contact tip loose. a. Firmly tighten with pliers.
contact tip. b. Tip too close to work. b. Maintain 1/4" (.6 mm) wire
protrusion; hold Torch further
from work.
c. Wire feed slipping. c. Increase pressure on pressure
roll by adjusting pressure knob.
d. Contact tip damaged. d. Trim back tip 1/16" (1.6 mm) max.
Replace if still faulty.
e. Voltage setting too high. e. Adjust setting.
f. Drive or pressure roll dirty or worn. f. Clean rolls or replace.
SECTION 5 SERVICE