03
2 PREPARATIONS FOR ASSEMBLY
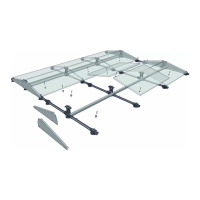
3 PLACE DUAL START UNIT
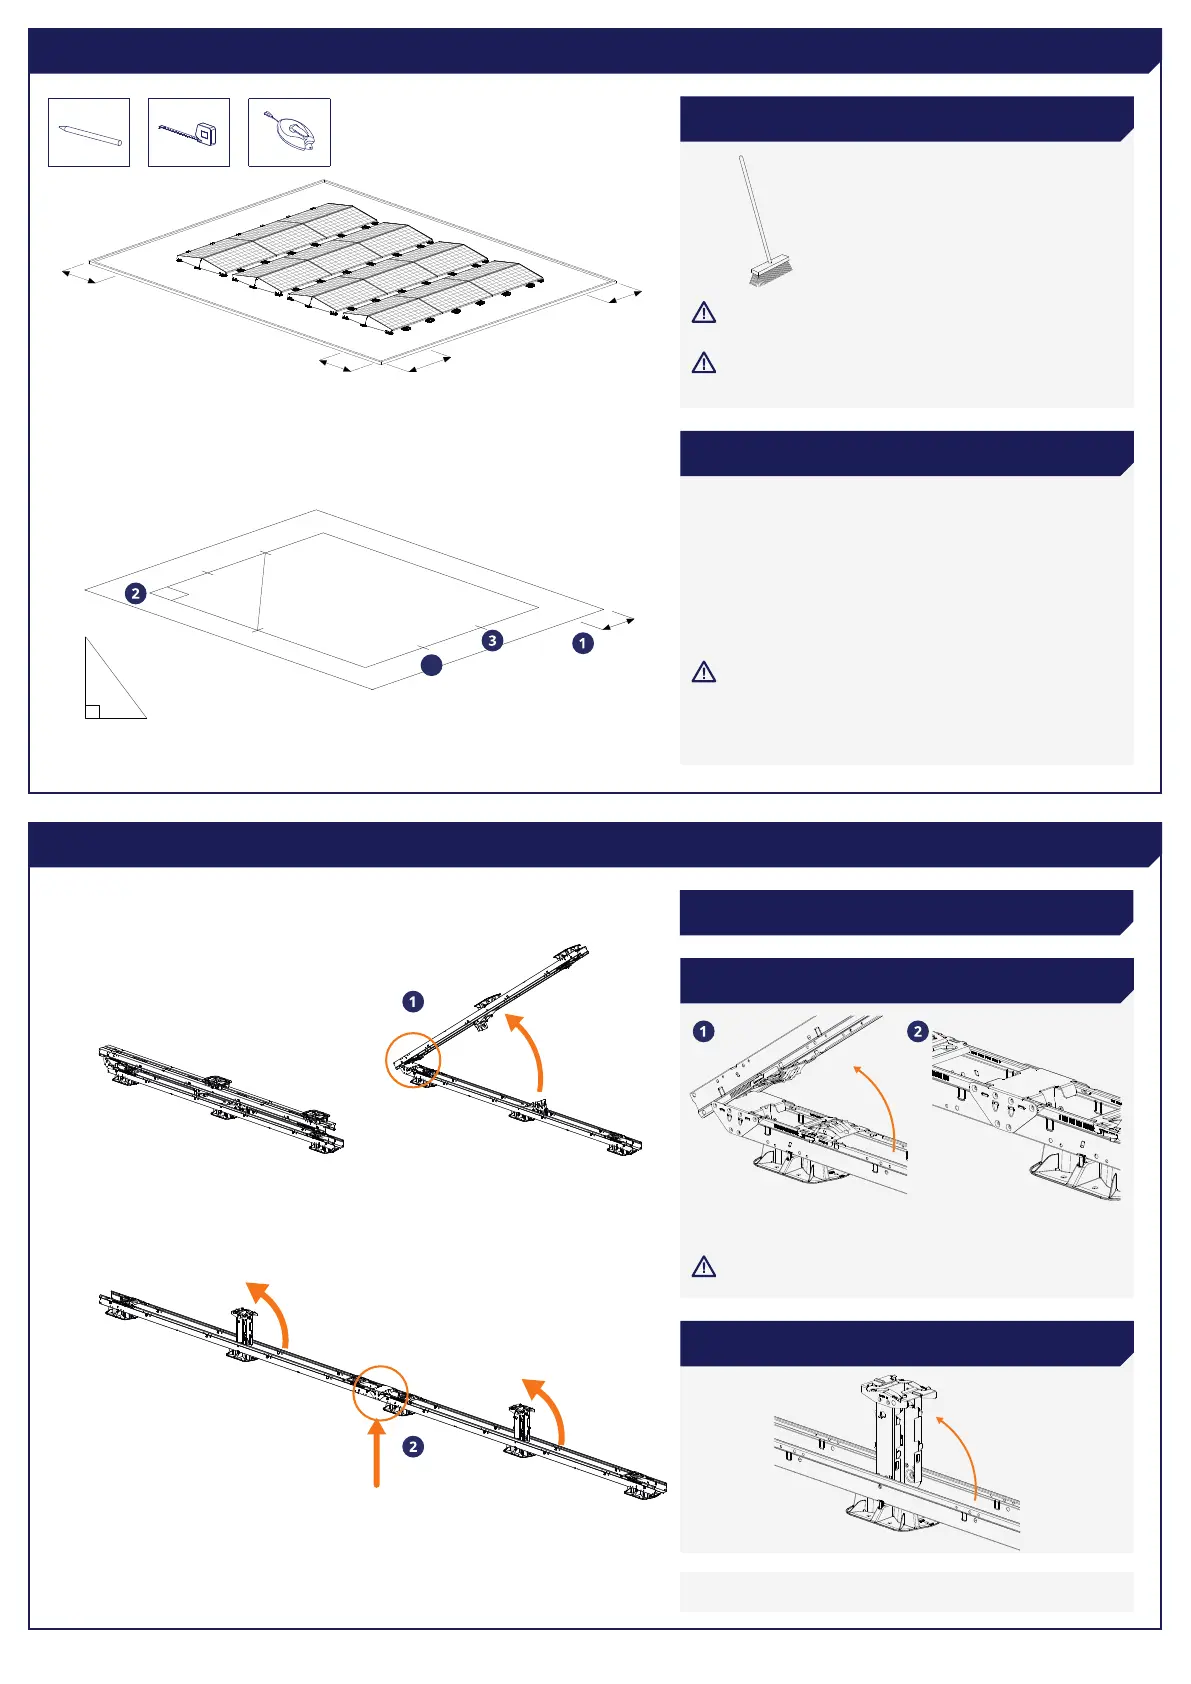
1 PREPARING THE ROOF AND ALIGNING (THE FIELDS)
2 MEASURING AND MARKING (OF FIELD)
2 UNFOLD THE TOP OF THE DUAL START UNIT UNTIL IT
IS COMPLETELY FLAT AND CLICKS INTO PLACE
3 PLACE THE HIGH BASE (2x) IN STANDING POSITION
SO THAT IT CLICKS
NB:
Follow the installation drawing and make sure the
elds are well coordinated.
Calculate how much space you need based on the
dimensions of your panel.
1. Keep at least 30 cm around the panel eld free.
2. Draw eld contours at right angles with 3-4-5 rule. Use a
chalk or blemish cord for this. Also mark each panel with a
short stripe.
3. Mark the panel edges.
4. Mark with chalk the place on the roof where the start units
are to be placed.
NB: Make sure your roof is in good condition! If in doubt,
consult your roof specialist.
NB: The distance from the solar panels to the edge of
the roof should be approximately 1/5 of the height of
the building. See the installation drawing that is calcu-
lated with the Esdec calculator for the correct distance.
Tip: Lift the dual start unit slightly at the coupling, by its
own weight the unit clicks rmly into place.
min. 30 cm
min. 30 cm
min. 30 cm
min. 30 cm
Click!
Click!
Click!
Click!
Click!
Tip: Check the measurement using the 3-4-5 rule.
NB: Make sure that your hands/ngers are not trapped
in the area of the hinged parts!
min. 30 cm
3
4
5
5
4
3
4
1 PLACE THE DUAL START UNIT DIRECTLY ON THE
RIGHT PLACE ON THE ROOF
See Annex A for an explanation of how to attach additional
roof supports to the unit.