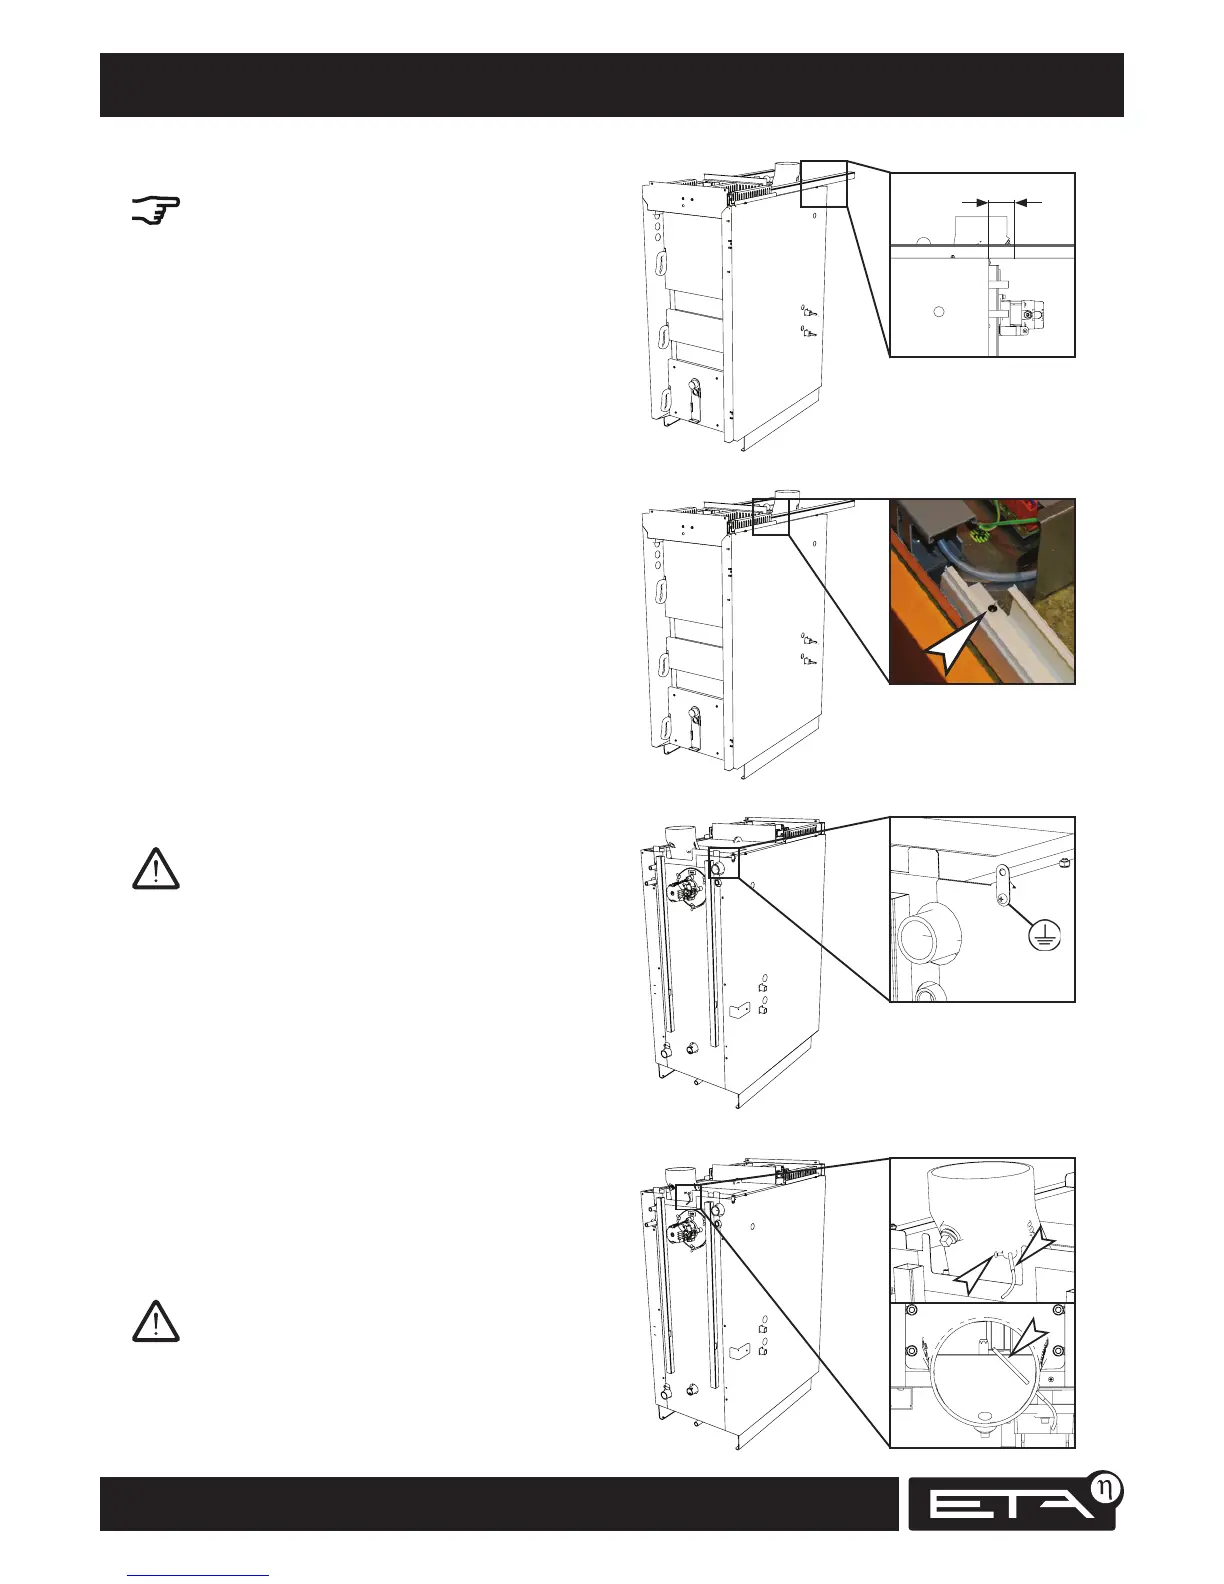
Change length of cable ducts
The cable ducts for the left and right sides of the
boiler are different due to the openings.
Put both cable ducts on the boiler and fit their
lengths to the boiler room. The cable ducts should
extend at least 5 cm over the rear wall of the
boiler; ideally they should extend to the wall
behind the boiler.
Connect control system's earthing wire
Run the earthing wire from the control system to
the rear side of the boiler and screw it onto the
side wall.
Install flue gas temperature sensor
Run the wire for the flue gas temperature sensor
(striped silver-black) to the flue outlet. Insert the
temperature sensor into the coupling on the flue
outlet and secure it with the screw.
Let it project in far enough so that the screw clamps
the sensor's metal sleeve and not the wire.
Fasten cable ducts
Fasten the left and right cable ducts with one 3.5
x 9.5 self-tapping screw each.