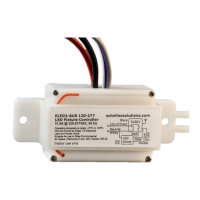
Echoflex Installation Guide
LED Fixture Controller (120-277 VAC)
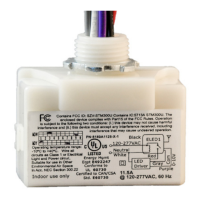
Learn Button
The [Learn] button initiates Link mode for manually linking compatible
Echoflex devices to the controller. See the relevant switch or sensor
documentation for information on linking. Link mode times out after
60seconds of inactivity.
Devices can be linked to a controller manually, using Garibaldi Pro, or
during the Echoflex pre-commissioning process.
Remote Linking Solution
Use the following method to link the first switch if you cannot access the
[Learn] button on a controller that has not been pre-commissioned and
you do not have Garibaldi Pro software.
This method only works if there are no switches linked to the controller.
You cannot link a scene station using this method.
1. Ensure you are within wireless range of the controller and have a
wireless paddle switch.
a. If the controller has a linked sensor, you must press the [Teach]
button on the sensor and complete step 2 within 60 seconds.
2. Click the switch paddle ON three times, OFF three times, and ON
three times quickly, for a total of nine consecutive clicks. The relay
will toggle and the Power LED will indicate the switch is linked.
Clear Button
The [Clear] button can be used to reset the controller either to its pre-
commissioned state or to its factory default state.
To reset to pre-commissioned state:
1. Press and hold the [Clear] button until the red Power and green Learn
LEDs start blinking.
2. Release the [Clear] button. The Power LED blink codes indicate the
type and count of devices linked at pre-commissioning.
To reset to factory default state:
1. Press and hold the [Clear] button until the red Power and green Learn
LEDs start blinking, and continue to hold for 15 seconds until the
LEDs stay on solid.
2. Release the [Clear] button. The Power LED displays solid red to
indicates factory default state.
LED Fixture Controller (120-277 VAC) Page 6 of 12 Echoflex