EasyManua.ls Logo

ETC Echoflex ELED1 - User Manual

ETC Echoflex ELED1
12 pages
Print Icon
To Next Page IconTo Next Page
Loading...
Echoflex Installation Guide
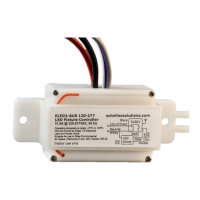
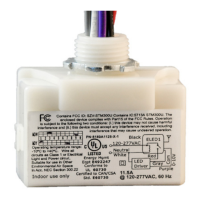
LED Fixture Controller (120-277 VAC) ELED1
Corporate Headquarters n Middleton, WI, USA | +1 608 831 4116
Web echoflexsolutions.com | Email info@echoflexsolutions.com | Support service@echoflexsolutions.com
©2022 Echoflex Solutions, Inc. Trademark and patent info:echoflexsolutions.com/ip
Product information and specifications subject to change.
Echoflex intends this document to be provided in its entirety.
8189M2100 Rev D Released 2022-08
Overview
The LED Fixture Controller (120-277 VAC) (ELED1) provides wireless
control of an individual fixture or single zone lighting based on
occupancy state, manual switch action, ambient light levels, and gateway
commands.
ELED1-DUN
ELED1-DUS
This document covers installation of all the ELED1 models. The
Echoflex
LED Fixture Controller ELED1(H) Configuration Guide
is available for
download at echoflexsolutions.com.
The product package includes the controller, installation guide, and
mounting strap (for ELED1-DUS model).
Prepare for Installation
To ensure optimal function, consider the installation environment and the
following guidelines:
Avoid spaces with high density construction materials and large
metal appliances or fixtures as they may disrupt wireless reception.
For optimal performance, switches and sensors should be installed
within a 24 m (80 ft) unobstructed view of the controller. Consider
adding a repeater to extend the wireless signal, if required.
Mount the controller to an electrical junction box (preferably non-
metallic) or a panel in a location and at a height where it is not
subject to tampering by unauthorized personnel.
Make sure the antenna wire is unrestricted and not in contact with
any metal surface.
Question and Answer IconNeed help?

Do you have a question about the ETC Echoflex ELED1 and is the answer not in the manual?

Summary

Overview

Prepare for Installation

Important Safeguards

Installation Procedure

Install ELED1 with Nipple

Mount the controller to the exterior of a junction box or panel using the nipple attachment.

Install ELED1 with Mounting Strap

Mount the controller to a lighting fixture or appliance using the supplied mounting strap.

Wiring Diagram

Electrical Terminations

User Interface Overview

Device Linking Procedures

Learn Button Linking

Describes how to use the Learn button for linking Echoflex devices to the controller.

Remote Linking Method

Alternative method for linking switches when pre-commissioning is absent.

Clear Button Operations

Procedure to reset the controller to pre-commissioned or factory default states.

Blink Indications

Test the Controller

Compliance Information

ETC Echoflex ELED1 Specifications

General IconGeneral
OutputPWM
Frequency50/60 Hz
Housing MaterialPlastic
Control ProtocolDMX512
Operating Temperature50 °C
Dimming Range100%

Related product manuals