EVAstream Electrical connections - PCB Settings EVAstream Electrical connections - PCB Settingswww.evaoptic.com22 23
Connect tablet to EVA Experience web app environment:
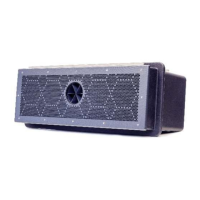
Go to your internet browser and enter the following address in the address bar:
http://evacontroller.local
You will see the following screen:
The pop-up provides instructions for creating an EVA shortcut icon on your tablet’s desktop
(for easy access to the EVA Experience web app environment in the future).
1. Click on the share icon to the right of the address bar.
2. Select Add to Home Screen.
3. Name the icon EVAstream and select Add.
4. The icon is now added to your tablet’s desktop.
Apple IOS
Android
5
Click on the EVA app icon you created in the previous step, or go to your internet browser and enter
the following address in the address bar:
http://evacontroller.local
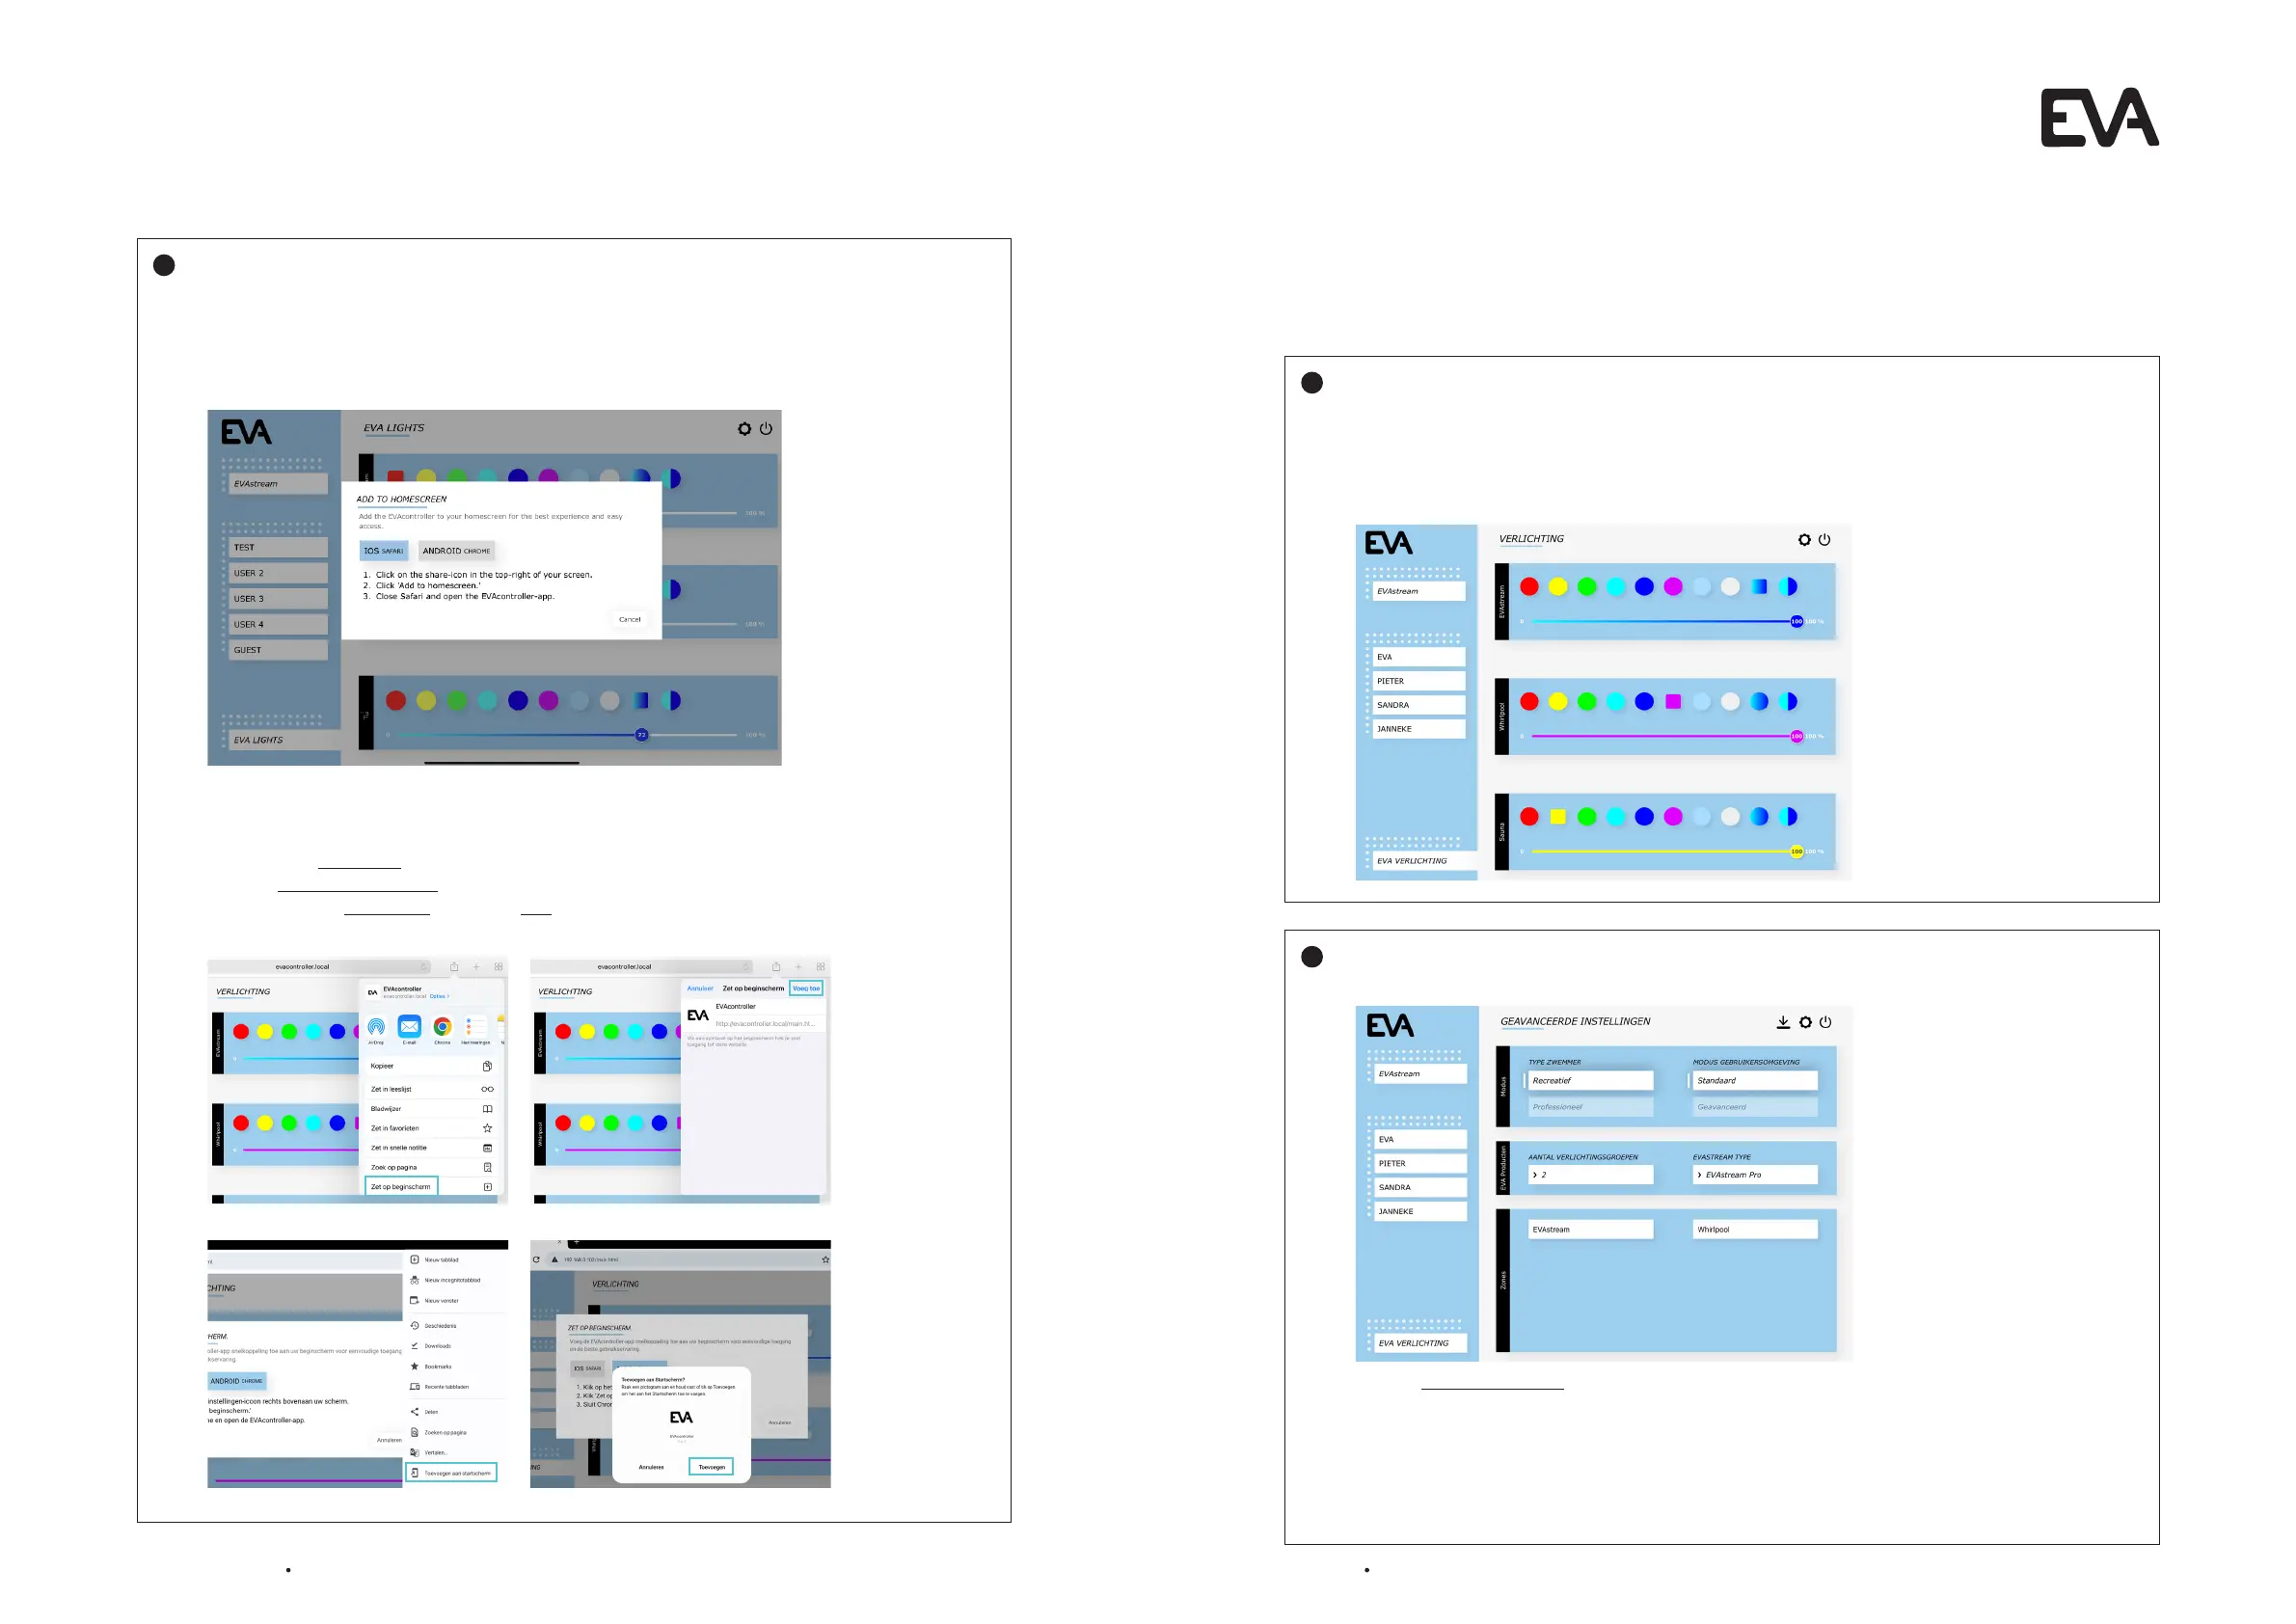
You will now see the home page of the EVA Experience web app environment:
Click twice on the gear icon at the top right of the screen to go to the advanced settings
for linked EVA products:
1. Select number of groups at lighting groups and give recognizable names al Zones (block below).
Only enter multiple zones when there are several light groups such as EVAstream Lamps, Jacuzzi
Lamps, etc. NB! The first group is always the lighting group linked to the EVAstream. The lighting in
this group automatically changes color during training.
4. Select the correct EVAstream type at EVAstream type.
1
2
6.6 Settings for first use
Before using the EVA Experience web app environment for the first time, it is advisable to enter a
number of settings: