Step 4:
- Bring the charger near to its final location in accordance with the transport safety notes
"Transportation" (See chapter 2)
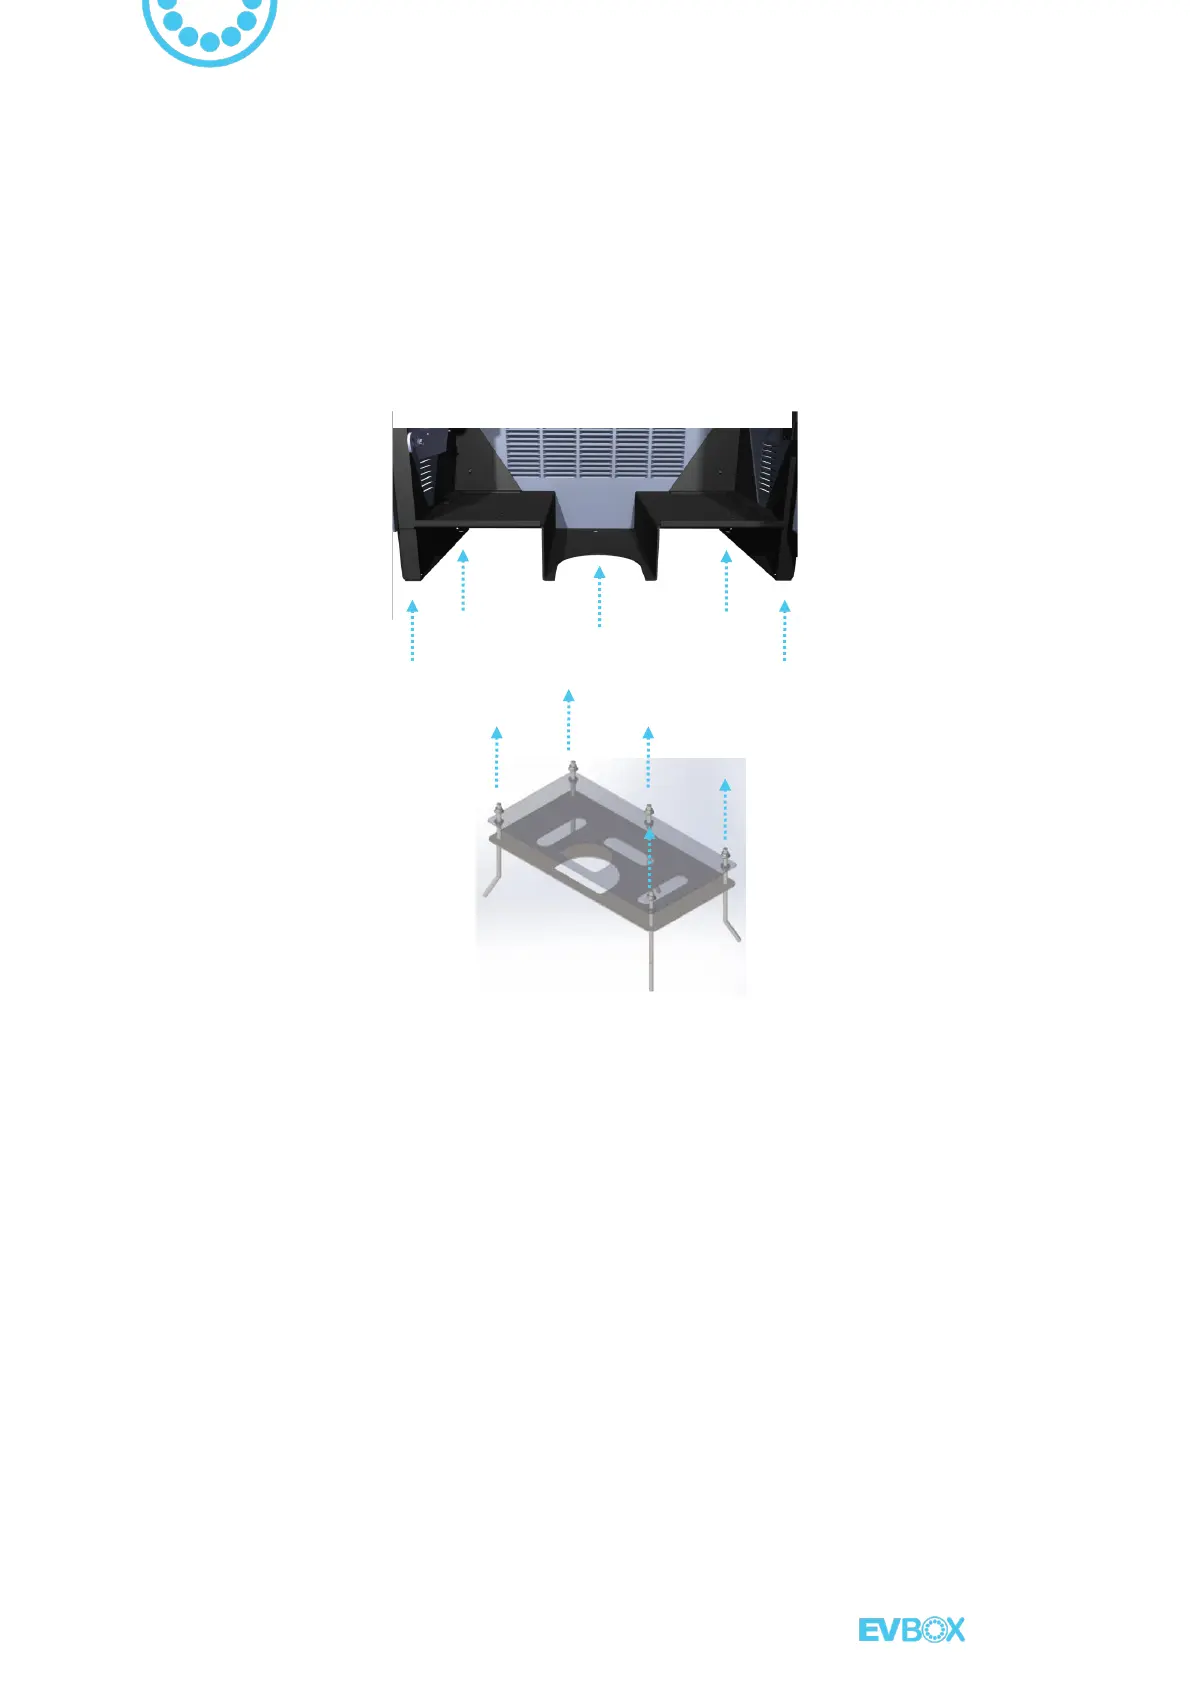
Step 5:
- Remove the M12 nuts from the upper metal sheet and Install the charger over the 5 threaded
rods
which come out of the ground, it must pass through the 5 holes of the chassis, green
arrows as shown bellow:
Chassis fastening holes to the ground