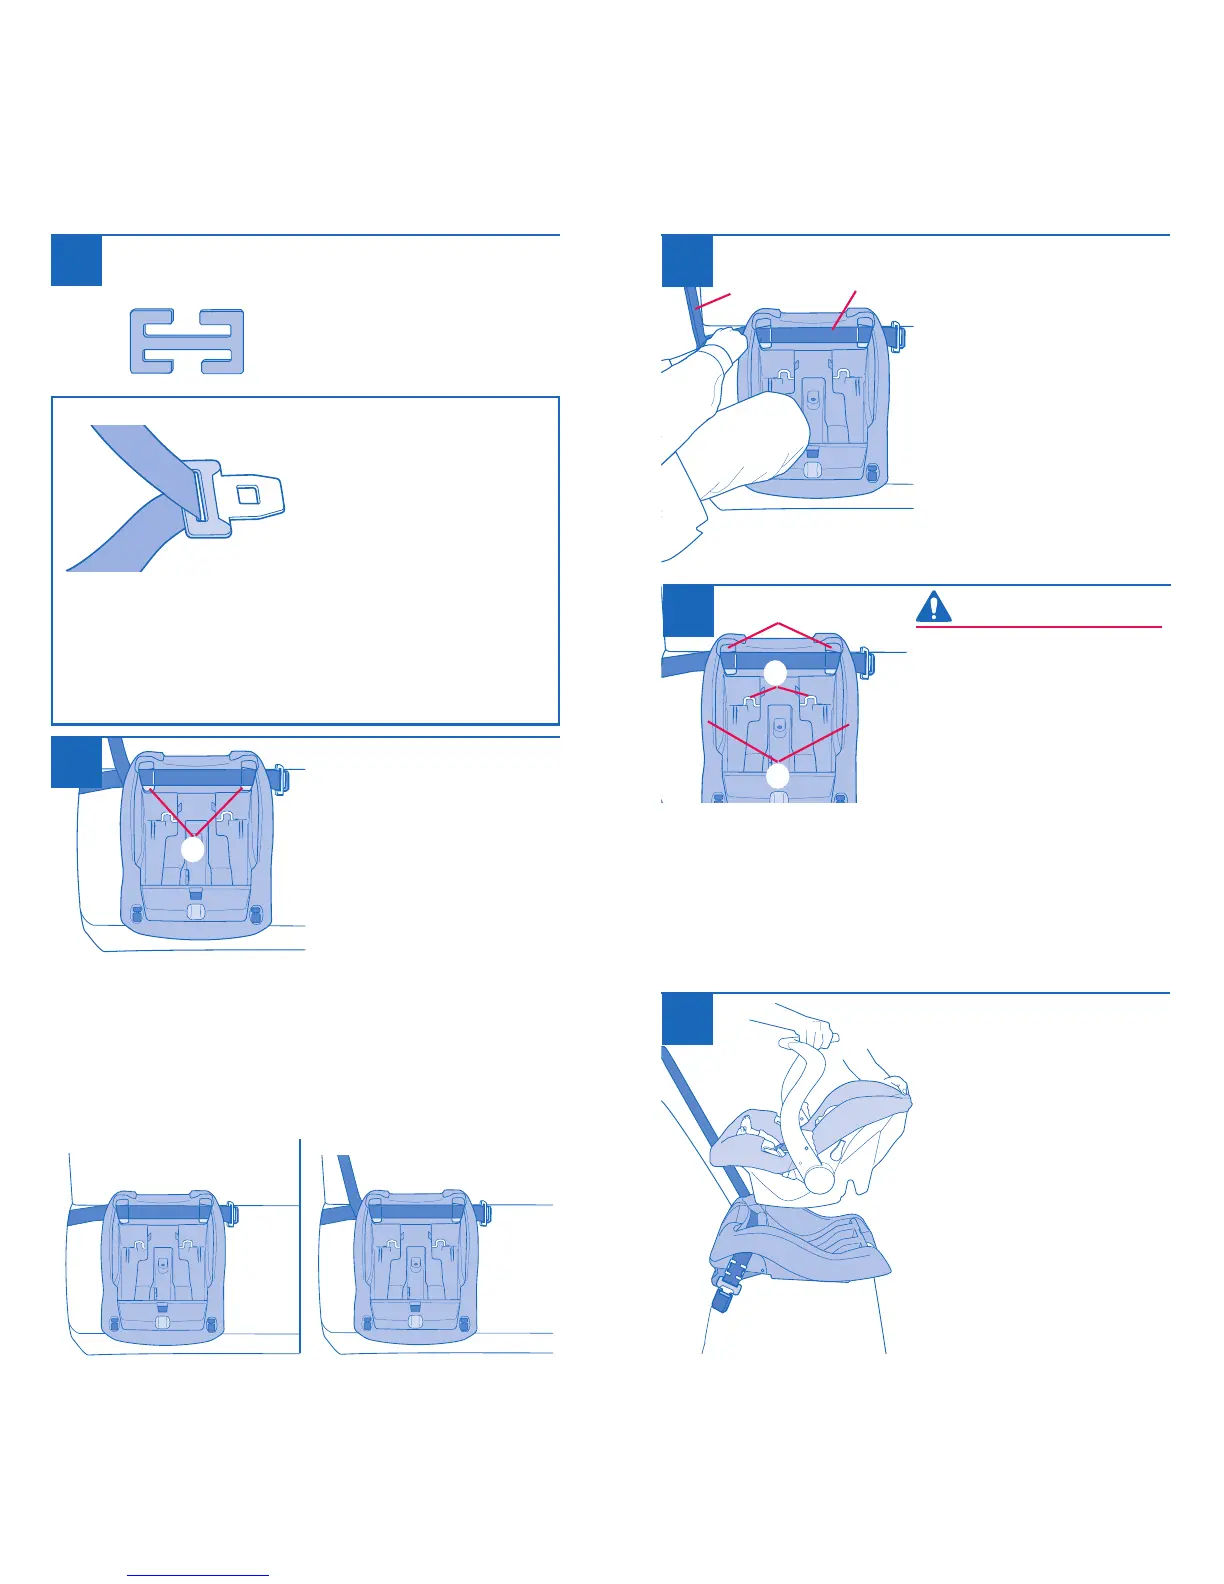
Secure the carrier to the
base by placing it into
the base and pressing
down on the front and
back.
The carrier MUST be
locked firmly into the
base. Check by lifting
up on the carrier handle.
6
➚
22
23
➚
Note: In vehicles with a lap and shoulder belt, a free
sliding buckle tongue, you must install with the
locking clip, unless your vehicle owner’s manual
states otherwise. Refer to “Using the Locking Clip” on
page 40. Refer to the vehicle owner’s manual to
determine which type of belt retractor is in the
vehicle.
LAP BELT
LAP AND
SHOULDER BELT
Pull the shoulder
belt tightly to remove
all slack from the lap
portion of the belt ,
at the same time push
down on the base using
your full weight. Check
to be sure the base is
secured in the vehicle
seat.
Make sure the lap belt is
tight. Grab the base at the
areas
, as shown. If you
can move the base more
than 25 mm (1 inch)
forward or side-to-side
the lap belt is not tight
enough. You will need to try again, or find another loca-
tion for your
convenience
base.
IMPORTANT
Route any excess lap belt through the openings , on the
sides of the base, so it does not interfere with the metal
carrier retainers when attaching the carrier.
4
5
WARNING
Secure the base to your
vehicle seat by routing
the vehicle seat belt
through the openings
on the sides of the base.
3
Lap/shoulder seat belt
combination that has a
buckle tongue that slides
freely along the belt
without locking into place
and is equipped with
an emergency locking
retractor (ELR).
Locking
Clip
Check your vehicle seat belt type.
If you have this type of seat
belt (below) in your vehicle,
you
MUST
install the carrier
using the locking clip (p. 40).
2
Some ELR vehicle belts can be switched so that they
lock when tightened.
Consult your vehicle owner’s manual before
installing the locking clip.