INSTALLING or REMOVING a BLADE
WARNING:
Only carry out this operation with the machine
disconnected from the mains supply.
WARNING: Only use genuine Evolution blades or those
blades specifically recommended by Evolution Power Tools and
which are designed for this machine.
Ensure that the maximum speed of the blade is higher than the
speed of the motor.
Note: It is recommended that the operator considers wearing
protective gloves when handling the blade during installation
or when changing the blade.
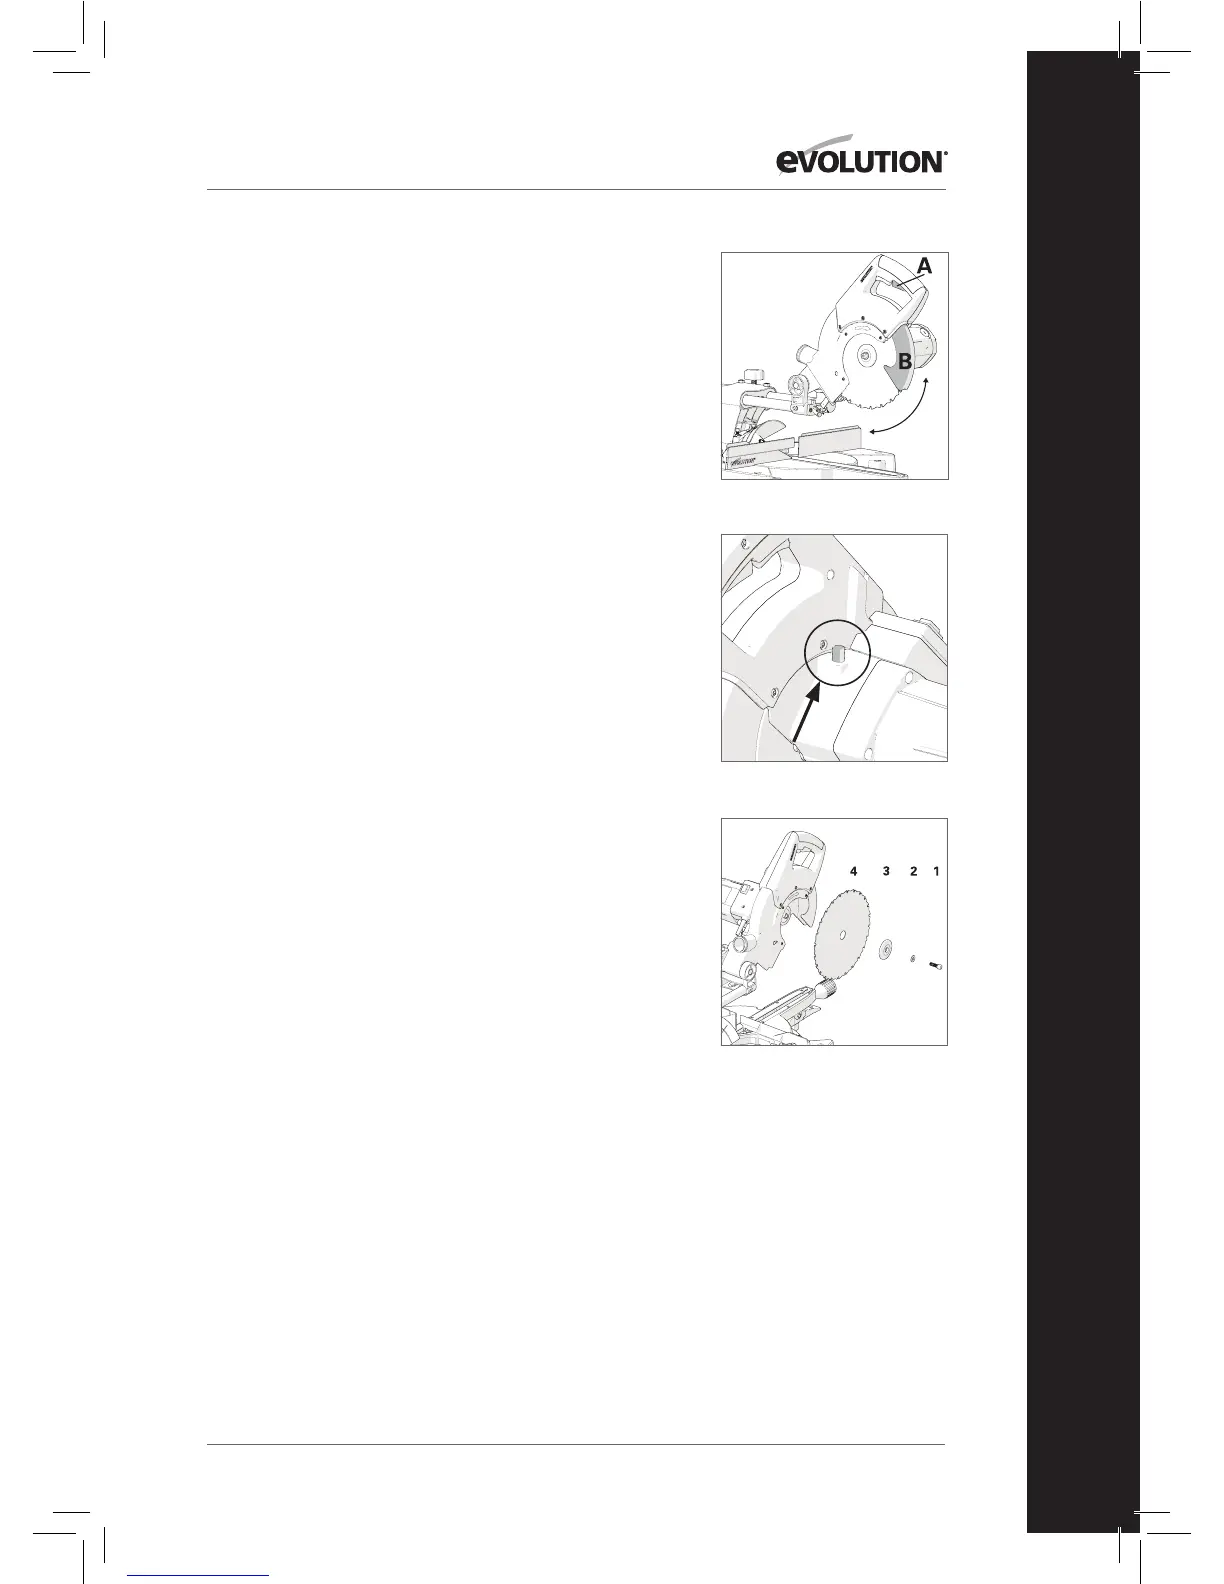
• EnsuretheCuttingHeadisinitsupperposition.
• Pressthelowerbladeguardlockingtrigger(38a) and rotate
the lower blade guard (38b) up and into the upper blade
guard. (Fig. 38c).
• Presstheblackarborlockbuttontolockthearbor.(Fig. 39)
• UsingthesuppliedHexKey,releasethearborscrewand
remove the washer and outer blade flange and the blade
from the arbor. (Fig. 40)
Note: The arbor screw has a LH thread. Turn clockwise to
loosen. Turn counterclockwise to tighten.
• Ensurethatthebladeandbladeflangesarecleanandfree
from any contamination
• Theinnerbladeflangeshouldbeleftinplace,butifitis
removed for cleaning it must be replaced the same way
round as it was removed from the machine.
• Installthenewblade.Makesuretherotationarrowontheblade
matches the clockwise rotation arrow on the upper guard.
Note: The blade teeth should always point downward at the
front of the saw.
• Installtheouterbladeflange,washerandarborscrew.
• Lockthearborandtightenthearborscrewusingmoderate
force, but do not overtighten.
• EnsuretheHexKeyisremovedandthearborlockhas
released before operating.
• Ensurethebladeguardisfullyfunctionalbeforeusing
the machine.
Note: Blade Bore Reducing Inserts should only be used in
accordance with the manufacturers instructions.
Fig. 39
Fig. 40
Fig. 38
C
33
www.evolutionpowertools.com
EN