Maintenance
CheckingtheTirePressureinDriveSystem
Maintenance.
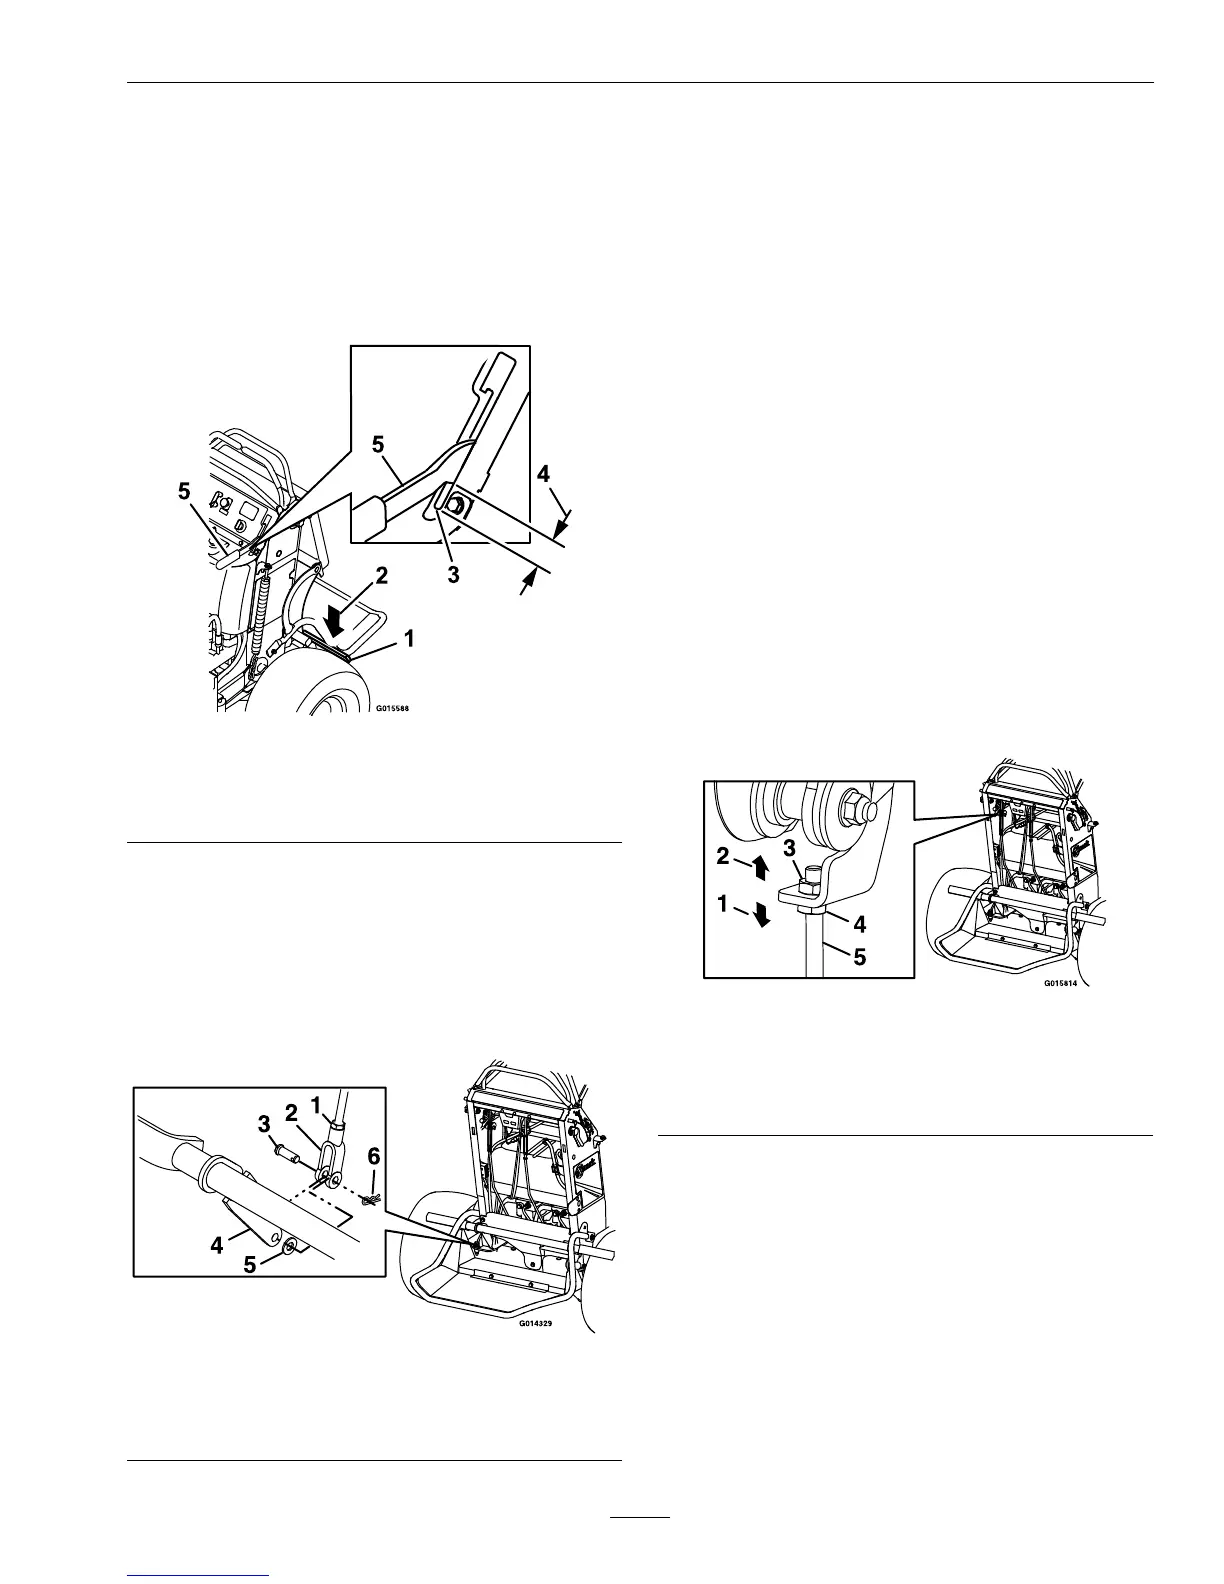
4.Disengagetheparkbrake.
5.Pushdownonthebrakebaruntilittouches
thetires.Therewillbea3/4inch(19mm)gap
betweentheparkbrakehandleandtheslotinthe
controlpanel(see
Figure28).
Figure28
1.Brakebar
4.3/4inch(19mm)
2.Pushdown5.Parkbrakehandle
3.Slot
6.Therearetwomethodstoadjusttheparkbrake;
oneorbothmethodsmaybeused.
A.Adjustingthelowerbrakelever:
a.Removethehairpin,washer,andclevispin
fromthelowerbrakeleverandyokeas
shownin
Figure29.
Figure29
1.Jamnut4.Lowerbrakelever
2.Yoke5.Washer
3.Clevispin
6.Hairpin
b.Loosenthejamnut.
c.Rotatetheyoke.Totightenthebrake,
rotatetheyokeup.Toloosenthebrake,
rotatetheyokedown.
d.Securetheyoketolowerbrakeleverwith
thehairpin,washer,andclevispin.
e.Tightenthejamnut.
f.Checkthebrakeoperationagain.
B.Adjustingtheupperbrakelinkage:
a.Loosenthetopjamnut.
b.Totightenthebrake,turnthebottom
jamnutclockwise(asviewedfromthe
top)thenturnthetopjamnut.Move
thelinkageupwardtoachievethedesired
setting.
c.Toloosenthebrake,turnthetopjam
nutcounterclockwise(asviewedfrom
thetop)thenturnthebottomnut
counterclockwise.Movethelinkage
downwardtoachievethedesiredsetting.
Figure30
1.Movedowntoloosen
brake
4.Bottomjamnut
2.Moveuptotightenbrake5.Linkage
3.T opjamnut
d.Tightenthejamnuts.
e.Checkthebrakeoperationagain.
7.Afterthebrakeisadjusted,theleverswitchneeds
tobechecked.
8.Checkthegapbetweenthebrakeleverandthe
switchasshownin
Figure29.Thegapneedsto
bean1/8inch(3mm)withthebrakeengaged.
39