3.5 DESCRIPTION OF COMPONENTS
3.5.1 KEY SWITCH
After switching on the power supply with the wip-switch (7), the projector can be activated. To activate
the device, only short impulse via the key switch is needed. It can be turned off after activation. The
Wave Flamer will remain switched on regardless.
This has an important function during a show in case of a power outage. If the key switch is in the ON
position, the device will start up automatically after losing power. If it is switched off however, the
device will remain powered off too after getting the power back.
3.5.2 DISPLAY AND USAGE BUTTONS
Via the display and the usage buttons, the most important values of the Wave Flamer can be seen,
and the menu be navigated through. Outside of the Menu, some buttons have special functions.
Usage buttons of the X2 Wave Flamers
Outside the menu, this button is used to access the menu.
Inside the menu, this button is used to confirm.
If held during startup of the Wave Flamer: Wave Flamer will start in radio mode.
Outside the menu this button is used to de-pump. If the device is armed, it will be
switched into test mode too.
Inside the menu this button functions as a minus button.
Outside the menu you can use this button toggle the background light on and off.
Inside the menu it can be used as a plus button.
Outside the menu this button can be used to send a test signal to the transmitter, to
check radio connection (only in test mode).
Inside the menu can be used as an escape button.
If held during startup: Wave Flamer starts in DMX-Mode.
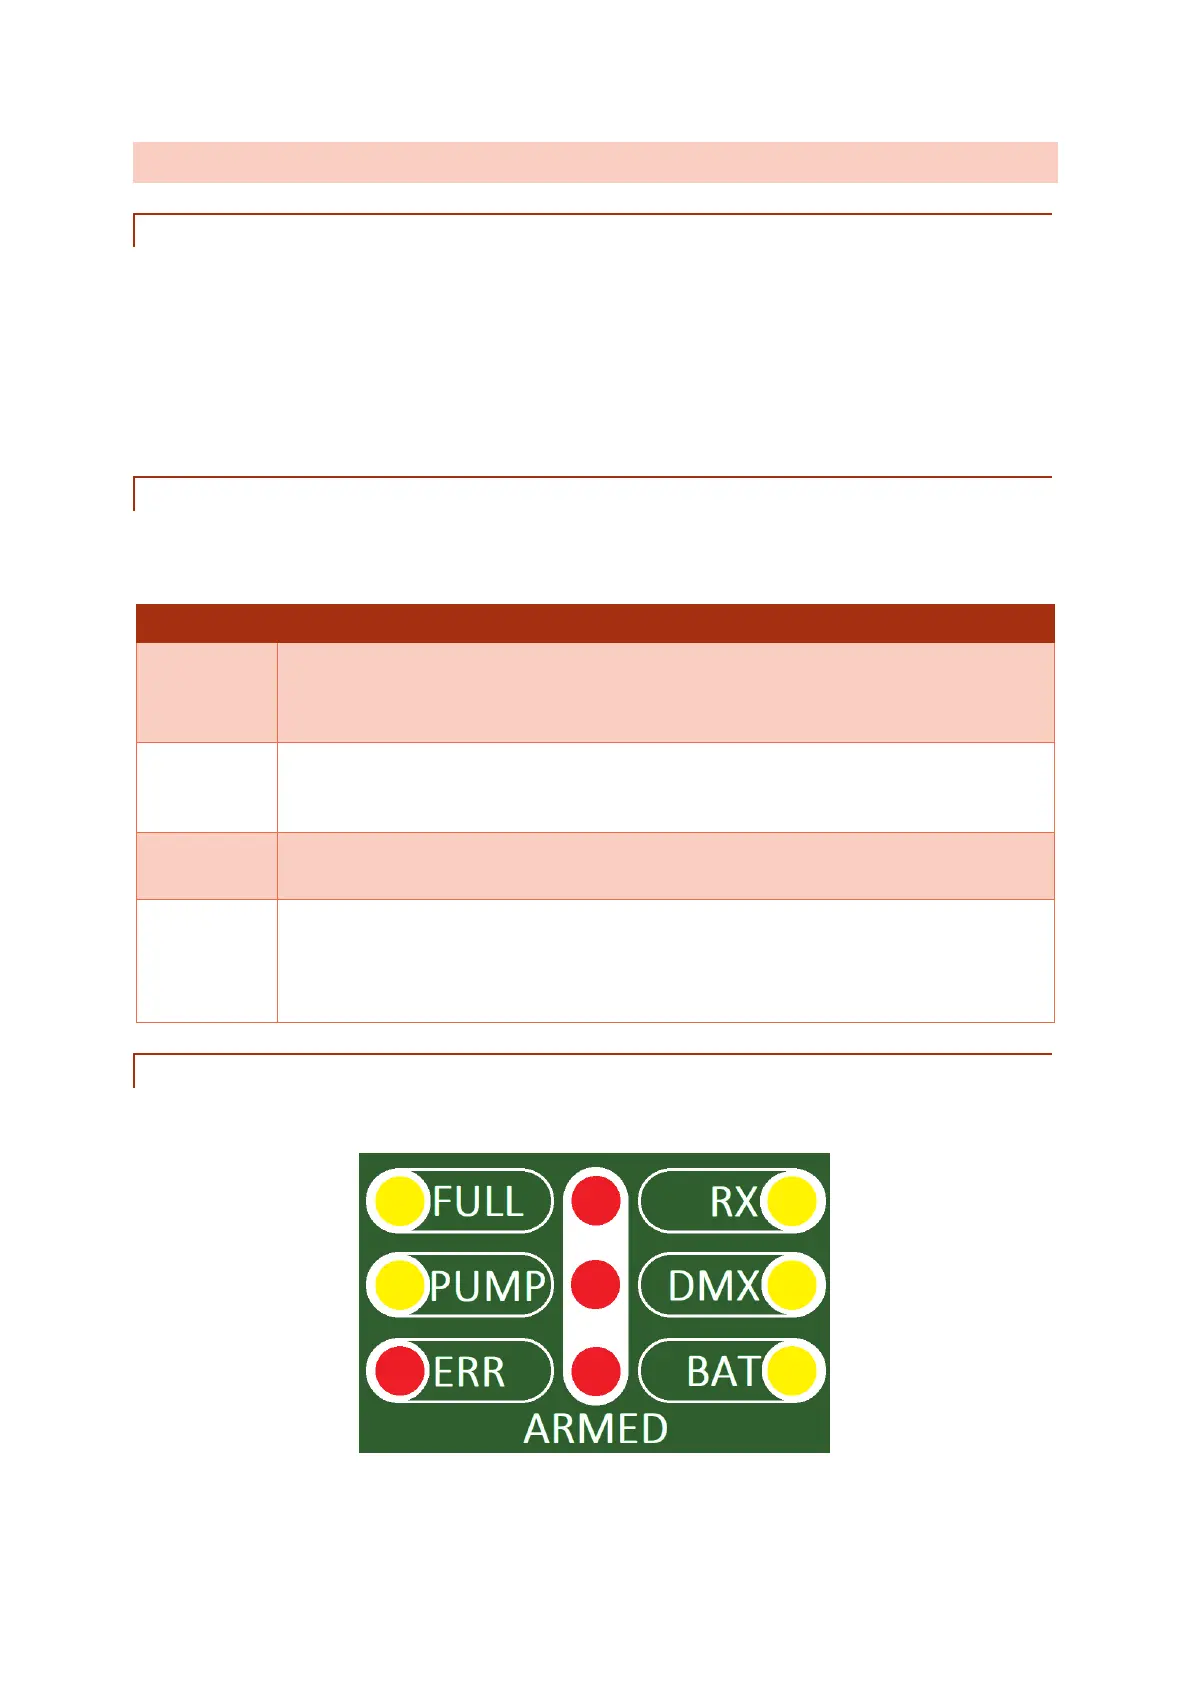
3.5.3 STATUS-LEDS
Via the Status LEDs, different states of the Wave Flamer can be checked.