MAX300-RTG : Hardware Manual Hardware Maintenance
72
Quadrupole Reassembly and Vacuum Chamber Installation
Required Tools
(1) 5/64 inch Hex Wrench
(1) Pair Lint Free or Nylon Gloves
(1) New 3-3/8" Copper Gasket
(1) New 4-1/2" Copper Gasket
(1) 1/4 inch Hex Key
(1) 1/8 inch Flat Blade Screwdriver
With the quadrupole cleaned, the collar shield assembly will be re-attached and
the quad installed into the vacuum system. An ohmmeter will verify that nothing is
shorted to ground before the system is pumped back down.
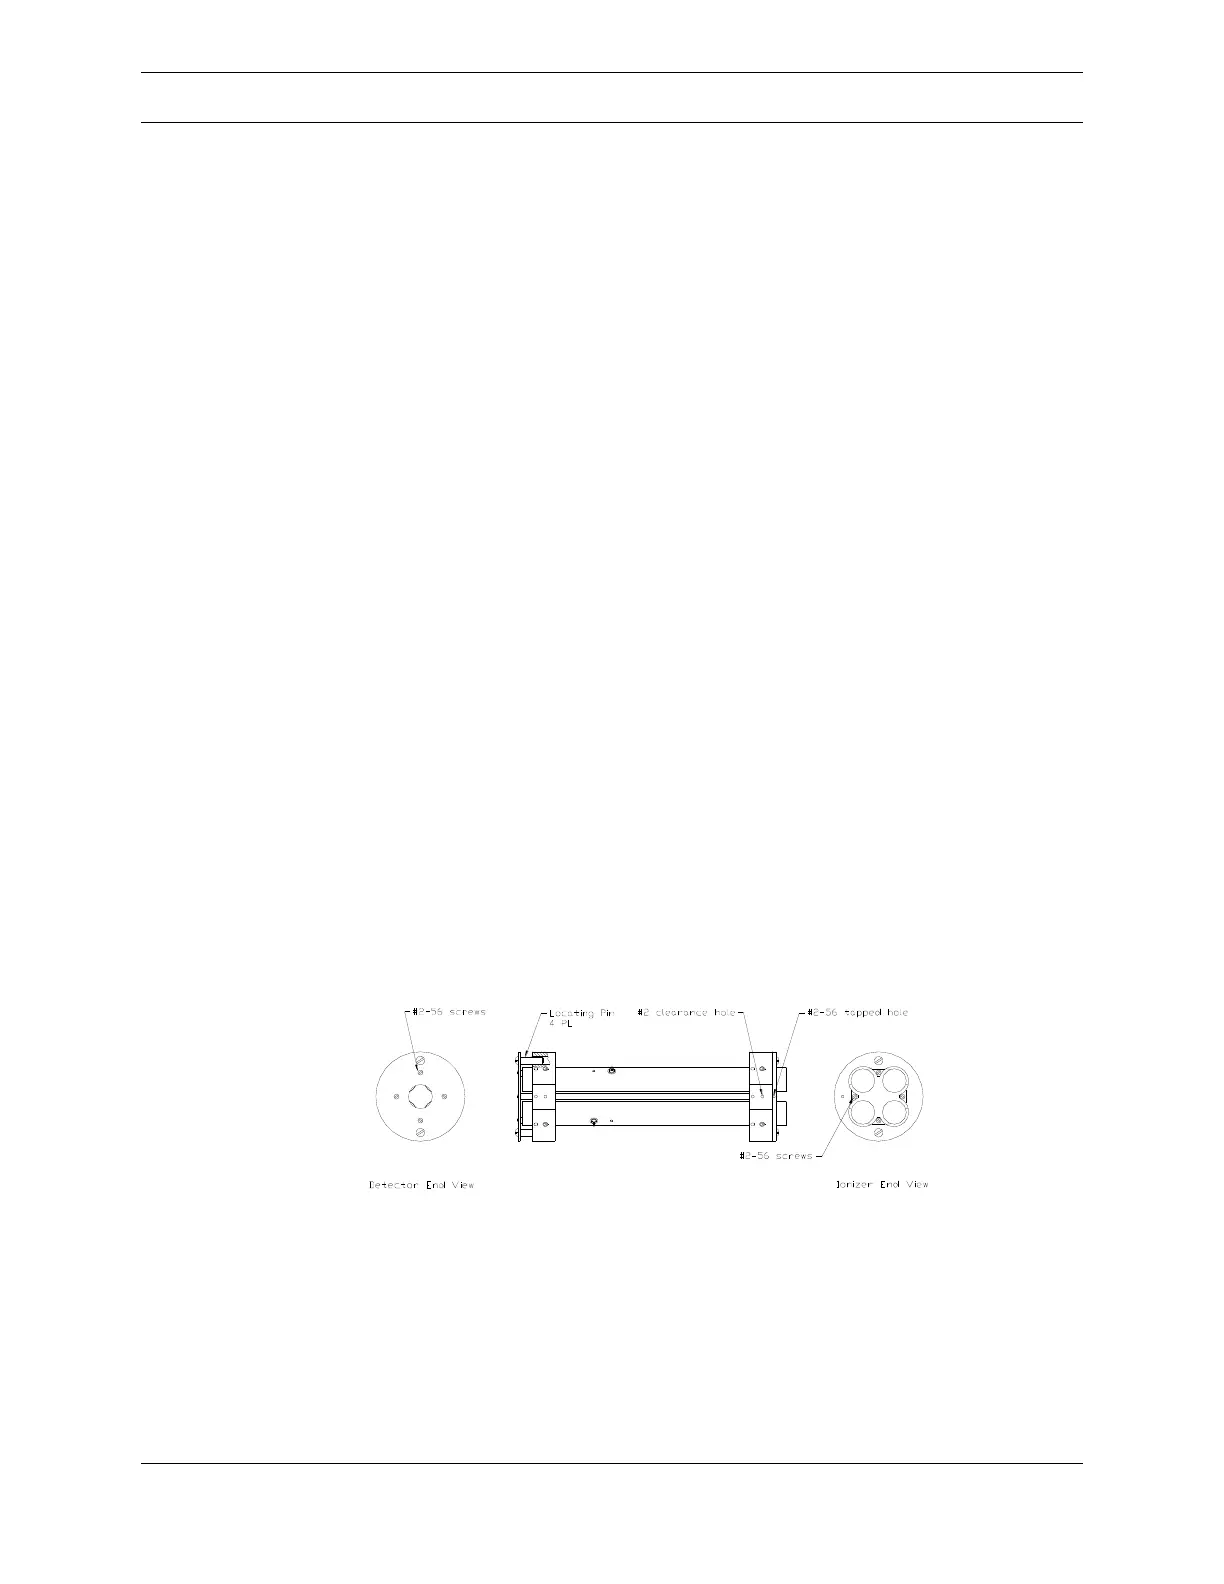
To re-attach the collar shield assembly, slide the detector end plate with the rods
attached into the quadrupole from the detector end. The locating pins must fit into
the holes of the ceramic mounting collars as shown in Figure 46 below.
Use the four 2-56 pan head screws to attach the ionizer end plate to the free ends
of the shield rods at the ionizer end of the quad. Be sure to orient this plate
properly. The recessed area faces outward and the threaded hole in the edge is
aligned with the pair of holes in one of the corners of the ceramic collar.
Figure 46: Locating Pins of Quadrupole
When this is completed, the quadrupole assembly can be inserted into the vacuum
chamber. Be sure the ionizer end will face the ionizer and the detector end will face
the end nearest wires connecting opposite poles. Also, rotate the quad assembly
so the threaded hole in the edge of the ionizer end plate is on top.