MAX300-RTG : Hardware Manual Hardware Maintenance
75
Instruments equipped with the optional electron multiplier detector will require
replacement of this component after the required gain can no longer be achieved.
When this occurs, the vacuum system must first be vented. After venting,
disconnect the inlet line from the enclosure wall and release the slide latch on the
left slide of the VacTrac assembly and extend the VacTrac out of the enclosure.
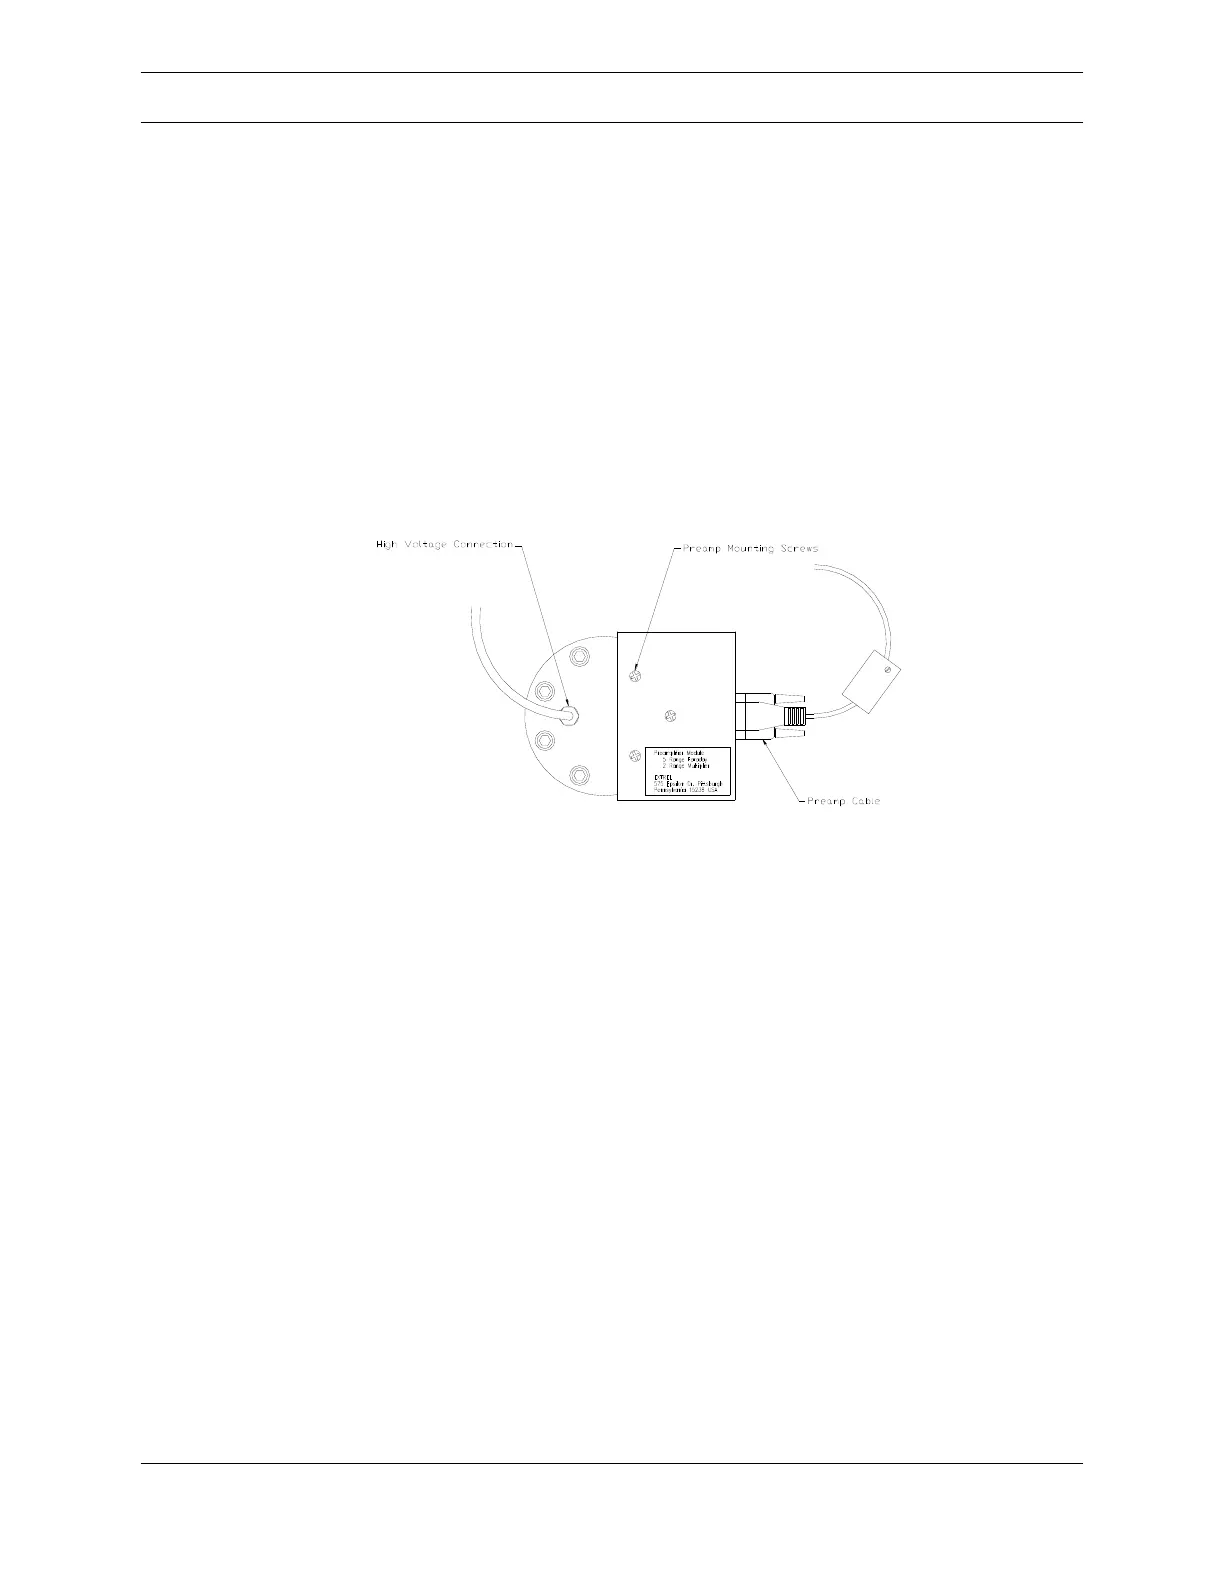
Remove the connection cables on the detector flange (the multiplier HV cable and
the preamp cable). The preamp assembly is detached using the Phillips
screwdriver to remove the two preamp securing screws. Figure 49, below, shows
the preamp assembly.
Figure 49: Preamp Assembly
The detector mounting flange can be detached from the vacuum chamber by
removing the securing socket head screws using a 1/4inch hex key. Discard the
old copper gasket.
Note: Care must be taken when removing this flange to not damage the detector
assembly as the securing screws are removed. Support the flange as the last
screw is taken out and pull the assembly straight back from the vacuum chamber.
The replacement multiplier (P/N 810670) is a completely assembled multiplier with
all the wires attached and the extended faraday plate installed. Remove the old
detector assembly and install the new one on the flange. Place the detector
mounting flange onto a clean level working surface to begin the replacement
procedure.