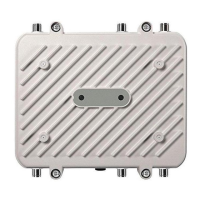
Hardware Mounting and Installation
AP-7562 Installation Guide 33
1 With the open slot connections facing down, attach the angle adjust bracket at the
desired mounting location using four #10/32 lag bolts.
2 Using a torque wrench or a ratchet and a 10mm sock
et, or an adjustable wrench, attach
(but don’t tighten) the Access Point bracket to the AP-7562 with four M6 hex flange
screws and insert two M6 hex flange screws into the bottom holes on the sides of the
Access Point bracket.
3 With the Access Point positioned so the gore vent is facing down, insert the two M6 hex
flange screws in the bottom holes on the sides of the Access Point bracket into the open
slot connections on the bottom of the angle adapter bracket. Rotate the Access Point
bracket upward and align the top holes on the sides with the top holes on the angle
NOTE
The lag bolts are not included in the mounting bracket kit.
 Loading...