PRODUCT GUIDE: EYEDRO ELECTRICITY MONITORING PRODUCTS
©2011-2023 Eyedro Green Solutions Inc. Page | 18
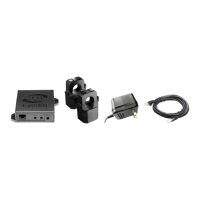
MOUNT EYEDRO DEVICE(S)
MATERIALS YOU WILL NEED
• Two (2) #8 (4.2mm) pan head or round head mounting screws (optional – not included)
• Double-sided tape (optional – not included)
TOOLS YOU WILL NEED
• Screwdriver
PROCEDURE (VERTICAL MOUNT)
1. Write down the 8-digit serial number from the back of the module. This will be required during
software setup.
The serial number will be in the format "123 - 45678"
2. Find a clear area on the wall beside the electrical panel (or router in the case this is the Eyedro
Wireless Gateway Module).
Make sure all cables will easily reach the module before securing.
Equipment shall not be mounted within 50.8 mm (2 in) in of any live parts including primary
conductors, primary terminals, primary lugs. This requirement excludes insulated cables.
Equipment attached to the enclosure shall not contact the panel interior insulation.
Mounting provisions shall not be attached to any live part.
Do not install equipment in any area where breaker arc venting exhaust gasses could be re-
directed as a result of equipment installation.
3. Secure the module using either:
a) Screws (recommended method)
i. Drive two (2) screws into the wall surface through the flange holes on the sides of
the enclosure.
ii. Carefully tighten the screws until snug. Do not overtighten or it may cause
damage to the flange(s).
iii. Ensure secure fit.
b) Double-sided tape
i. Cut several pieces of double-sided tape and place on back of module.
ii. Peel tape backing off.
iii. Press module carefully but firmly against surface to be mounted on.
iv. Hold in place as per tape instructions.
v. Ensure module is held securely in place.