PRODUCT GUIDE: EYEDRO ELECTRICITY MONITORING PRODUCTS
©2011-2023 Eyedro Green Solutions Inc. Page | 23
PROVISIONING EYEDRO WI-FI
MATERIALS YOU WILL NEED
• None
TOOLS YOU WILL NEED
• Phone, tablet, or computer (to connect to the device’s network)
PROCEDURE (WI-FI DEVICES ONLY)
1. Using a phone, tablet, or computer, disconnect from your current Wi-Fi network.
It may be necessary to explicitly deselect ‘auto-connect’. Failing to do so may cause the
provisioning device to switch back to its original network during provisioning.
If your device has an alternate path to the internet (i.e., cellular), it may be necessary to
disable that network connection during provisioning (i.e., turn off cellular).
It may be necessary to temporarily disable your virus scanner during provisioning.
2. Using the same phone/tablet/computer, search for available Wi-Fi networks and connect to the
Wi-Fi network created by your Eyedro device.
The name of the created network will be “Eyedro[xxx-yyyyy]” where xxx-yyyyy matches
the serial number of the device.
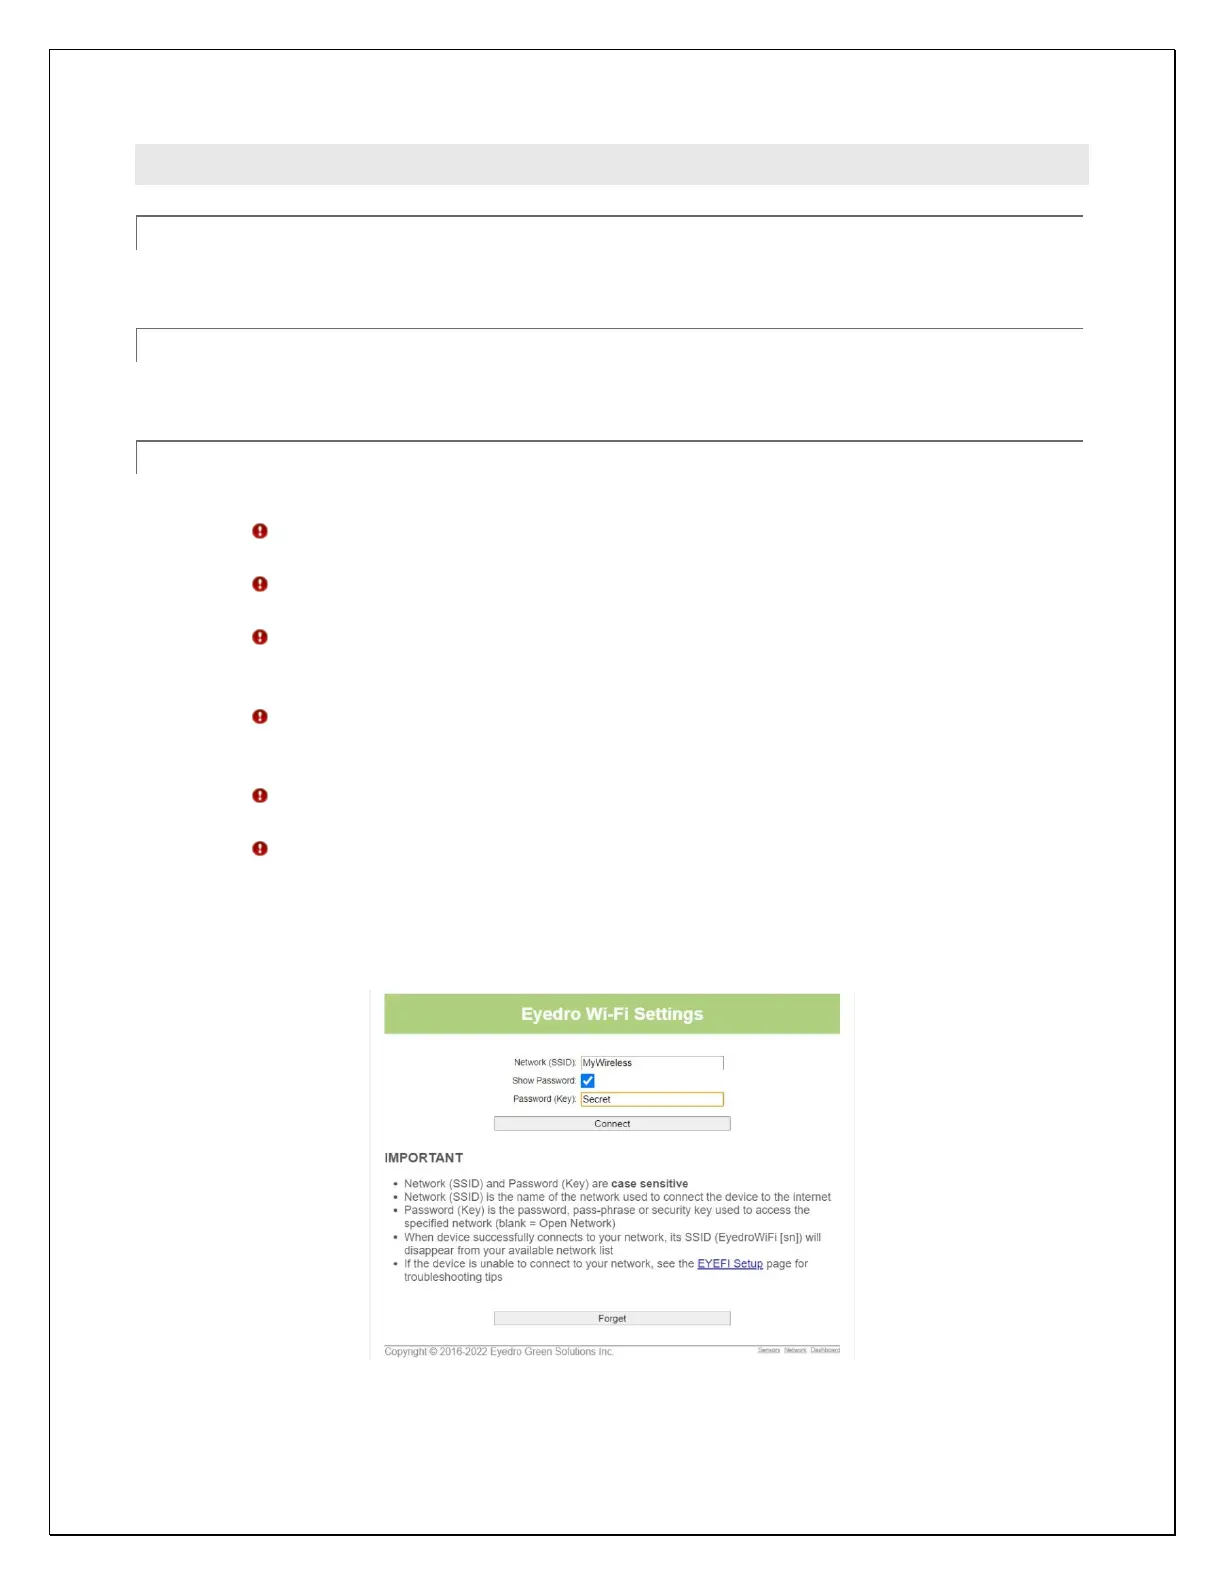
3. Open a browser and go to eyedro.com/setup.
If not automatically redirected to the setup page, it may be necessary to enter
192.168.1.1 in the browser URL.
On some mobile devices, you may get a message indicating ‘Sign in’. Click sign in and
you should be redirected to the setup page. If not, refresh the page and/or open a
browser and browse to eyedro.com/setup or 192.168.1.1.
4. Input the Wi-Fi credentials (Network SSID and Password) for the network you would like the
device to connect to in the appropriate fields and click Connect.
5. Reconnect your phone, tablet, or computer to your original Wi-Fi network. Don’t forget to re-
enable your cellular connection and/or virus scanner if you turned them off during provisioning.