Page 53 of 72
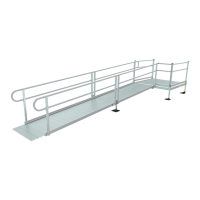
5.7.11. Measure the gap between the long leg of the closure brackets and cut the 1-1/2” x 2”
curb to the measured gap length less 1/8” to account for the threaded inserts which will
be installed after cutting (FIG. 5.23).
5.7.12. Install 5/16”-18 round threaded inserts into both ends of the cut curb. Use a rubber
mallet or similar tool to fully seat the threaded inserts (FIG. 5.23).
5.7.13. Using a metal file, smooth all sharp edges from cutting the curb.
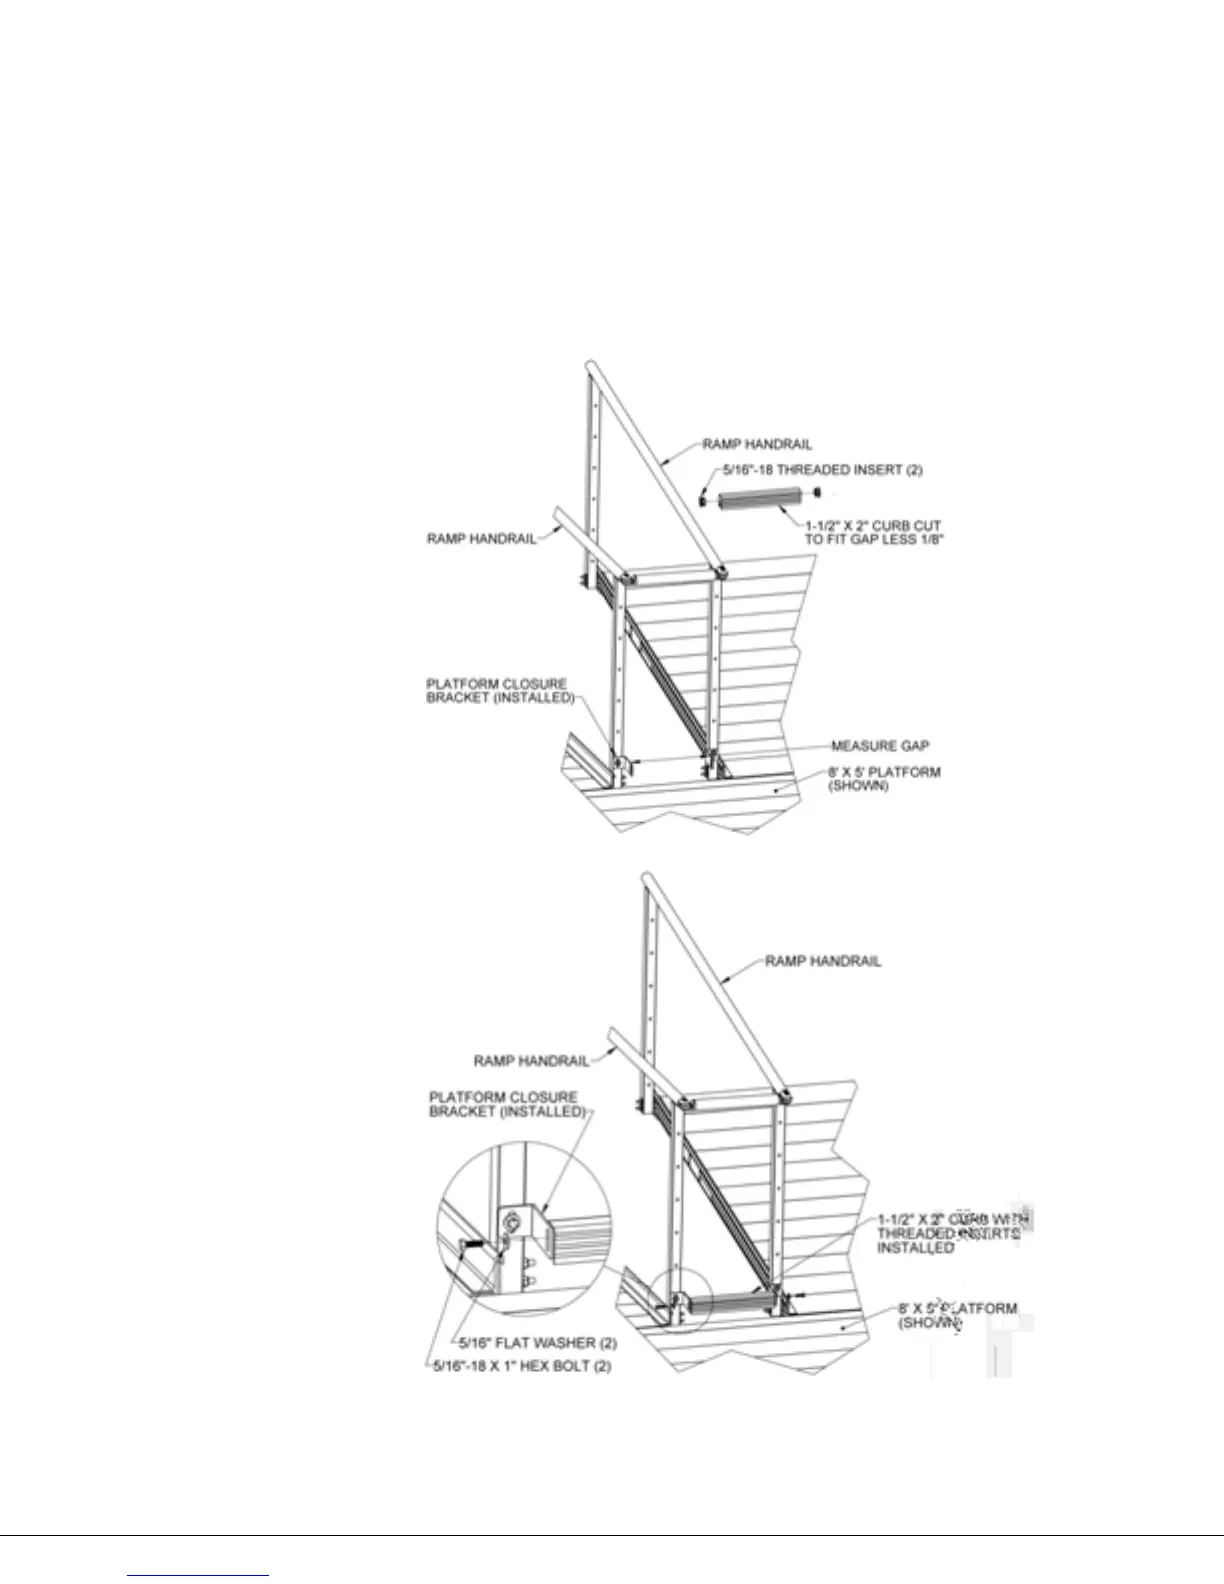
5.7.14. Align the top of the curb with the top of the closure brackets then install 5/16″-18 x 1″
hex bolts through 5/16” flat washers and through the slot in the long leg of the closure
bracket into the threaded insert installed in the previous step then tighten all fasteners
securely (FIG. 5.24).
FIG. 5.23
FIG. 5.24