B680H 5 732719 - Rev.D
Translation of the original instructions
ENGLISH
B680H AUTOMATED SYSTEM
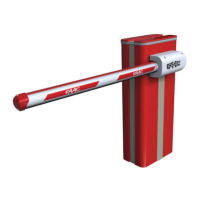
The automated system consists of a white aluminium beam with
reflectors, optional signalling lights, a covering compartment and steel
upright profile. Inside the compartment there is an operator consisting
of the upright profile with a hydraulic unit and two plunging pistons
fixed to it, which, by means of a rocker arm, rotate the beam. The latter
remains balanced thanks to a balance spring fitted on one of the two
plunging pistons. The electronic control equipment is also housed on
the upright, inside a compartment, and the whole is protected by the
external covering compartment.
The system features an adjustable electronic anti-crushing safety,
a device that guarantees stopping and locking of the beam in
any position, and a convenient manual release for use in case of
black-out or inefficiency.
1. TECHNICAL SPECIFICATIONS
1.1 Summary table
Power supply (V ~ / Hz) 100-240 V ~ / 50-60Hz
Electric Motor 36Vdc Brushless
Absorbed power (W) 240
Absorbed current (A) 1,1A at 230 V ~
Motor rotation speed (RPM) 1000-6000
Pump capacity 3,2 l/min (max)
Yielded torque (Nm) 0-370
Oil type FAAC HP OIL
Oil quantity (L) ~ 1,2
Anti-crushing System Electronic with absolute encoder
Deceleration type Electronic with absolute encoder
Operating ambient temperature (°C) -20 / +55
Rated Operating Time (ROT) Continuous Duty at +55°C
Compartment protection treatment EP SL LF PRIMER
Beam type Rounded with lights and rubber bumper
Protection Class IP56
Compartment Dimensions
(LxHxP) (mm)
See illustration Fig. 8
Weight (body + compartment) (kg) 65 + 20 / 85 (total)
Opening and closing time (s),
including deceleration
1.5 - 2 m beam
6 opening / 9 closing - 8 m beam
햲
Built-in fl ashing lamp
햳
Electronic control equipment
햴
Oil fi lling cap
햵
Right piston bleeder screw
햶
Hydraulic unit
햷
Right plunging piston
햸
Unit cooling fan
햹
Right feed tube
햺
Left feed tube
햻
Release lock
햽
Left plunging piston
햾
Left piston bleeder screw
햿
Covering compartment
헀
Encoder
헁
Box connecting the main power supply
헂
Switching power supply
햲
Bearing structure
햳
Mechanical stops
햴
Rocker arm
햵
Drive shaft
햶
Securing plate
햷
Spring guide
햸
Balance spring
햹
Preload adjustment ring nut
1.2 Key Fig.5
1.3 Key Fig.6
2. ELECTRICAL PREPARATIONS (standard system)
See details in the illustration Fig. 7.
3. BARRIER DIMENSIONS
All the dimensions contained in this manual are expressed
in mm
For barrier dimensions, refer to Fig. 8. The covering compartment is
the same for both models, while the bar dimensions differ as shown
in detail at
햲 (bar S) and 햳 (bar L) - Fig. 8.
4. INSTALLING THE AUTOMATED SYSTEM
4.1 Preliminary checks
For the safety and correct operation of the automated system, ensure
that the following conditions are met:
• When in motion, the beam must not encounter obstacles or fl ying
power cables.
• The characteristics of the ground must guarantee suffi cient solidity
of the foundation plinth.
• No tubes or electrical cables should be present in the plinth digging
area.
• If the barrier body is exposed to vehicle transit, provide for adequate
protection against accidental impact, when possible.
• Ensure that there is an effi cient earth plate for connecting the
upright profi le.
Wall in the foundation plate so as to allow easy access to
the barrier door. The foundation plinth must be installed
keeping in mind the characteristics of the ground to ensure
perfect stability of the automated system.
4.2 Walling in the foundation plate
!
The barrier must be installed with the base plate
- The foundation schematic appended to this manual gives the char-
acteristics of the foundation as pure approximations. The schematic
considers the barrier applied to the maximum limits indicated in this
manual and under the most arduous conditions. The installation
engineer is responsible for the evaluation of the foundation materials
and dimensions on the basis of the characteristics of the ground and
place of installation. Perform structural calculations where necessary.
• Assemble the foundation plate as shown in Fig. 9 ref. 햲
• Set the foundation plinth as shown in Fig. 9 ref. 햳
• Wall in the foundation plate as shown in Fig. 9 ref. 햳 providing
for one or more sheaths for the passage of the electrical cables.
For dimensional reasons, the cable passage sheaths
must be placed on one side of the space provided at the
base of the barrier (see Fig. 9).
• Use a level to ensure that the plate is perfectly horizontal.
Wait for the cement to set.
4.3 Electrical preparations
Following the instructions shown in Fig. 7, prepare the ducts to make all
the control board electrical connections with the chosen accessories.
Always separate the power cables from the control and safety cables
(button, receiver, photocells, etc.).
Use the cable diameters shown in Fig. 7 and referred to in the following
key:
햲
Barrier mod. B680H
햵
Flashing lamp
햳
Photocells
햶
Radio receiver
햴
Key button
햷
Magnetic Loops
4.4 Mechanical installation
• Fix the upright profile onto the foundation plate using the four
provided nuts (Fig. 11). Remember that the hydraulic unit must
usually face the inside of the property.
• Prepare the operator for manual operation, as shown in paragraph
6 / Fig. 18 (Manual Operation).
• Remove and set aside the venting screw, as shown in Fig. 12
ref.
햳.
• Set the rocker arm horizontally, then remove, as shown in Fig. 13
ref.
햲, the upper fixing pin of the piston on the bar side and insert
on it the spring guide and balance spring, as shown in Fig. 14,
followed by the preload adjustment ring nut, paying attention to
the direction it must be inserted in (see Fig. 14 ref.
햲).