2Easy
OPEN
CLOSE
FSW
STOP
ALARM
GND
+24
12
34
5
6
7
8
9
10
11
12
13
14
15
16
17
18 19 20
21
22
23
24
25
26
27
+24
+24
+24
+24
OUT1
OUT2
OUT3
GND
LAMP
LOOP
BUS
LOOP 1 LOOP 2
Encoder
Relais
NO
COM
1
2
OUT4
OUT5
OUT6
GND
Fig. 2
B680H 9 732719 - Rev.D
Translation of the original instructions
ENGLISH
4. ELECTRICAL CONNECTIONS
To connect the
photocells and safety
devices, refer
to paragraph 4.1.1
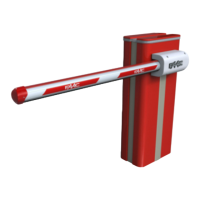
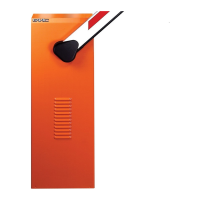
Released beam
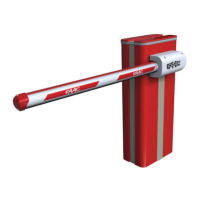
Integrated
flashing
traffic light
4.1 Terminal board J1 (inputs)
OPEN - Open” command (N.O. - terminal 3): means any pulse
generator (e.g. button) which, by closing a contact, commands opening
and/or closing of the barrier.
CLOSE - Close” command (N.O. - terminal 4): means any pulse
generator (e.g. button) which, by closing a contact, commands closing
of the barrier.
FSW - Safety contact when closing (N.C. - terminal 5): the purpose
of the closing safeties is to protect the area affected by the movement
of the barrier during the closing phase, reversing its motion. They never
trip during the opening cycle.
The closing Safeties, if engaged when the automated system is open,
prevent the closing movement.
If CLOSE safety devices are not connected, jumper
terminals FSW and GND (Fig. 26) and leave the FAILSAFE
function (parameter
o1 in ADVANCED programming) set
on the default value (disabled)
STP - STOP contact (N.C. - terminal 6): means any device (e.g.
button) which, by opening a contact, can stop movement of the
automated system.
If STOP safety devices are not connected, jumper terminals
STOP and GND (Fig. 26)
EMR - Emergency contact (N.C. - terminal 7): means any device
(e.g. switch) which, if activated in a situation of emergency, will open
the barrier until the contact is restored. When activated, this input has
priority over any other command.
If emergency safety devices are not connected, jumper
terminals ALM and GND (Fig. 26)
GND (terminals 8-9) - Accessories power supply minus
+24 (terminals 10-11) - Accessories power supply plus
The maximum load of the accessories is 800mA. To
calculate absorption, refer to the instructions included
with the individual accessories.
4.1.1 Connecting the safety devices
The E680 control board features an input for closing safety devices,
which trip during closing of the automated system, provided to protect
the gate area from the risk of impact.
These devices must use a signal with “N.C.” contact, and must be
connected in series to the relay photocells that may be installed on
the system, as shown in Fig. 23 to Fig. 26.
Fig. 23: connection of one pair of closing photocells, with FAILSAFE
safety enabled: in addition to making the connection as
shown in the diagram, it is necessary to set in Advanced
Configuration
o1 = 00
Fig. 24: connection of one pair of closing photocells without FAILSAFE
safety
Fig.25: connection of two pairs of closing photocells without
FAILSAFE safety
Fig. 26: connection of no relay safety device
4.1.2 Connecting BUS photocells
Up to 8 pairs of photocells can be connected to the E680 control board
using BUS technology. The connection must be made in parallel, on
terminal board J6, using a single power/communication line, as shown
in Fig. 27.
BUS photocells do not require a matching polarity
connection.
The 8 pairs of photocells feature the following functions:
Pairs of closing photocells: max 7
Pairs of OPEN pulse photocells: max 1
After positioning the BUS technology photocells, it is necessary
to proceed with selecting the address for each pair using various
combinations of the DIP-SWITCHES located on each photocell.
Set the SAME DIP-SWITCH ADDRESS chosen both on
the transmitter and receiver of the same pair.