Inspecting The Equipment
Visually inspect the UPS for freight damage. If any equipment has been damaged during shipment,
keep the shipping cartons and packing materials for the carrier, and immediately file a claim for
“shipping damage” with the carrier. If you discover damage after acceptance, file a claim for
“concealed damage”.
To file a claim for shipping damage or concealed damage:
1. YOU MUST file with the carrier within 15 days of receipt of the equipment;
2. YOU MUST send a copy of the damage claim within 15 days to Falcon Electric, Inc.
CAUTION
The UPS and Battery Module are heavy. Take proper precautions when lifting or moving them.
1. Install the UPS indoors in a controlled environment.
2. Place the UPS in an area with unrestricted airflow around the unit, away from water, flammable
liquids, gases, corrosives, and conductive contaminant.
3. Maintain a minimum clearance of 4 inches in the front and rear of the UPS.
4. Maintain an ambient temperature range specified in the model specificaiton. To maximize the life
time of the batteries, an ambient temperature of 68ºF to 77ºF (20ºC to 25ºC) is recommended.
OPERATION IN TEMPERATURES ABOVE 77ºF (25ºC) WILL REDUCE BATTERY LIFE.
5. The SSG Series UPS can be installed in either a free-standing mini-tower or into a 19 inch
equipment rack. Follow the appropriate instructions in either Rackmount UPS Setup or
Free-standing UPS Installation.
Rackmount UPS Setup
All SSG Series models are shipped with front panel mounting ears that allow the unit to be installed
in a 19" equipment rack. Each UPS unit and external battery enclosure requires 2U (3.5 inches) of
vertical rack space.
NOTE !
The rack-mounting ears WILL NOT support the weight of the UPS or battery bank
by themselves. They are only to be used to secure the UPS to the front rails of the
rack. Mounting rails or an equipment shelf are required to support the weight of
each UPS or battery module.
Use the following procedure to install the UPS in an standard 19” equipment rack:
1. Place the UPS on a flat, stable surface with the front of the UPS facing you.
2. Align the mounting ears with screw holes on the side of the UPS and secure with the
supplied screws.
3. If installing the Battery Module, repeat above STEPS.
4. For slide rail installations, fasten the inner parts of the slide rails to the UPS on both
sides with the screws provided.
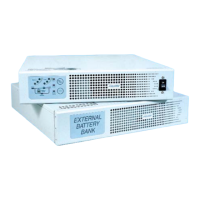
CAUTION: When making battery bank connections to the UPS, alwasy verify the battery bank
circuit breaker(s) are in the off position. PRIOR to turning on the first battery bank circuit
breaker, ALWAYS DEPRESS AND HOLD THE BATTERY PRECHARGE PUSHBUTTON LOCATED
ON THE UPS REAR PANEL WHILE TURNING ON THE FIRST BATTERY BANK CIRCUIT
BREAKER TO PREVENT UPS DAMAGE
10
 Loading...