3
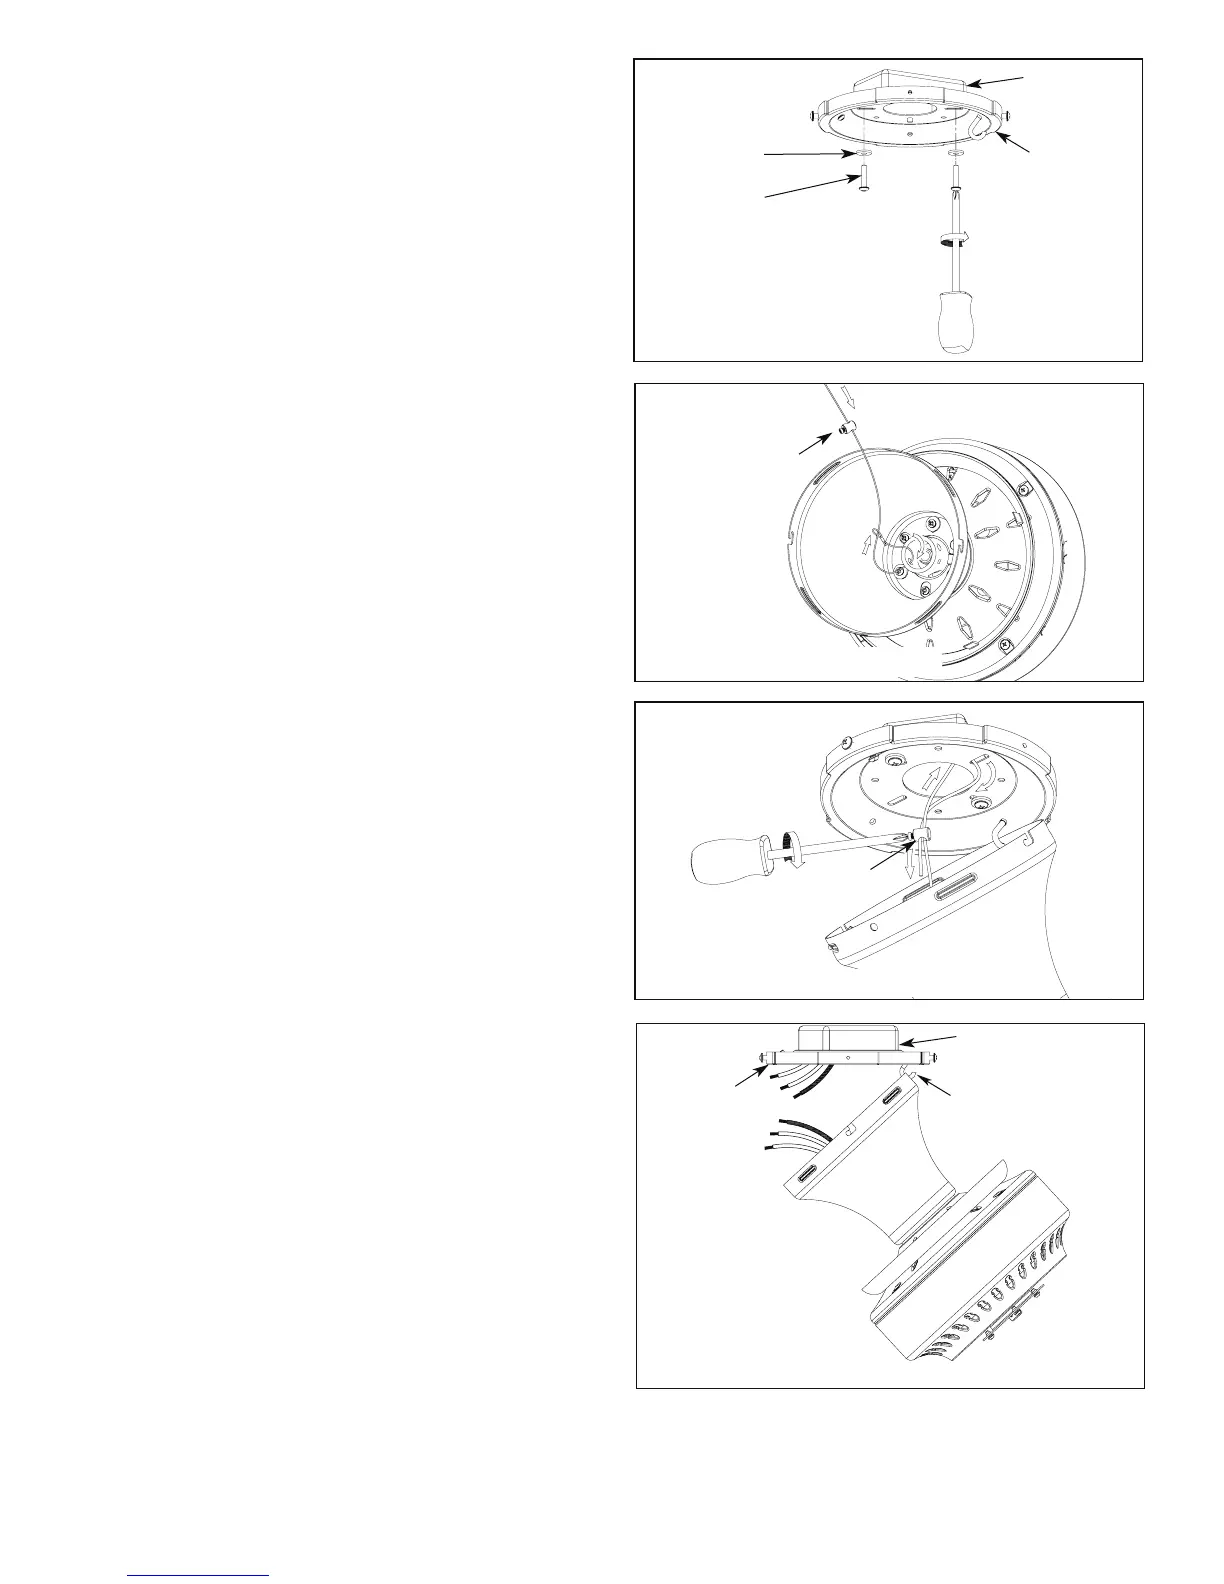
9. Loop the safety cable through pin hole in motor coupler
and put the cable clamp in the end of safety cable.
(Figure 10).
10. Loop the safety cable end through one of the holes in
the hanger plate up into the outlet box, then back out
the center of the plate, then connect the end with the
screw down clamp. Tighten the set screw in the clamp
. (Figure 11).
Figure 12
HOOK
OUTLET
BOX
MOUNTING
BRACKET
Figure 11
Lift your fan motor assembly and hang it from the 11.
ceiling bracket hook through one of the two screw
holes in the canopy lip. Do not use the grooved slots.
(Figure 12)
Connect your fan’s wiring according to your fan’s owners 12.
manual. If you have misplaced your owners manual
one can be downloaded at www.fanimation.com or
contact a licensed electrician to complete the wiring
of your fan.
Figure 10
CABLE CLAMP
CABLE CLAMP
Using the two screws and washers, securely attach 8.
the ceiling bracket to the ceiling junction box, making
sure to run the supply wires through the hole in the
center of the bracket. (Figure 9)
Figure 9
MOUNTING
BRACKET
NOTE: SUPPLY WIRES
HAVE BEEN OMITTED
FROM DIAGRAM
OUTLET
BOX
WASHER
SCREW