Do you have a question about the Fanimation MAD3250 series and is the answer not in the manual?
Follow key safety guidelines to prevent fire, shock, and personal injury during fan operation and maintenance.
Adhere to specific safety rules for wiring, mounting, and general fan usage to prevent hazards.
Details the lifetime warranty for the fan motor due to defects in materials or workmanship.
Covers labor costs for motor repair within the first year of original purchase.
Covers repair or replacement of other fan parts within one year of original purchase.
Details exclusions like finish changes, damage from misuse, and limitations on implied warranties.
Lists essential tools such as screwdrivers, stepladder, and wire connectors for fan assembly.
Details required outlet box type, wire size, and includes a list of included parts.
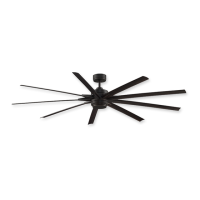
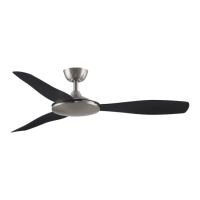
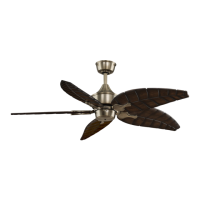
Verify all fan components are present against the parts list and exploded view illustration.
Guidance on ideal placement for ceiling fans for optimal airflow and efficiency.
Conserves energy by turning off the fan when the room is unoccupied.
Instructions for summer (cooling) and winter (heating assistance) fan operation.
Details on mounting a low profile outlet box directly to a joist or wood structure.
Instructions for using a deep outlet box attached to blocking between joists.
Describes using a deep box with a brace spanning between joists for mounting.
Ensures outlet boxes are rated for fan support (35 lbs) and uses provided mounting screws.
Emphasizes turning off main fuse box power and proper grounding for electrical safety.
Stresses following wiring instructions and seeking licensed electrician for unlisted work.
Assemble the hanger ball and downrod, ensuring proper alignment of pin and setscrews.
Route wires through the downrod and install it into the coupler, aligning clevis pin holes.
Install clevis pin, hairpin clip, and tighten setscrews securely to prevent loosening.
Critical warning on correctly installing clevis screw, setscrews, and hairpin clip to prevent fan falling.
Route wires through motor coupling cover, canopy screw cover, and ceiling canopy.
Reinstall hanger ball, route wires and safety cable, and securely tighten setscrew.
Trim excess lead wire and strip insulation for electrical connections.
Ensure electricity is off at the main fuse box before hanging the fan.
Maintain a minimum of 7 feet clearance between fan blades and the floor.
Securely attach the hanger bracket to the outlet box using provided screws.
Drill pilot hole and attach safety cable to ceiling joist or wood structural member.
Pull electrical supply wires and safety cable through the downrod to the junction box.
Ensure outlet box is anchored and hanger bracket seats firmly to prevent wobble or falling.
Lift fan and seat downrod/hanger ball assembly on hanger bracket, aligning groove with tab.
Failure to align groove and tab can cause wire damage, shock, or fire hazard.
Avoid pinching wires between the hanger ball assembly and the hanger bracket.
Attach safety cable to ceiling support cable using the cable clamp and tighten screw.
Ensure electricity is off at the main fuse box before proceeding with wiring.
Consult a licensed electrician if unsure about outlet box grounding for safe operation.
Connect grounding leads and supply wires (white to white, black to black) using wire connectors.
Seek assistance from a licensed electrician if electrical wiring knowledge or experience is insufficient.
Ensure all wire connections are tight, no bare wire visible (except ground), and do not operate before blades are attached.
Carefully push leads into the outlet box, organizing wires by type (grounded/ungrounded).
Ensure wires are fully inside canopy housing and not pinched to prevent fire or shock.
Assemble canopy by rotating key slot over shoulder screw, tighten screws securely.
Securely attach and tighten the canopy screw cover using the keyslot twist-lock feature.
Position blade over holder, align posts, insert screws, and tighten to secure blade.
Do not connect fan blades until the entire fan is installed to prevent blade damage.
Attach blade holders to the fan motor hub using screws and lockwashers, ensuring tightness.
Avoid bending blade holders during installation, balancing, or cleaning; do not insert foreign objects.
Disassemble the switch housing cup assembly by removing three screws.
Assemble light plate assembly to the support bracket using key slots and screws.
Assemble the housing switch cup onto the adapter using three screws.
Turn on electricity at the main fuse box to restore power to the outlet box.
Verify all connections are tight, ground is visible, no bare wire, and do not operate before blades are attached.
Install 23A/12V battery in remote and follow the remote code setting process.
Press 'SET' button to pair remote, fan will run for 5 mins to complete setting.
Explanation of remote buttons for fan speed, off, reverse, and light control.
Configure 'D' (dimming) or 'ON' (non-dimming) dip switch for CFL or other bulbs.
Fan stops after 30s if obstructed; remove obstacles and reset. Over 80W protection also included.
Clean fan with a soft brush or lint-free cloth to avoid scratching the finish.
Avoid solvents during cleaning as they can damage the motor or blades and pose shock risk.
Periodically check and ensure screws securing blade holders to the motor hub are secure.
Lightly dust fan blades with a feather duster for best results.
Avoid water, cleansers, or harsh rags which can warp or ruin the fan blades.
Lists part numbers for major fan components like canopy, motor, and remote.
Details contents of hardware bags including balance kit, wire connectors, and mounting hardware.
Provide part number, part description, and fan model number when ordering repair parts.
Diagram showing all fan parts with corresponding reference numbers for identification.
Always turn off power at the fuse box or circuit breaker before troubleshooting the fan.
Diagnoses and suggests remedies for a fan that fails to start, checking fuses, connections, and remote.
Addresses causes of fan noise, including blade attachment, loose screws, and wire rattling.
Provides solutions for excessive wobble, checking downrod setscrews, blade holder screws, and blade balance.
Offers solutions for poor airflow, suggesting longer downrods or different blade types.
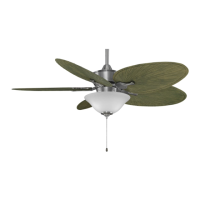
| Model | MAD3250 series |
|---|---|
| Blade Span | 52 inches |
| Number of Blades | 5 |
| Light Kit | Optional |
| Blade Pitch | 12 degrees |
| Speeds | 3 |
| Reverse Function | Yes |
| Reversible Motor | Yes |
| Motor Type | AC Motor |