39
"
#
!
!
$
%
&
Edgebander
G 330 / G 360 / G 380
Inspecting and adjusting settings
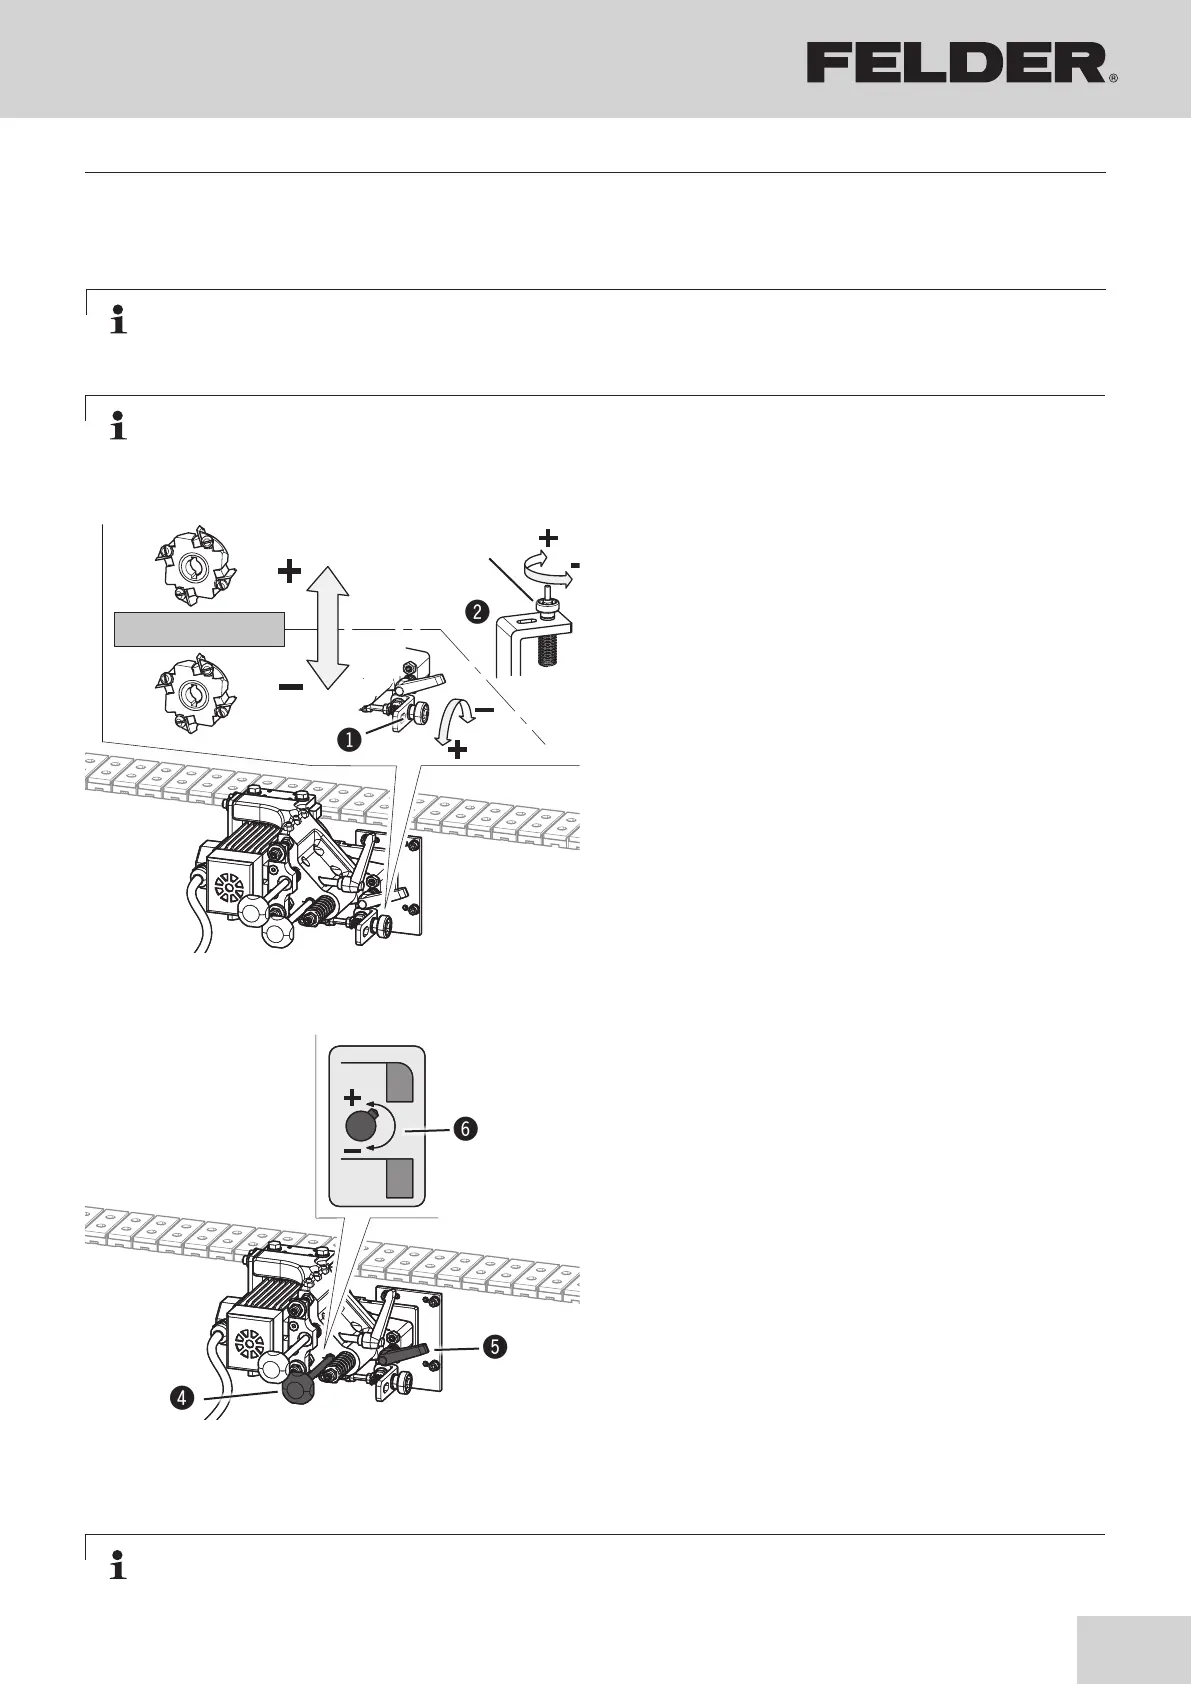
8.10.2 Height adjustment - Setting the protruding edge
Note:
Proceed very cautiously with the settings described here. The given values are recommended values and
must be tested using sample workpieces.
Activate/deactivate the units:
1. Switch the machine off and ensure that it cannot be
switched on again Open the rear access door.
2. Removing the trimming unit:
Tighten the thumb nut.
(Clockwise, up to stop)
3. Activate the units:
Loosen the thumb nut.
(Anti-clockwise, up to stop)
!Thumb nut
"Adjustment - upper
#Adjustment - down
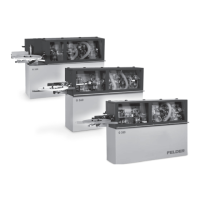
Adjusting the moulding height :
1. Switch the machine off and ensure that it cannot be
switched on again Open the rear access door.
2. Activate the units.
3. Adjusting the moulding height:
Open clamping lever.
The setting can be carried out by twisting the screws.
The setting is displayed on the scale.
+ Anti-clockwise up to stop
Radius trimming
– Clockwise up to stop
flush trimming
4. Clamp the clamping lever.
$Thumb screw - green / Height adjustment
%Clamping lever / Height adjustment
&Scale
Note:
The setting is carried out by FELDER employees on delivery.
Fig. 8-15: Height adjustment
Note:
The setting is carried out by FELDER employees on delivery.
Fig. 8-15.1: Adjusting the moulding height