BLUEHELIX TECH RRT 24 C
35EN
cod. 3541P250 - Rev. 01 - 07/2018
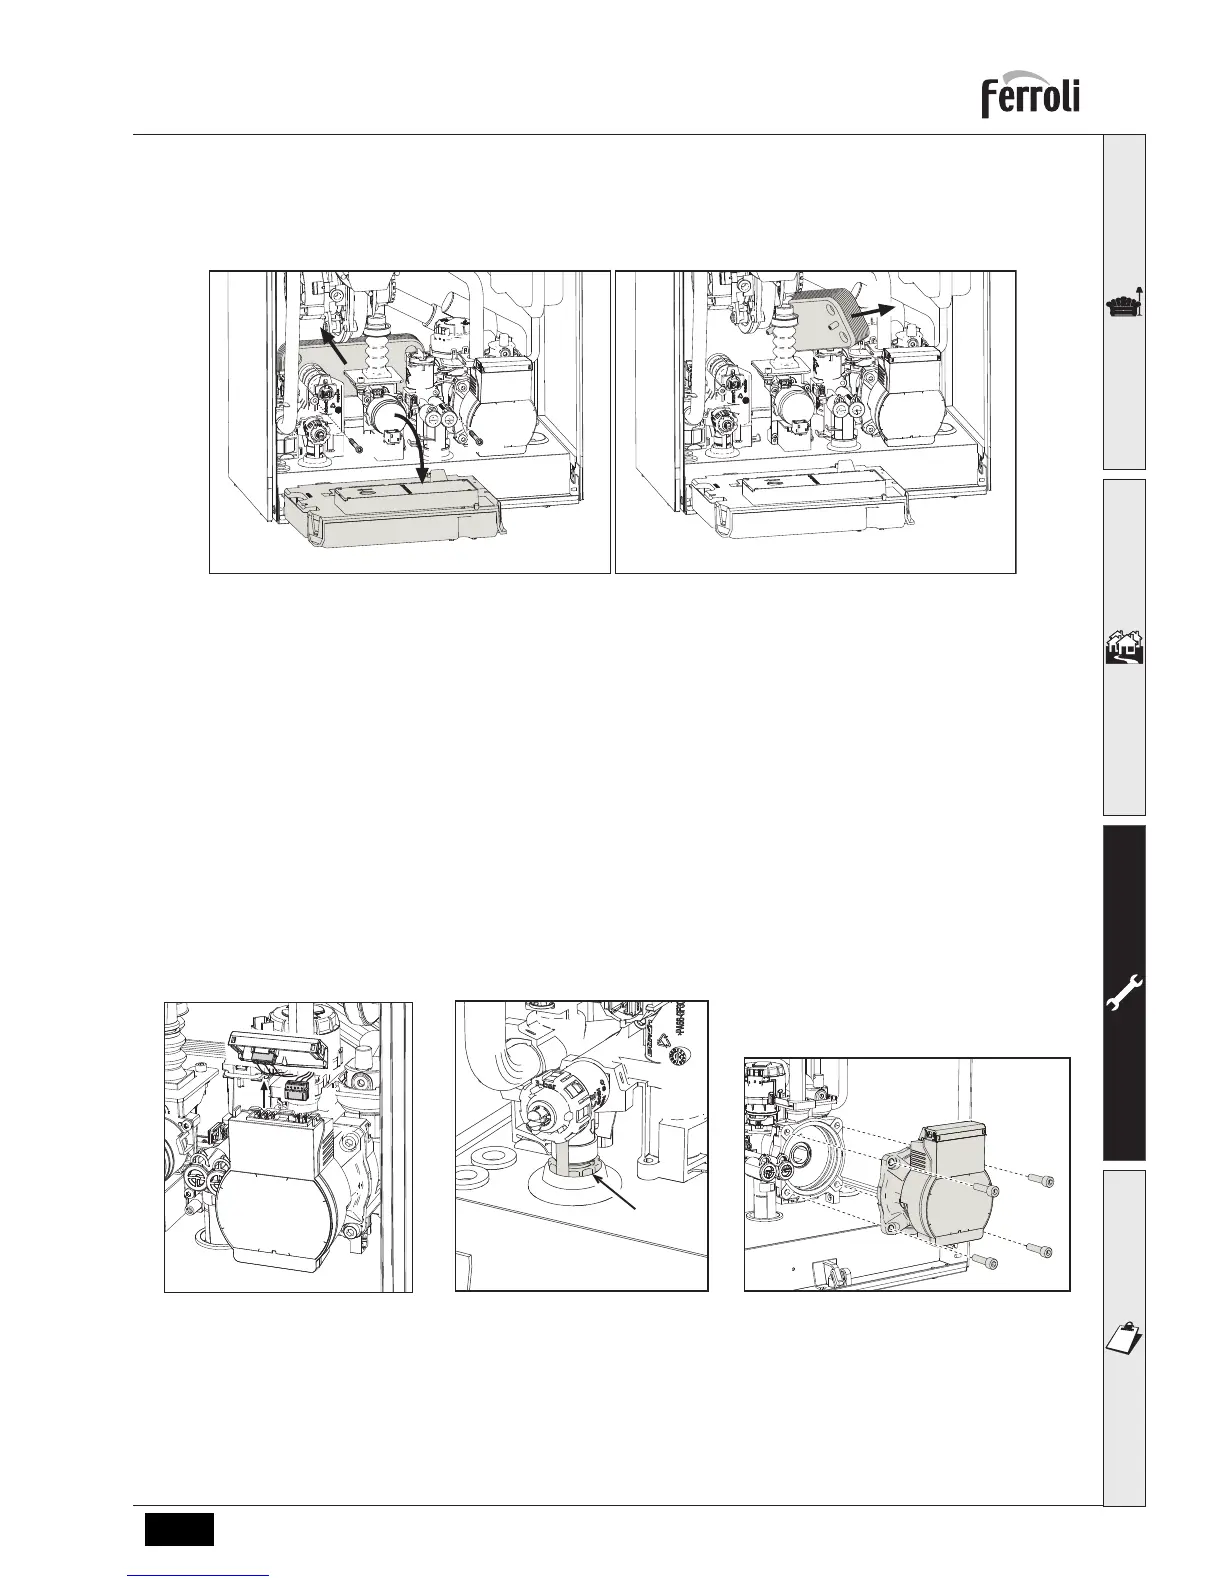
Plate heat exchanger
A
Before carrying out the following instructions it is advisable to protect the area and the boiler’s PCB housing
against accidental water spillage.
fig. 38- Plate to plate heat exchanger replacement/maintenance
• Isolate the power supply to the boiler.
• Isolate the boiler by closing the DHW inlet, Flow & Return isolation valves.
• Open a hot tap (preferably below the height of the boiler) to drain the domestic hot water.
• Remove the lower security screw & pivot the Fascia housing down "1"
• Drain the water in the boiler through the drain tap (see *** System draining on page 8 ***)
• Undo the screws “2”
• Move the plate heat exchanger back and slide it slightly to the left "3"
• Remove the plate heat exchanger as shown in the figure "4"
• Note: To gain more access you can easily remove the flexible connection on the top of the condense trap
• When refitting the plate heat exchanger, make sure the arrows (indicating: HEATING) are pointing downwards.
Circulating pump
A
Before carrying out the following instructions it is advisable to protect the area and the boiler’s PCB housing
against accidental water spillage.
• Isolate the power supply and close the Gas isolation valve to the boiler.
• Pull up the security tab “1” of fig. 39 then remove both electrical connections to the pump "2".
• Close the flow & return Isolation valves, & drain the water in the boiler "3" of fig. 40 " (see “System draining” on
page 8).
• Unscrew ( 4 x 5mm Allen key bolts) and remove the circulating pump motor assembly of fig. 41 .
• Replace in reverse order, refill the boiler, re-establish the power supply & test
fig. 39 fig. 40 fig. 41
4

 Loading...