2120
Chapter 4 Splice Mode
4.1 Displaying the Active Splice Program
MINI3S has an intuitive and simple but very powerful program structure to operate.
Splice programs dene arc currents, splice times as well as various parameters
used when performing a splice. Therefore, it is essential to select the correct splice
program.
There are a number of “Preset” splice programs for common ber combinations.
Therefore, it is much easier to modify and further optimize the parameters for more
unusual ber combinations.
The active splice program is
always displayed at the top of the
screen (see below).
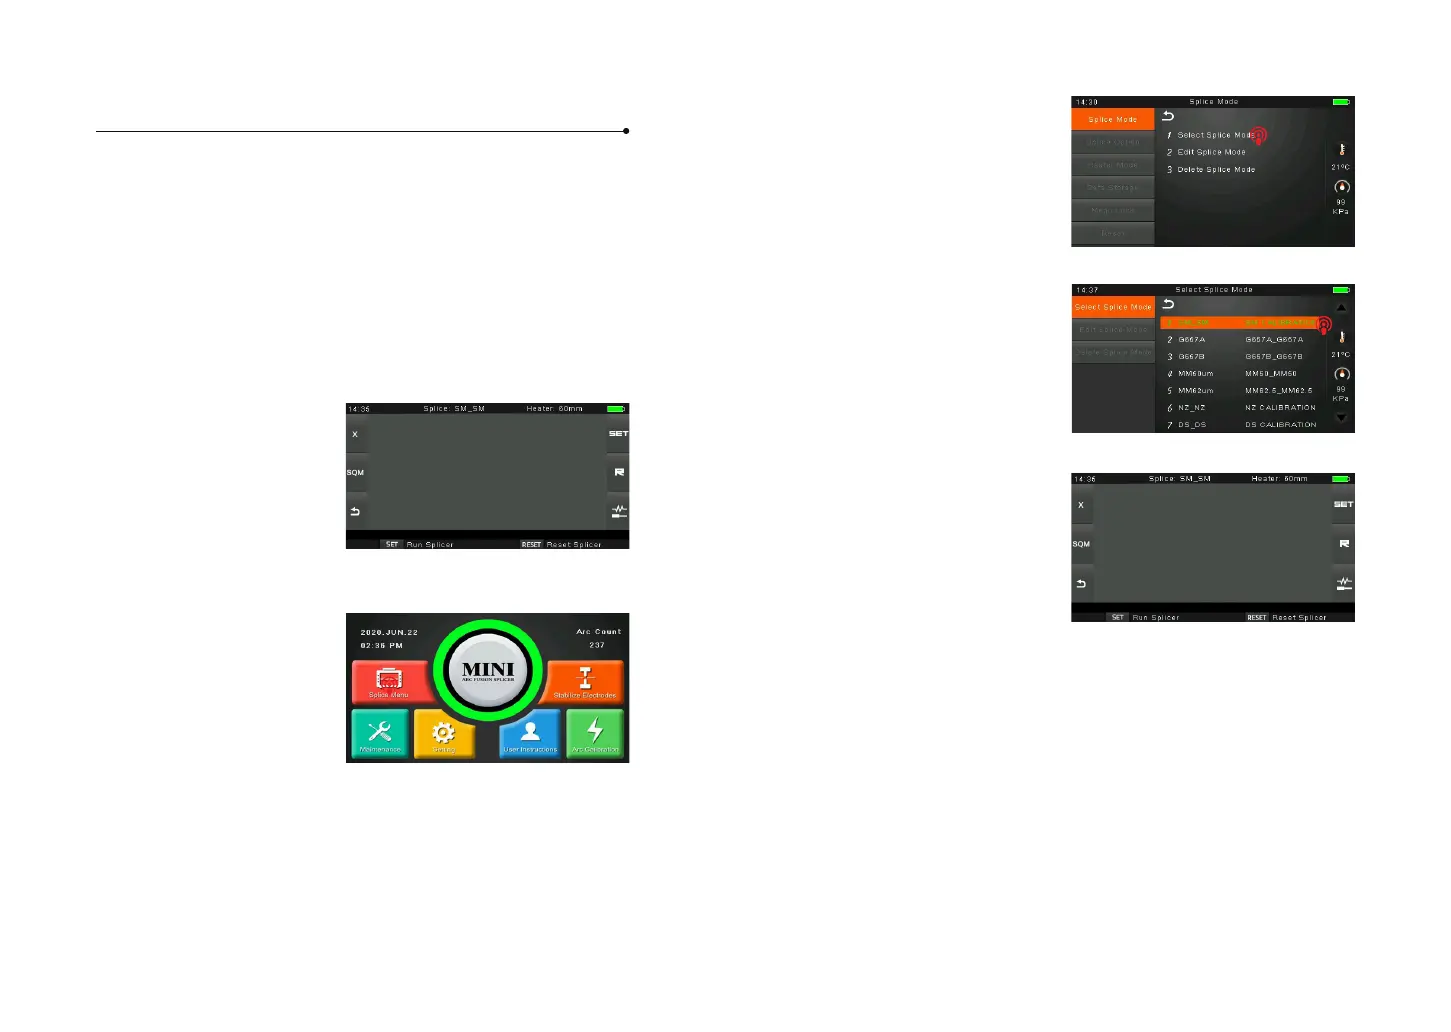
4.2 Selecting a Splice Program
To select another splice program
other than the active one, you
must enter Select splice mode
menu.
① Enter main menu
② Select Splice Mode
③ Highlight the program you
want to select.
④ Back to initial interface
4.3 General Splicing Steps
This section explains the steps involved in automatic splicing process and describes
how various program parameters are related to this process. The normal splicing
process can be divided into two sections: pre-fusion and fusion.
Pre-Fusion
During pre-fusion, the splicer performs automatic alignment and focusing, where
the bers are subjected to a low pre-fusion current for cleaning purposes; a pre-
fusion image is also taken. At this point, the user is informed of any problems
recognized in the pre-fusion image, such as a poorly prepared ber. The splicer will
then issue a warning before the bers are fused together.