1514
3.4 Adjust Monitor Position
Users can adjust the monitor position by moving it with a desired angle for the
clearest display.
3.5 Adjust LCD Backlight Brightness
Enter into Power save option
interface, and select LCD
Brightness option to adjust LCD
backlight brightness until you
nd the clearest position.
Note: The LCD monitor is a precise component produced by manufacturing factory
under strict quality control. However, some tiny dots in dierent colors may still
remain on the screen. Meanwhile, the screen brightness may not appear uniform,
depending on its viewing angles. Note that these symptoms are not defects, but are
natural phenomenon.
3.6 Preparing the Fiber
3 steps should be carried out before splicing:.
1.Stripping
Remove at least 50mm of secondary coating (valid for both tight and loose tube
secondary coating) and approximately 30~40mm of primary coating with an
appropriate stripper.
Note: always remember to slip a
heat-shrinkable sleeve onto either
end of the bers at the beginning
of each ber preparations.
2. Clean bare bers with pure alcohol-soaked gauze or lint-free tissue.
3. Cleave the ber
In order to ensure the best splicing result, cleave the bers with high quality cleaver
such as DC-09 ber cleaver, and strictly control the cleaving lengths shown as
below.
Important!
From this moment, you must be very careful with the bers to ensure that they do
not become dirty again.(For example, avoid putting them down on a dusty working
surface, or even waving them around in the air). Also check if the V-grooves are
clean, if not, wipe them clean.
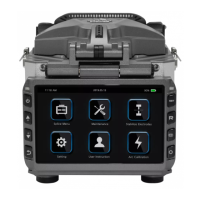
3.3 Turn On the Splicer
Press [Power] key on the operation
panel, and wait the splicer to be
turned on and move to Workbench
page.
Examples of cleaving lengths
primary coating
use blue V-grooves
(Clamping on bare ber)
tight secondary
coating