17
BLOWER MODULE REPLACEMENT
! To avoid any risk of electrical discharge, turn off and unplug the Filtrabox
before doing any activities that require disassembly of the unit.
! Replacement modules can be purchased from your dealer or:
info@filtrabox.com or call 514.840.9696 ext. 102
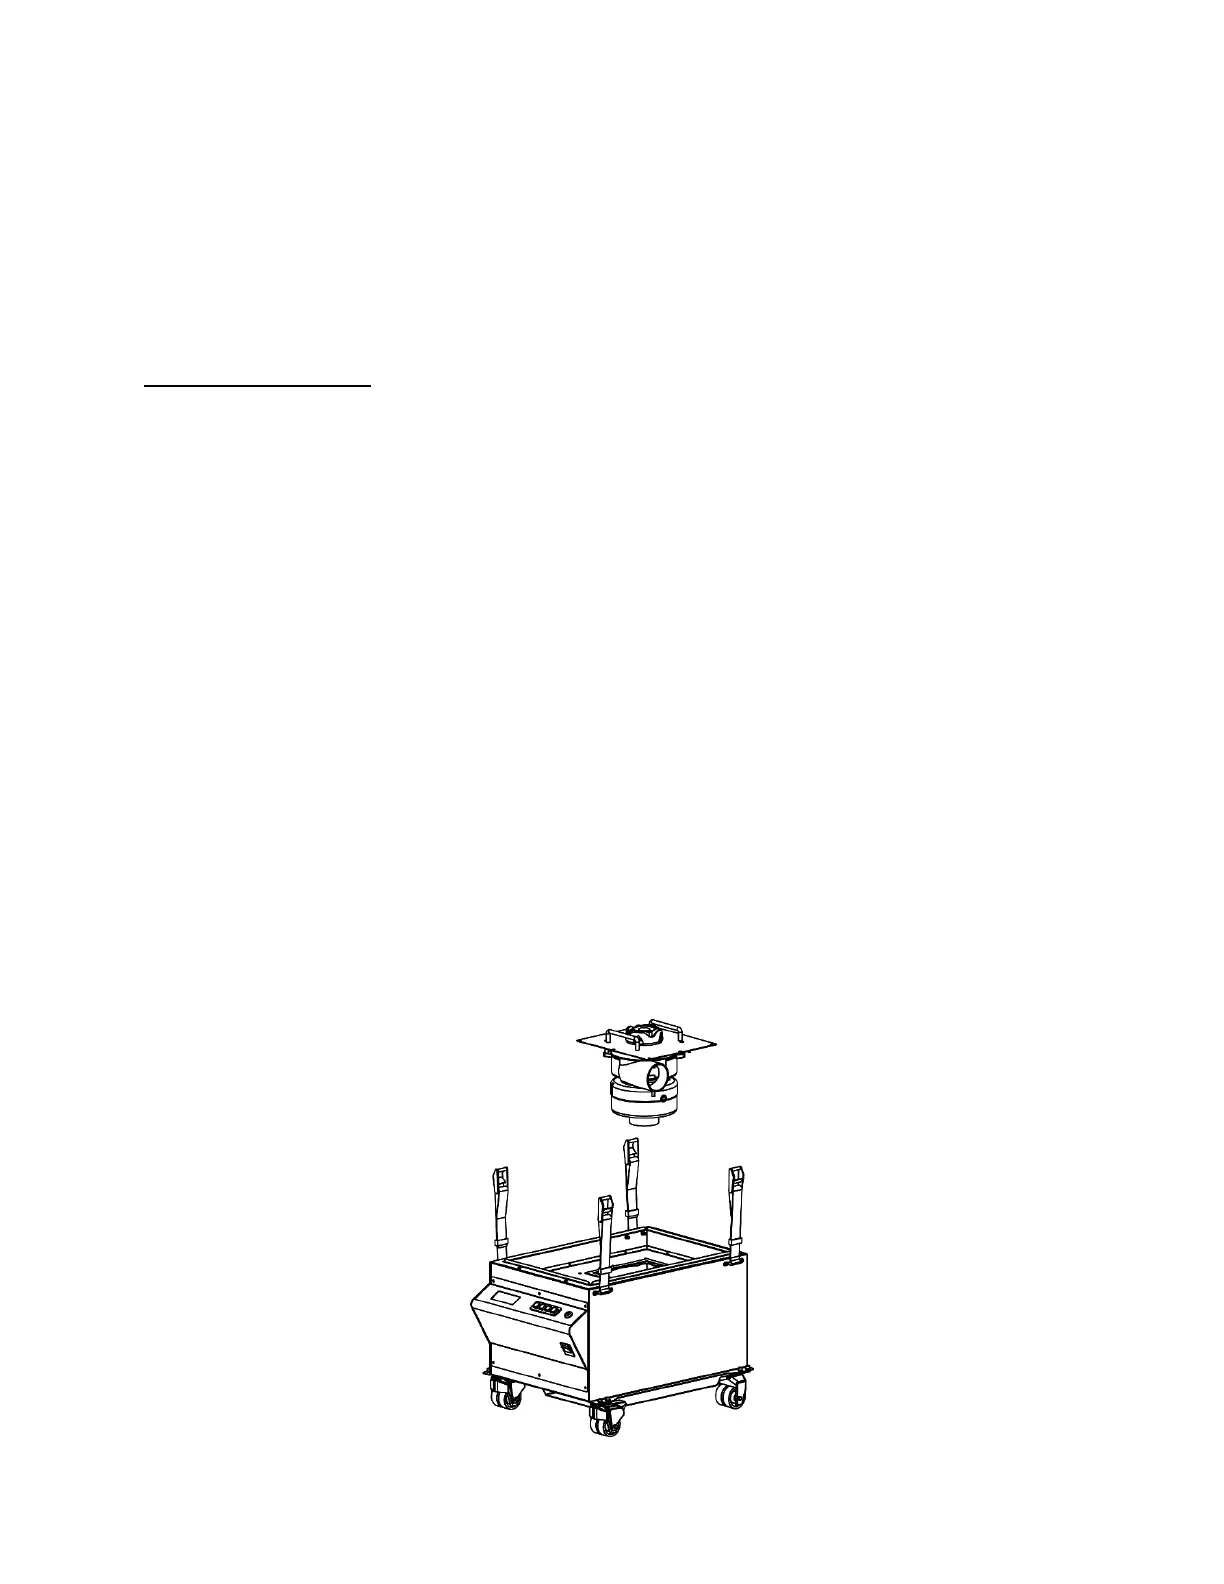
The Compact X comes standard with one Blower Module that can be easily replaced by removing a
few screws and disconnecting/connecting two cables.
1. !IMPORTANT! Ensure that the Filtrabox is powered off and unplugged.
2. Loosen all four Strap Clamps on the Lid by pressing the lever on the clamps. Unhook the
Strap Clamps and remove the Lid by lifting it straight up off the assembly.
3. Remove all three filters and all three Filter Alignment Rings between them; set these parts
aside.
4. Unplug the Fan Sensor plug from its socket on the top of the machine.
5. Remove all eight Phillip’s-head screws holding down the Blower Module.
6. Pull up the Blower Module by the two handles and unplug the wire harness on the module.
Once unplugged, the old blower module can be removed.
7. Plug in the wire harness for the new module then insert it into the machine.
8. Screw the eight Phillip’s-head screws back in.
9. Plug in the new Fan Sensor.
10. Reinstall all the filters and the lid with all four Strap Clamps as it was before. Refer to the
Machine Diagram on page 4 if necessary.
11. Plug in and power-on the unit, then go to the User Interface and press the “Menu” button.
Press the right arrow key to advance the screen until you reach the “New Application
Calibration” section. Press the “OK” button to initiate Calibration. The Calibration process
will take approximately one minute.