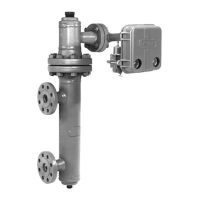
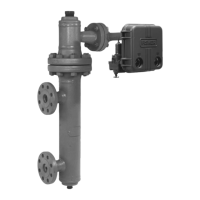
Type 2500
19
Note
If you cannot calibrate the controller or
transmitter, look for other problems as
described in the Troubleshooting proce-
dures, such as leaking connections, or a
binding displacer rod. If none of these
troubles are apparent, ensure that the
displacer is sized correctly for the ap-
plication.
Type 2500S and 2503 Controllers
1. Turn on the supply pressure and check that it is set
according to the appropriate prestartup checks proce-
dure.
2. Make sure that the PROPORTIONAL BAND ad-
justment (Type 2500S only) is at the setting deter-
mined according to the appropriate prestartup check
procedure.
3. Perform one or the other of the following:
For direct acting controllers, set the RAISE
LEVEL adjustment between 1.0 and 1.5.
For reverse acting controllers, set the RAISE
LEVEL adjustment between 3.5 and 4.0.
4. Set the process variable at the minimum value of
the input range as shown in table 5. For constructions
with an indicator assembly, make sure that the pointer
is over the LOW mark.
Note
In the following step, the alignment
screw (key 33, figure 19) always must
remain screwed in far enough to provide
spring tension on the underside of the
alignment screw head.
5. Be sure the flapper is centered over the nozzle. If
not, loosen the hex nut (key 40, figure 19) and reposi-
tion the flapper, tighten the hex nut.
6. Adjust the flapper (key 32, figure 19) as described
below. For coarse flapper adjustment, loosen the hex
nut (key 40, figure 19) and rotate the flapper assembly
about the torque tube shaft. For fine flapper adjust-
ment, turn the flapper alignment screw (key 33, figure
19).
For Direct Acting Controllers, move the flapper
toward the nozzle until the output pressure switches to
full supply pressure, then carefully adjust the flapper
away from the nozzle until the output pressure
switches to 0 psig.
For Reverse Acting Controllers, move the flap-
per away from the nozzle until the output pressure
switches to 0 psig, then carefully adjust the flapper
toward the nozzle until the output pressure switches to
full supply pressure.
7. Slowly increase the process variable until the out-
put pressure switches:
For Direct Acting Controllers, slowly increase
the process variable until the output pressure switches
to full supply pressure. The process variable should be
at the maximum value of input range as shown in table
5. If the process variable agrees with table 5, proceed
with step 8. If the process variable does not agree with
table 5, proceed to step 9.
For Reverse Acting Controllers, slowly in-
crease the process variable until the output pressure
switches to 0 psig. The process variable should be at
the maximum value of input range as shown in table 5.
If the process variable agrees with table 5, proceed
with step 8. If the process variable does not agree with
table 5, proceed to step 9.
8. If the unit does not contain an indicator assembly,
go to the startup section. If the unit contains an indica-
tor assembly, change the pointer span by loosening
the indicator plate screws (key 41, figure 19, indicator
assembly detail), slide the plate until the HIGH mark is
under the pointer. Tighten the plate screws and go to
the startup section.
Note
Any sliding of the level set arm (key 28,
figure 19) in the following step changes
the zero as well as the differential gap.
9. To adjust the differential gap, loosen the two level
set mounting screws (see figure 19) and slide the flex-
ure strip base (key 27) right or left along the elongated
slotted hole as follows:
To decrease the differential gap, slide the flexure
strip base away from the torque tube shaft.
To increase the differential gap, slide the flexure
strip base toward the torque tube shaft.
Retighten the screws. For the Type 2500S only, if the
flexure strip base has been moved as far as possible
and the differential gap is still too low, proceed to
step 11.
10. Repeat the procedure from step 4 until the re-
quired calibration points are obtained.

 Loading...
