Table of Contents
1 BlackflyS Installation Guide 1
2 Handling Precautions and Camera Care 2
3 BlackflyS Installation 3
3.1 Preparing for Installation 3
3.2 Installing Your Interface Card and Software 4
3.3 Installing Your BlackflyS—Cased Models 5
3.4 Installing Your BlackflyS—Board-level Models 6
3.5 Powering Your BlackflyS 7
4 Tools to Control your BlackflyS 8
4.1 Using the Spinnaker® Software Development Kit 8
4.1.1 SpinView Camera Evaluation Application 8
4.1.2 Custom Applications Built with the Spinnaker API 8
4.2 Using GenICam Applications 9
5 Configuring BlackflyS Setup 10
5.1 Configuring Camera Drivers 10
5.2 Camera Firmware 11
5.2.1 Determining Firmware Version 11
5.2.2 Upgrading Camera Firmware 11
5 BlackflyS Physical Interface 13
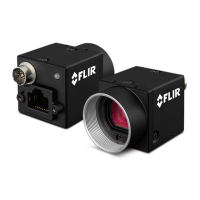
5.1 BlackflyS Cased Physical Description 13
5.2 BlackflyS Board-Level Physical Description 14
5.3 BlackflyS Dimensions 15
5.3.1 Keepout Layer—Board-level Models 18
5.4 Interface Connector 19
5.4.1 Ethernet Connector 19
5.4.2 USB3.1 Connector 19
5.5 Interface Cables 21
5.6 Interface Card 21
5.7 General Purpose Input/Output (GPIO) 22
5.8 Mounting 26
2/19/2019
©2015-2019 FLIR
Integrated Imaging
Solutions Inc.
All rights reserved.
FLIR Blackfly
®
S Installation Guide i