Configuration
42
427-0200-00-12 Revision 100
This document does not contain any export-controlled information.
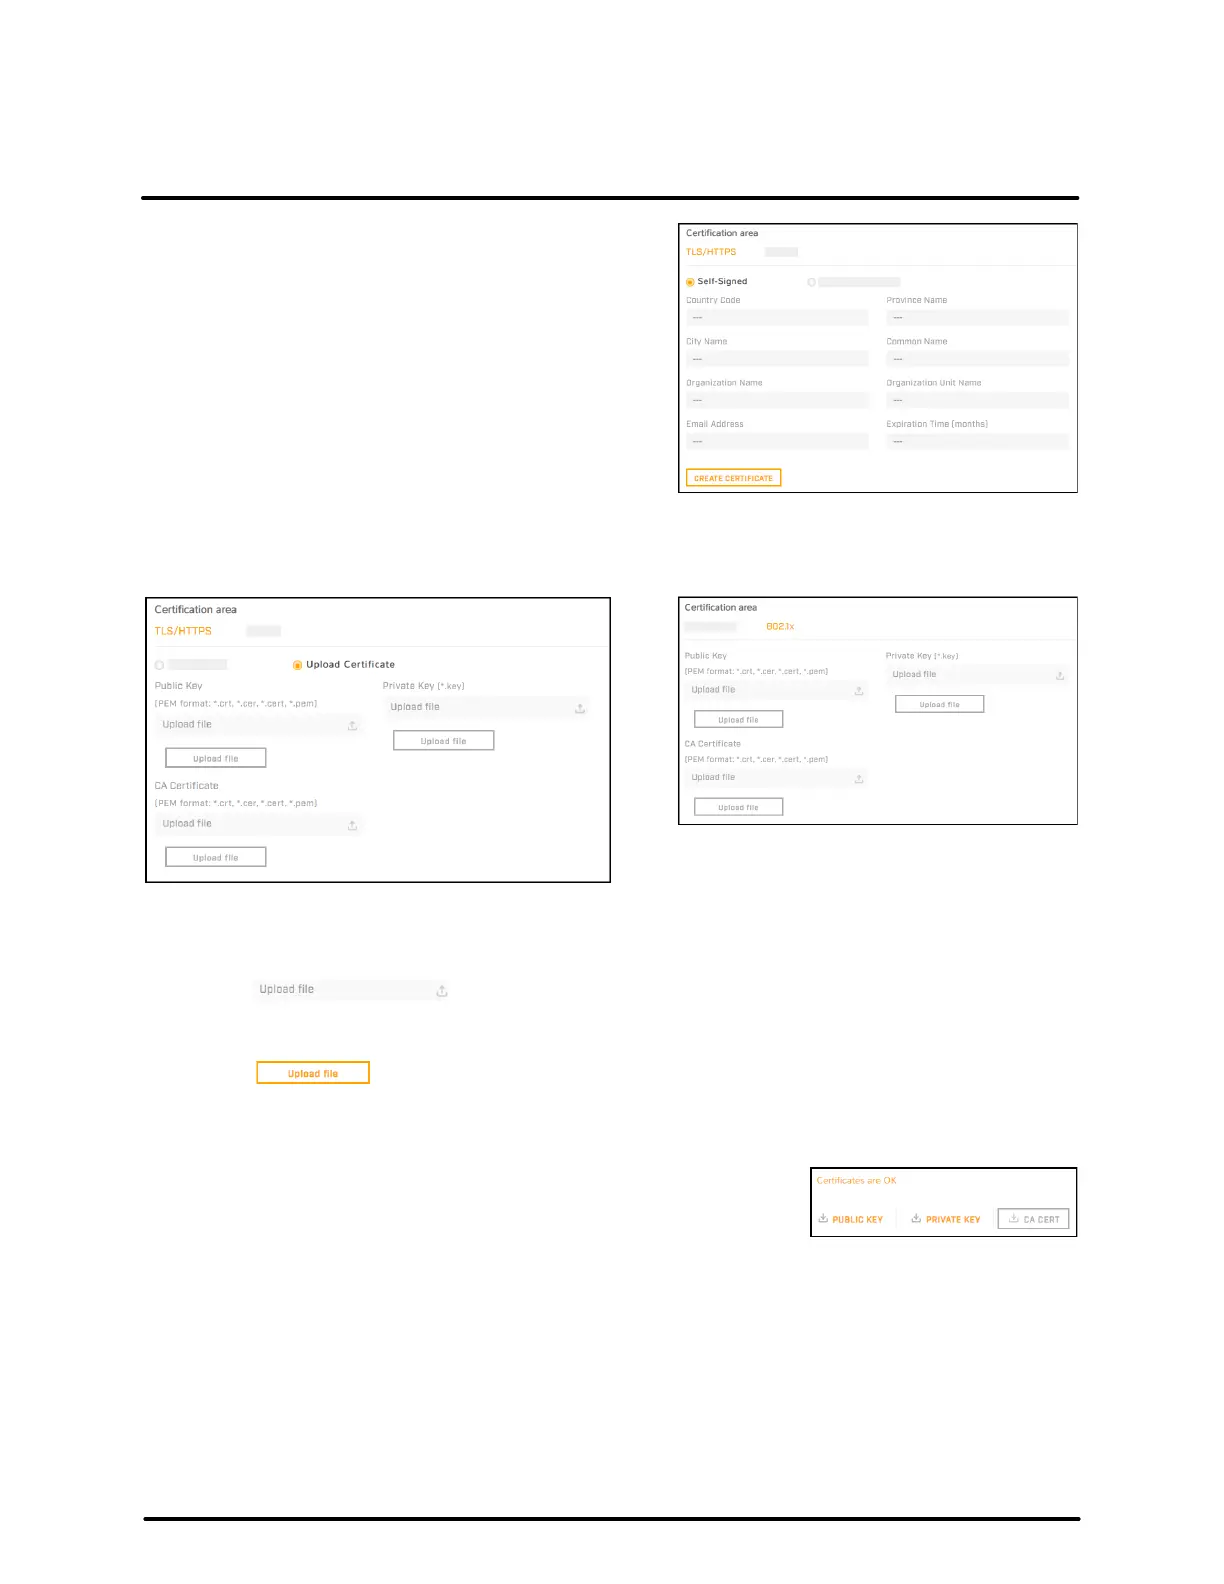
To generate and install a self-signed certificate
for TLS/HTTPS:
1. In the Certificates section and Certification area,
select TLS/HTTPS and Self-Signed.
2. Enter information such as country code, city
name, and organization name.
3. Click Create Certificate.
4. Allow 15 seconds for the camera to generate the
certificate, at which point a confirmation appears.
To upload a self-signed or third-party CA signed certificate for TLS/HTTPS or for 802.1x:
1. In the Certification area, click TLS/HTTPS and then select Upload Certificates, or click 802.1x.
To upload a certificate for TLS/HTTPS
To upload a certificate for 802.1x
2. If you are uploading a self-signed certificate, under Public Key and then under Private Key:
a. Click .
b. Select the appropriate key file.
c. Click .
If you are uploading a third-party CA signed certificate, select and upload the Public Key, Private Key,
and CA Certificate.
3. Verify that the camera certificate files are valid and make sure
Certificates are OK appears under the certificate information,
under Download certificate.
Note that you can download keys and certificates from the camera.
Changes in the Certificates section do not immediately take effect. To apply changes, click Save and then
reboot the camera.
 Loading...