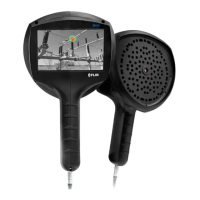
User interface
8
8.7 Settings
Press the settings button to show the available settings:
• Network settings
• Change mode
• Advanced settings
8.7.1 Network settings
Press the Upload snapshots button to enable/disable automatic upload of
snapshots to the FLIR Acoustic Camera Viewer cloud service. For more infor-
mation, see section 8.12 Cloud upload.
Press the Enable wifi button to show the available wifi settings.
When pressing the Select wifi button, the camera will scan for nearby wifi net-
works. After the scan, a list of the found networks will be shown. In case the
wifi network you wish to connect to doesn’t show up, try moving closer to the
wifi access point. Once you find and select the desired network, you will be
asked to enter the wifi password. Please note that public wifi networks are not
supported, only secure wifi networks are supported. The camera accepts wifi
networks that require password input (not networks that require both user
name and password).
An icon representing the wifi connection status and strength is shown to the
right of the settings button:
Excellent wifi connection strength.
Good wifi connection strength.
Satisfactory wifi connection strength.
#T810536; r. AB/63437/63437; en-US
16