True RMS Multimeters
Replacing the Fuses
7
11 A 440 mA
Ω
<.5
Ω
<12
OKOK
OK
OK
RANGEHOLD
MIN MAX
V
aik12f.eps
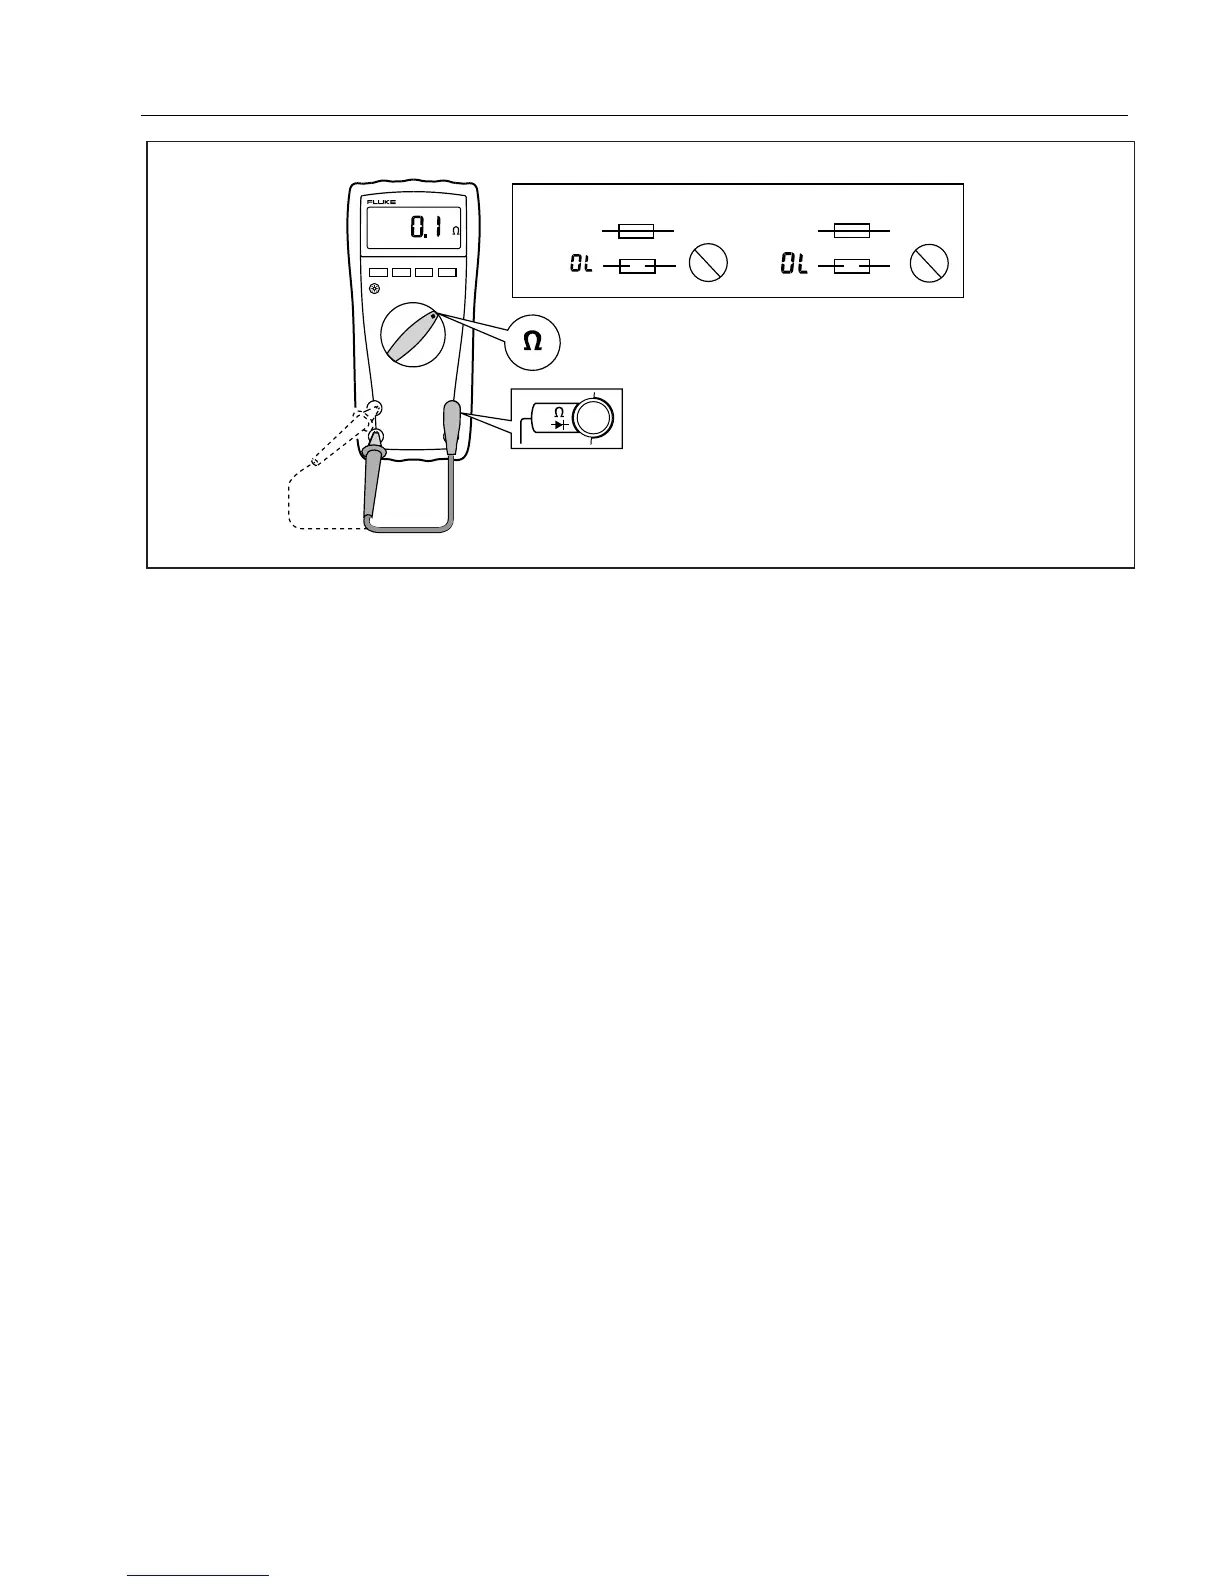
Figure 1. Testing the Current Fuses
Replacing the Fuses
WWarning
To avoid electrical shock, arc blast, or damage to the Meter, install only fuses
with the amperage, interrupt, and voltage, and speed ratings specified in
Table 5.
To replace the fuses (refer to Figure 2):
1. Turn the rotary switch to
OFF.
2. Disconnect the test leads and/or any connectors from the terminals.
3. Remove the four screws from the case bottom, and separate the case top from the case bottom.
4. Remove the fuses by gently prying one end loose, then slide the fuse out of its bracket, and replace
with a properly rated good fuse.
5. Rejoin the case bottom and case top, and reinstall the four screws.
Replacing the Battery
WWarning
To avoid false readings, which could lead to possible electric shock or personal
injury, replace the battery as soon as the low battery indicator (
b ) appears.
To replace the battery (refer to Figure 2):
1. Turn the rotary switch to
OFF and remove the test leads from the terminals.
2. Remove the two screws from the battery compartment door, and remove it from the case bottom.
3. Remove the battery from the battery connector.
4. Replace the battery with a new 9 V battery (NEDA A1604, 6F22, or 006P).
5. Reattach the battery compartment door to the case bottom and reinstall the two screws.
 Loading...