27
Service Manual
3-12
18. If the battery compartment O-ring (MP15) was not replaced during disassembly, it
should be replaced before reassembly. Use the procedure given in step 5 of the
disassembly procedure.
19. Connect the battery to the battery terminal connector, then slide the battery into the
battery compartment.
20. Slide the battery spacer/cover assembly into the back of the instrument.
21. Start the four screws (H6) that secure the battery cover. Press firmly on the battery
cover while tightening the screws in a diagonal pattern using a number 2 Pozidriv
®
screwdriver.
22. Move the rotary switch knob from OFF to any function. All segments of the LCD
should illuminate briefly if the instrument has been properly assembled.
3-11. Cleaning
Caution
Do not use aromatic hydrocarbons or chlorinated solvents for
cleaning. These solutions will react with the plastic materials
used in the instrument.
Caution
Do not allow the LCD to come in contact with moisture.
Clean the exterior plastic parts using a mild solution of detergent and water on a soft
cloth. Clean dust from the pcas using clean, dry air at low pressure (less than 20 psi).
Clean contaminates from the pcas using isopropyl alcohol and a soft brush, followed by
demineralized water and a soft brush (remove the LCD before washing). Dry the pca at
50 to 60 degrees Celsius for 24 hours after washing (and before reassembly ) to assure
that no moisture is sealed in the instrument.
3-12. Performance Tests
The following procedures allow you to check the performance of the Fluke 27 against
the specifications given in the Fluke 27 Users Manual. The procedures are recommended
for incoming inspections, periodic calibration verification, and as an aid in
troubleshooting. If the instrument fails any test, calibration adjustment or repair is
needed.
Prior to performing any of the sting procedures, allow the instrument to stabilize to room
temperature (18 to 28 degrees Celsius). Also, check the fuses and if the battery
annunciator is displayed, change the battery.
Note
In the following procedures, the Fluke 27 is referred to as the unit under
test, or UUT.
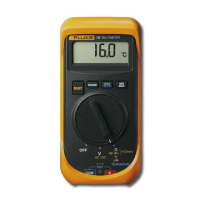
3-13. Display Test
When the function switch is moved from the OFF position to any other position, the
instrument performs a power-up self test. All LCD segments in the display are switched
on while the test is in progress, then the instrument commences normal operation. This
automatic self test verifies that the instrument is functional and that all LCD segments
are functioning.