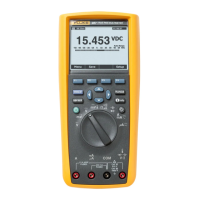
True-rms Digital Multimeters
Basic Maintenance
13
10.000
k
0.50
8:10pm
06/13/07
8:10pm
06/13/07
Menu Save Setup
Auto Range
500 0 100 200 300 400
Auto Range
500 0 100 200 300 400
Menu Save Setup
Replace F1 if
reading is OL
Replace F2 if
reading is OL
est33.eps
Figure 1. Testing the Current Fuses
Replacing Fuses
XW Warning
To avoid electrical shock, remove the test leads and any input
signals before replacing the battery or fuses. To prevent
damage or injury, install ONLY specified fuses and batteries.
To replace the fuses, refer to Figure 2 and do the following:
1. Turn the meter off and remove test leads from the input terminals
2. Remove the battery door by using a standard-blade screwdriver to turn the battery
door fastener to the unlock position.
3. Remove either fuse by gently prying one end loose, then lifting the fuse out of the
fuse contacts.
4. Install only Fluke specified replacement fuses with the amperage, voltage, and
interrupt ratings shown in the replacement parts list (see Table 8).
5. Replace the battery door and secure it by turning the battery door fastener to the lock
position.
Replacing the Batteries
The Meter is powered by 6 AA batteries (NEDA 15A or IEC LR6).
WCaution
Be sure to observe proper polarity when replacing batteries.
Incorrect battery polarity may seriously damage the Meter.
To replace the batteries, refer to Figure 2 and do the following:
1. Turn the meter off and remove test leads from the input terminals.
2. Remove the battery door by using a standard-blade screwdriver to the turn the battery
door fastener to the unlock position.

 Loading...