Documenting Process Calibrator
The Battery
23
3. Remove the battery.
4. Connect the battery charger to the input. Outside of the
Product, the battery will charge in 5 hours.
Note
An optional 12-Volt car charger is available. See
“Accessories”.
Battery Charge Level
Use these two methods to make sure the Battery is
charged:
• See the Battery Gauge Bar Graph on the display.
• See the Battery Charge Indicator on the battery.
The Battery Charge Indicator can be seen while the battery
is outside of the Product. With the battery removed and not
connected to its charger, push the button below the Battery
Charge Indicator. Solid Green LEDs show the level of
charge on the battery. The Battery is fully charged when all
LEDs are illuminated.
Connect the battery charger to the battery and push the
button below the Battery Charge Indicator. LEDs flash to
show the charge level but also show that the battery is being
recharged. As the battery charges, the LED flashes and
moves to the top of the charge indicator.
Battery Life
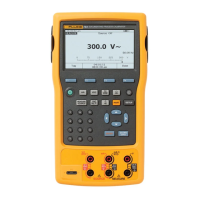
The battery gauge bar graph is shown on the upper
right of the display.
Table 6 shows the typical operation time for a new, fully-
charged battery. Product performance is guaranteed to its
specification until the battery gage reads empty ().
To replace the battery, see “Battery Replacement”.
Table 6. Typical Battery Life
Operation Modes
Backlight
Low
Backlight
High
Measure, continuous 13 Hours 12 Hours
Measure and source, with
loop power on, continuous
7 Hours 6 Hours
Typical intermittent
operation
>16 Hours >16 Hours
1.800.868.7495info@Fluke-Direct.ca
Fluke-Direct.ca